IIS future (set SSL certificate, basic AU to virtualDirectory, URL rewriter)
1. Install SSL certificate to IIS.
Currently I want to show simplest pattern to working with certificates on IIS.
Step 1. Create P12 certificate with Public and Private key.
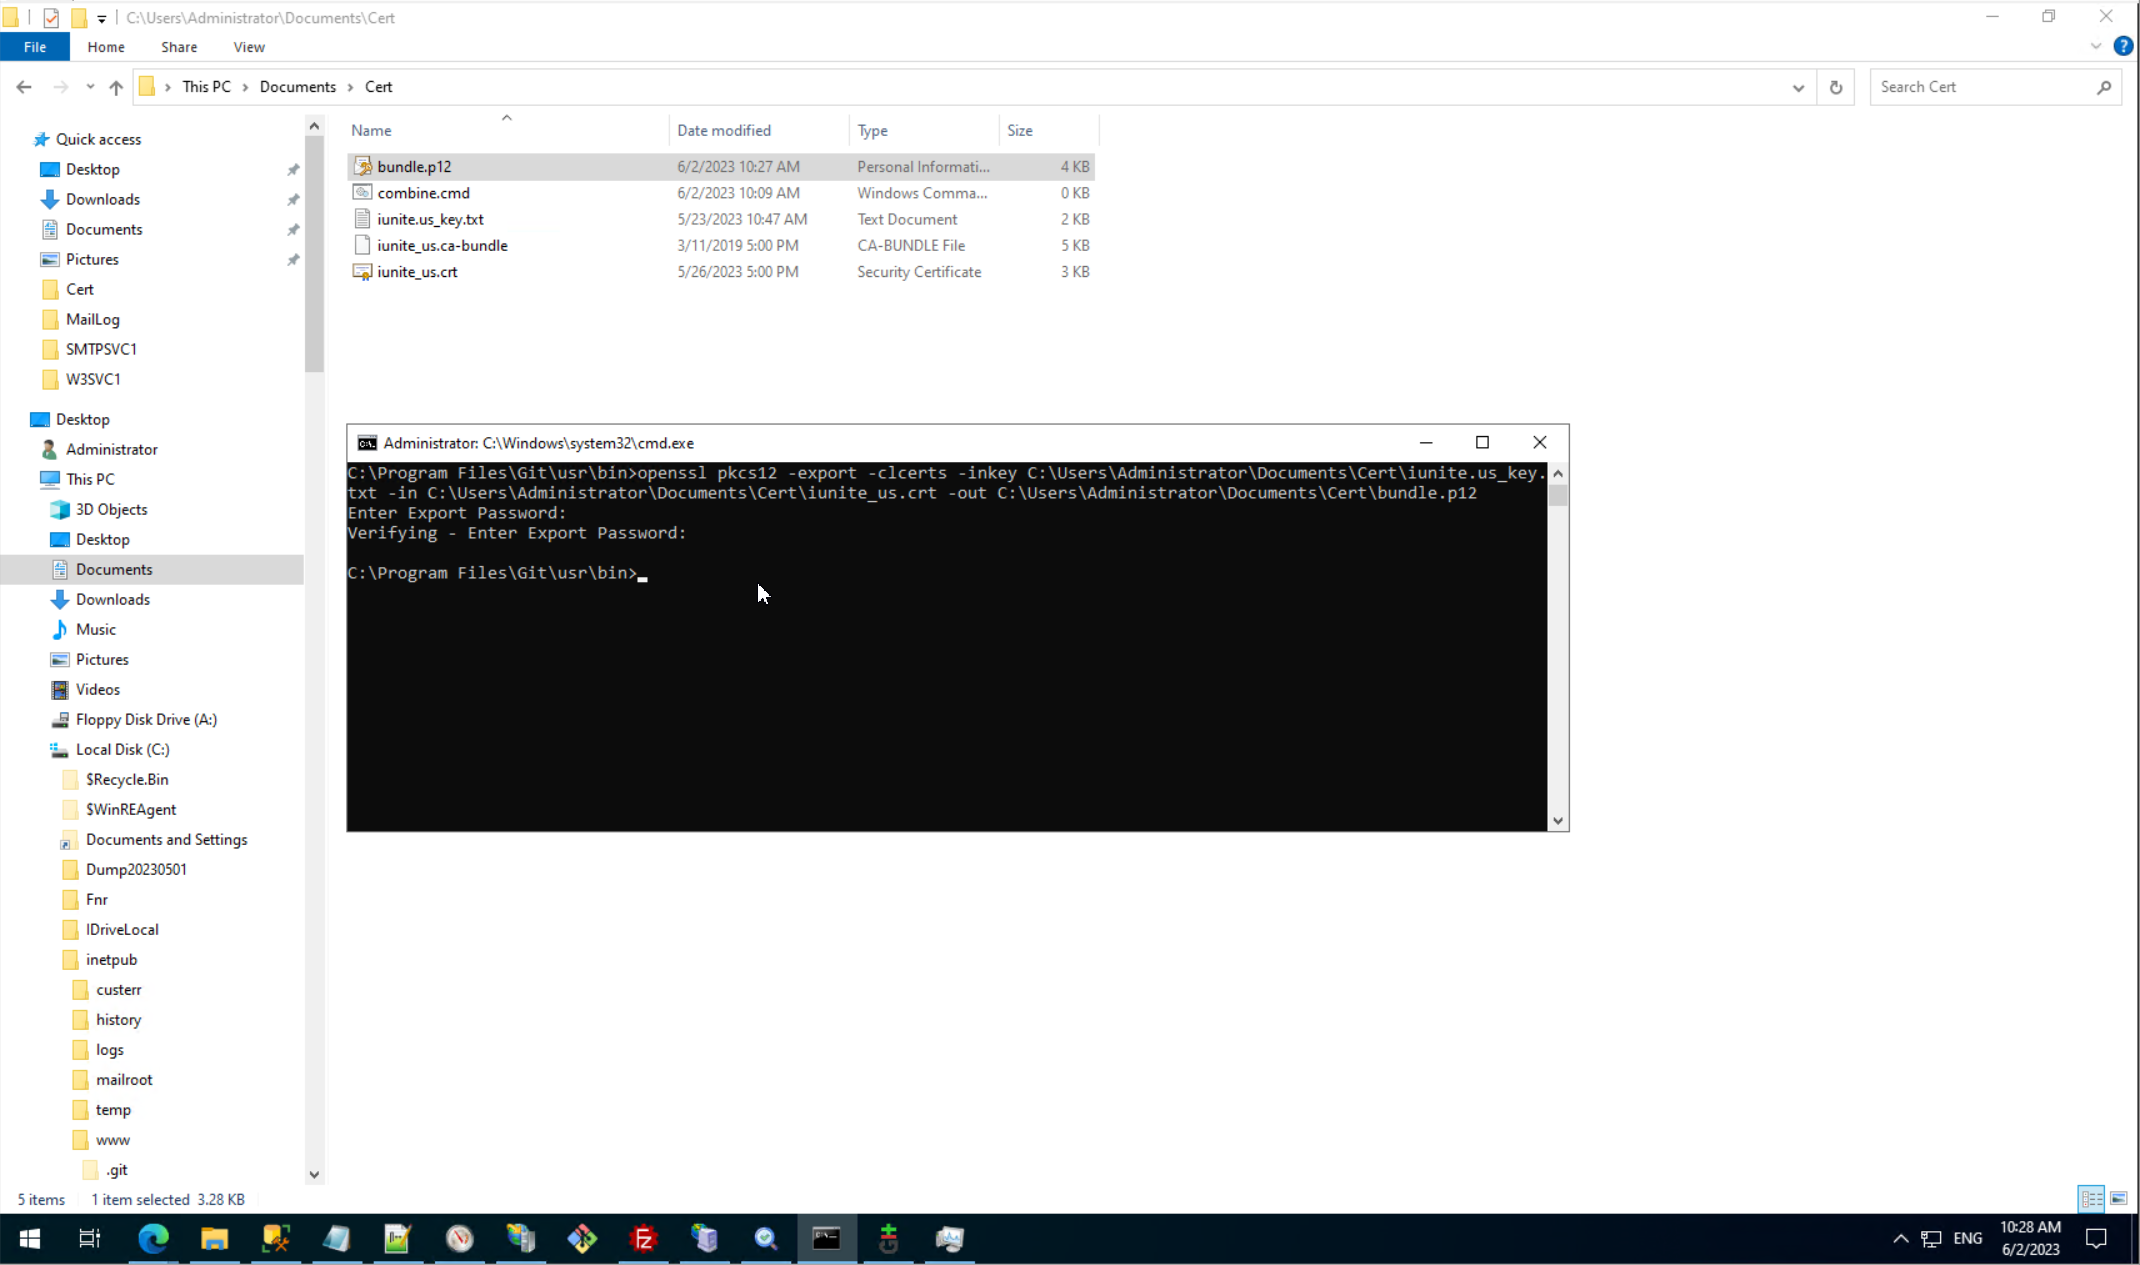
Before uploading certificate to IIS first step is combine PrivateKey and PublicKey to one *.P12 style certificate, there is a related command.
openssl pkcs12 -export -clcerts -inkey PATH\_key.txt -in PATH\ca-bundle.txt -out PATH\\bundle.p12
Pay attention that OpenSSL utility usually placed on C:\Program Files\Git\usr\bin\
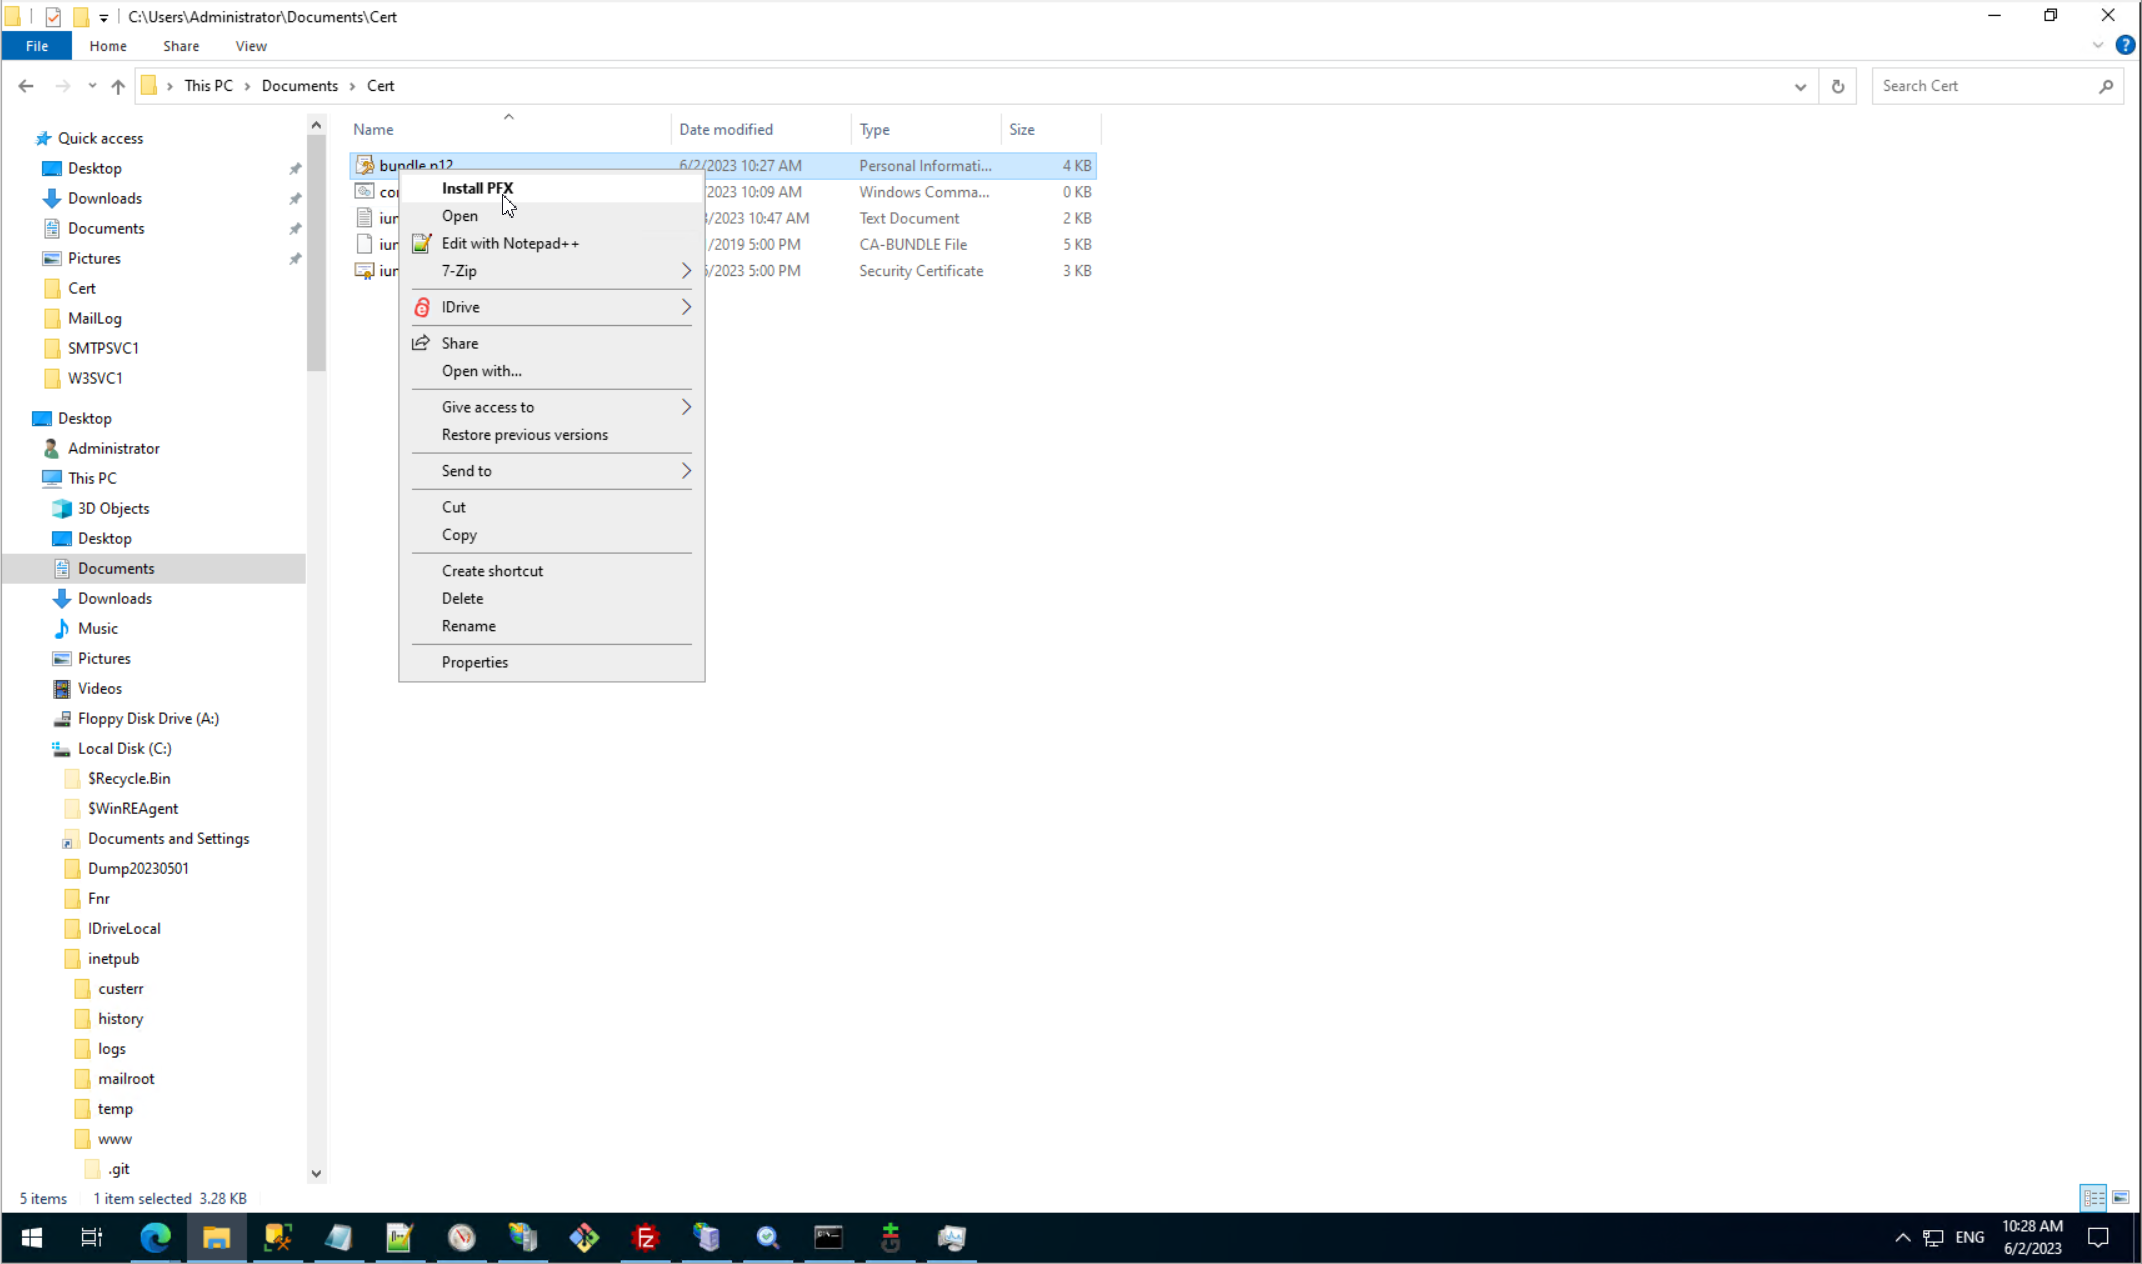
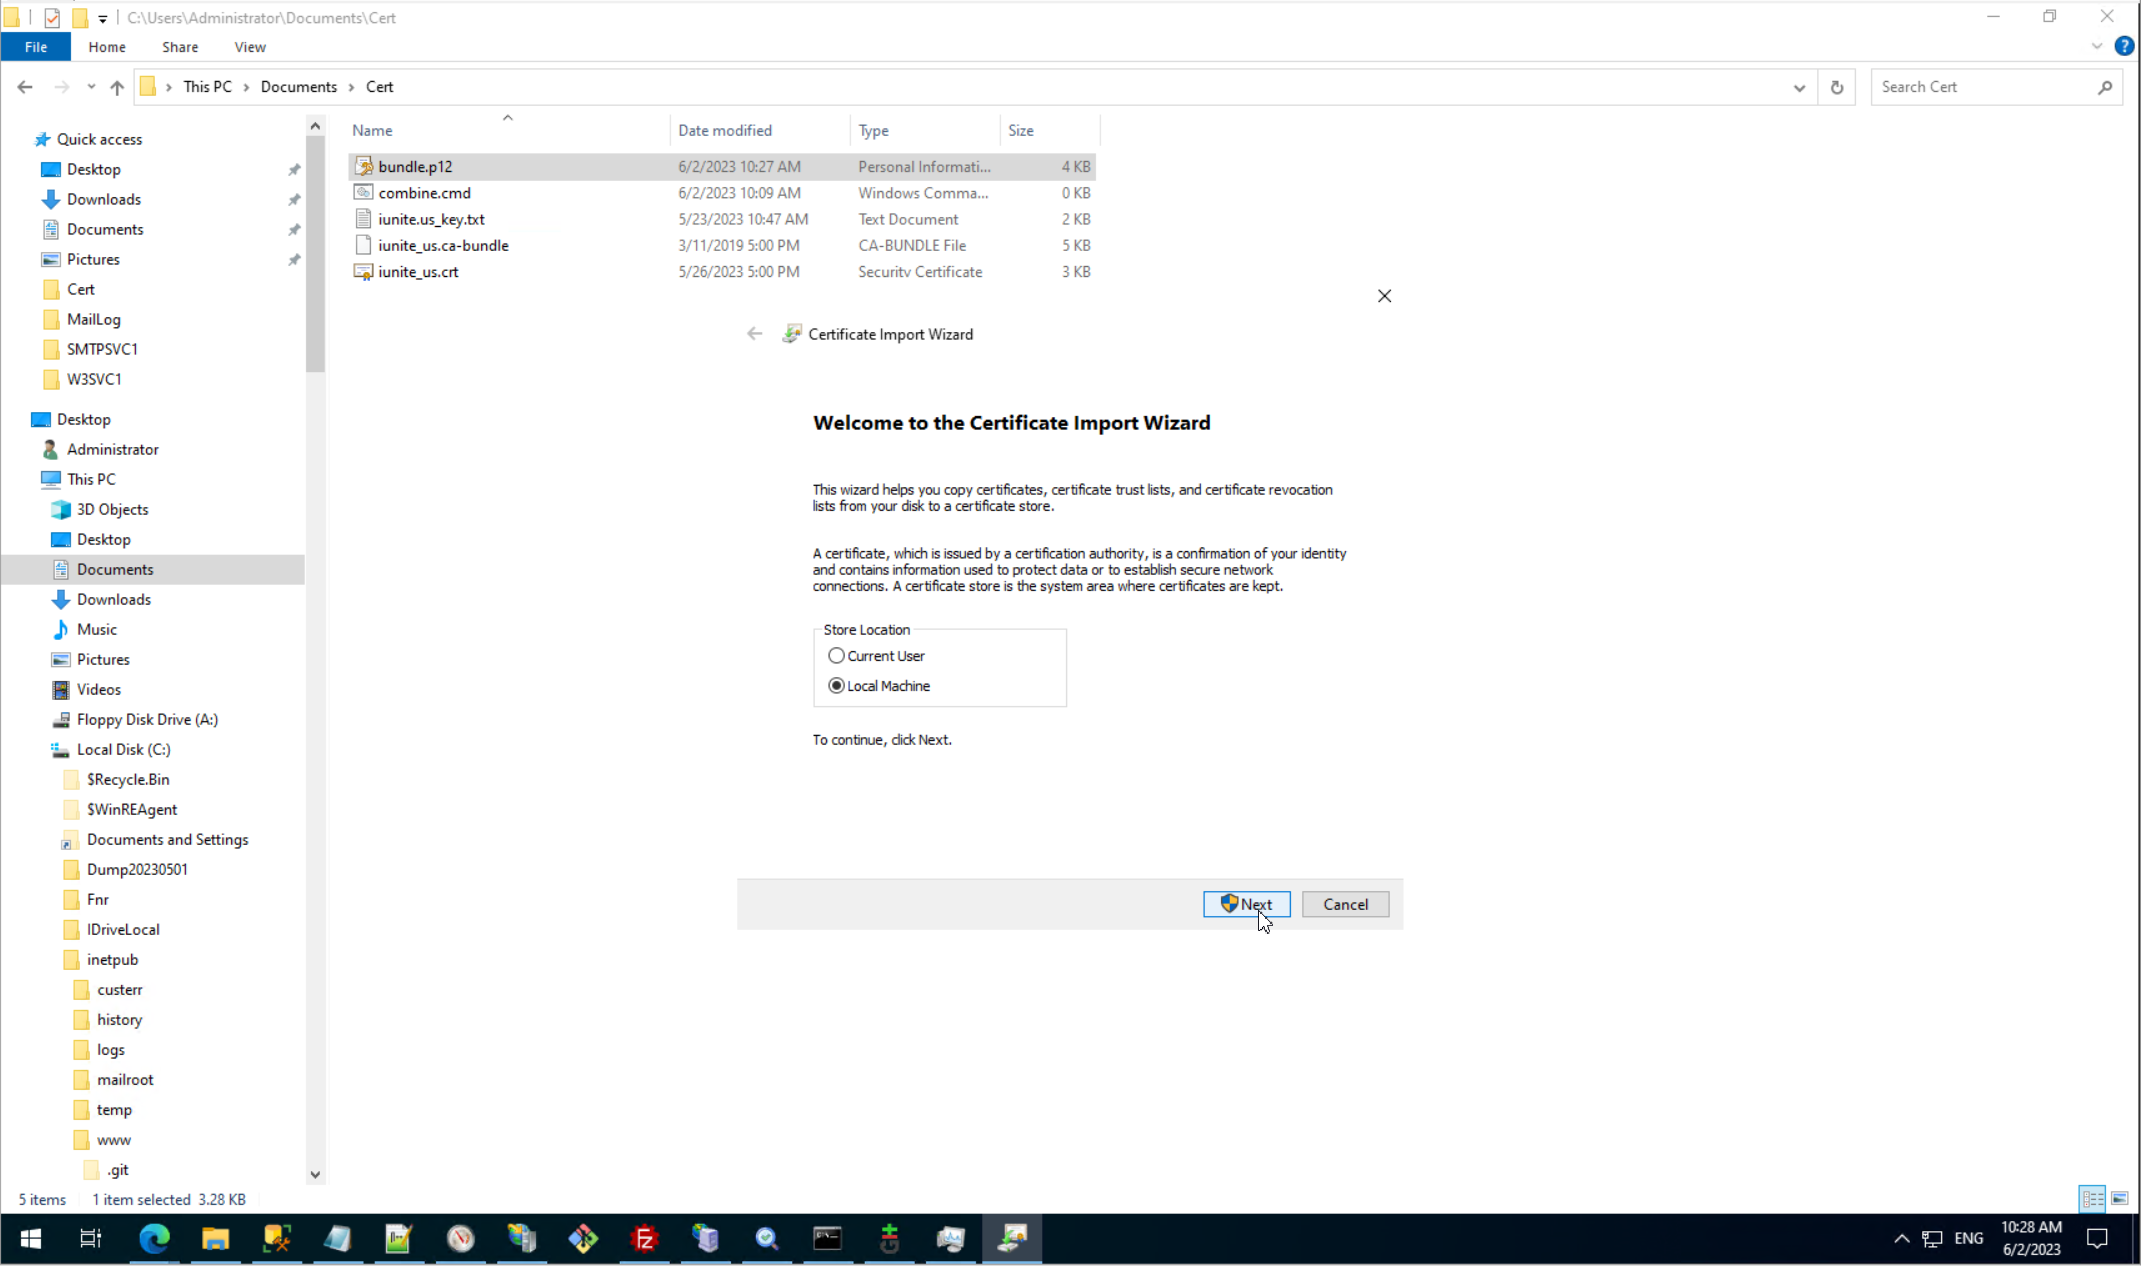
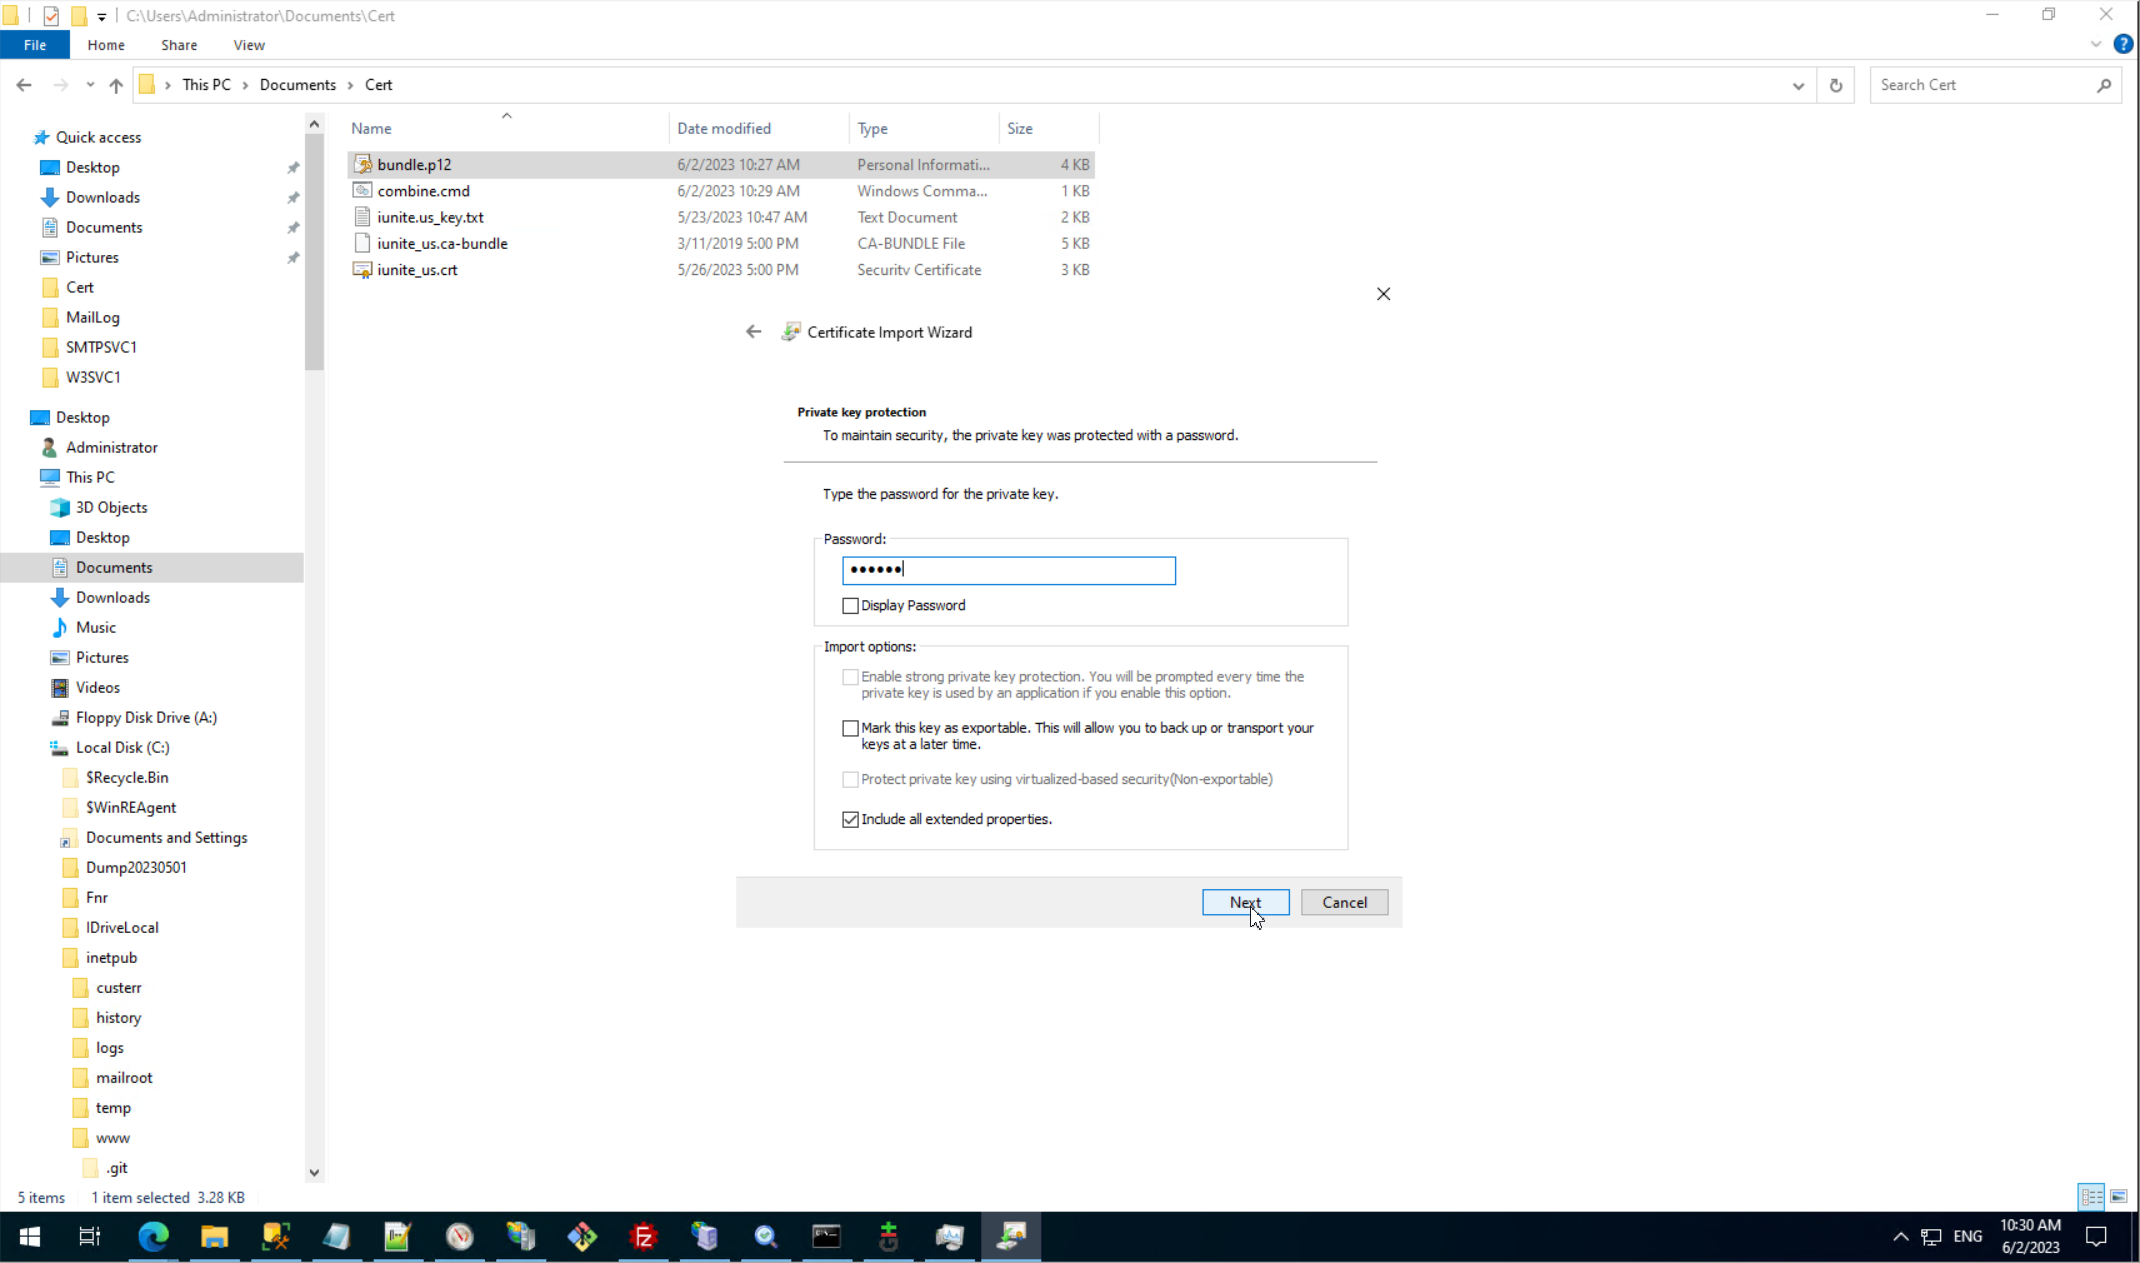
Step 2. Upload P12 certificate to Windows registry.
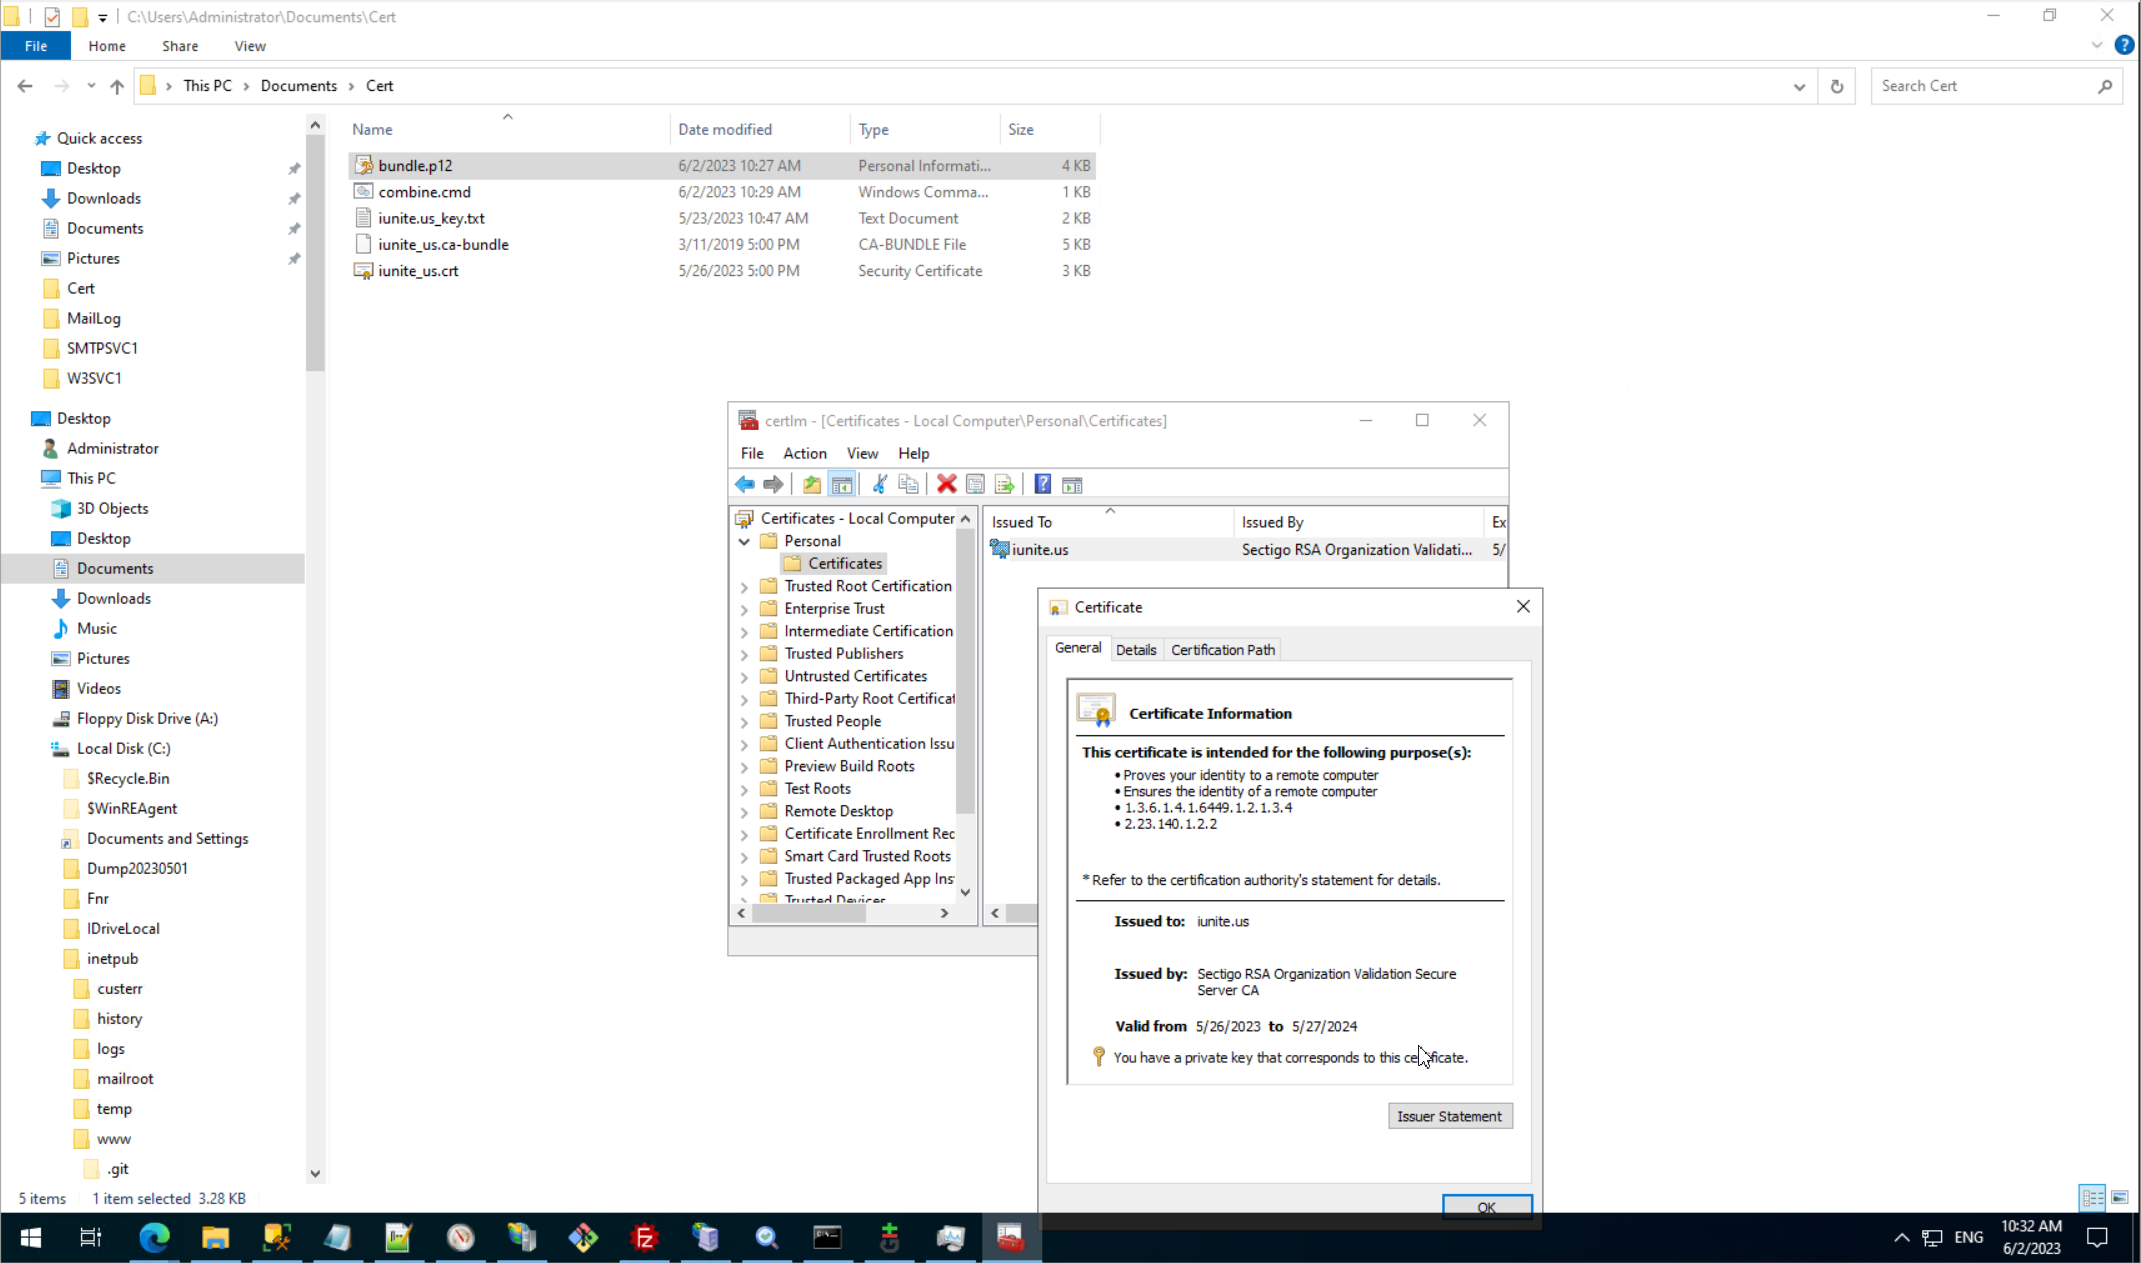
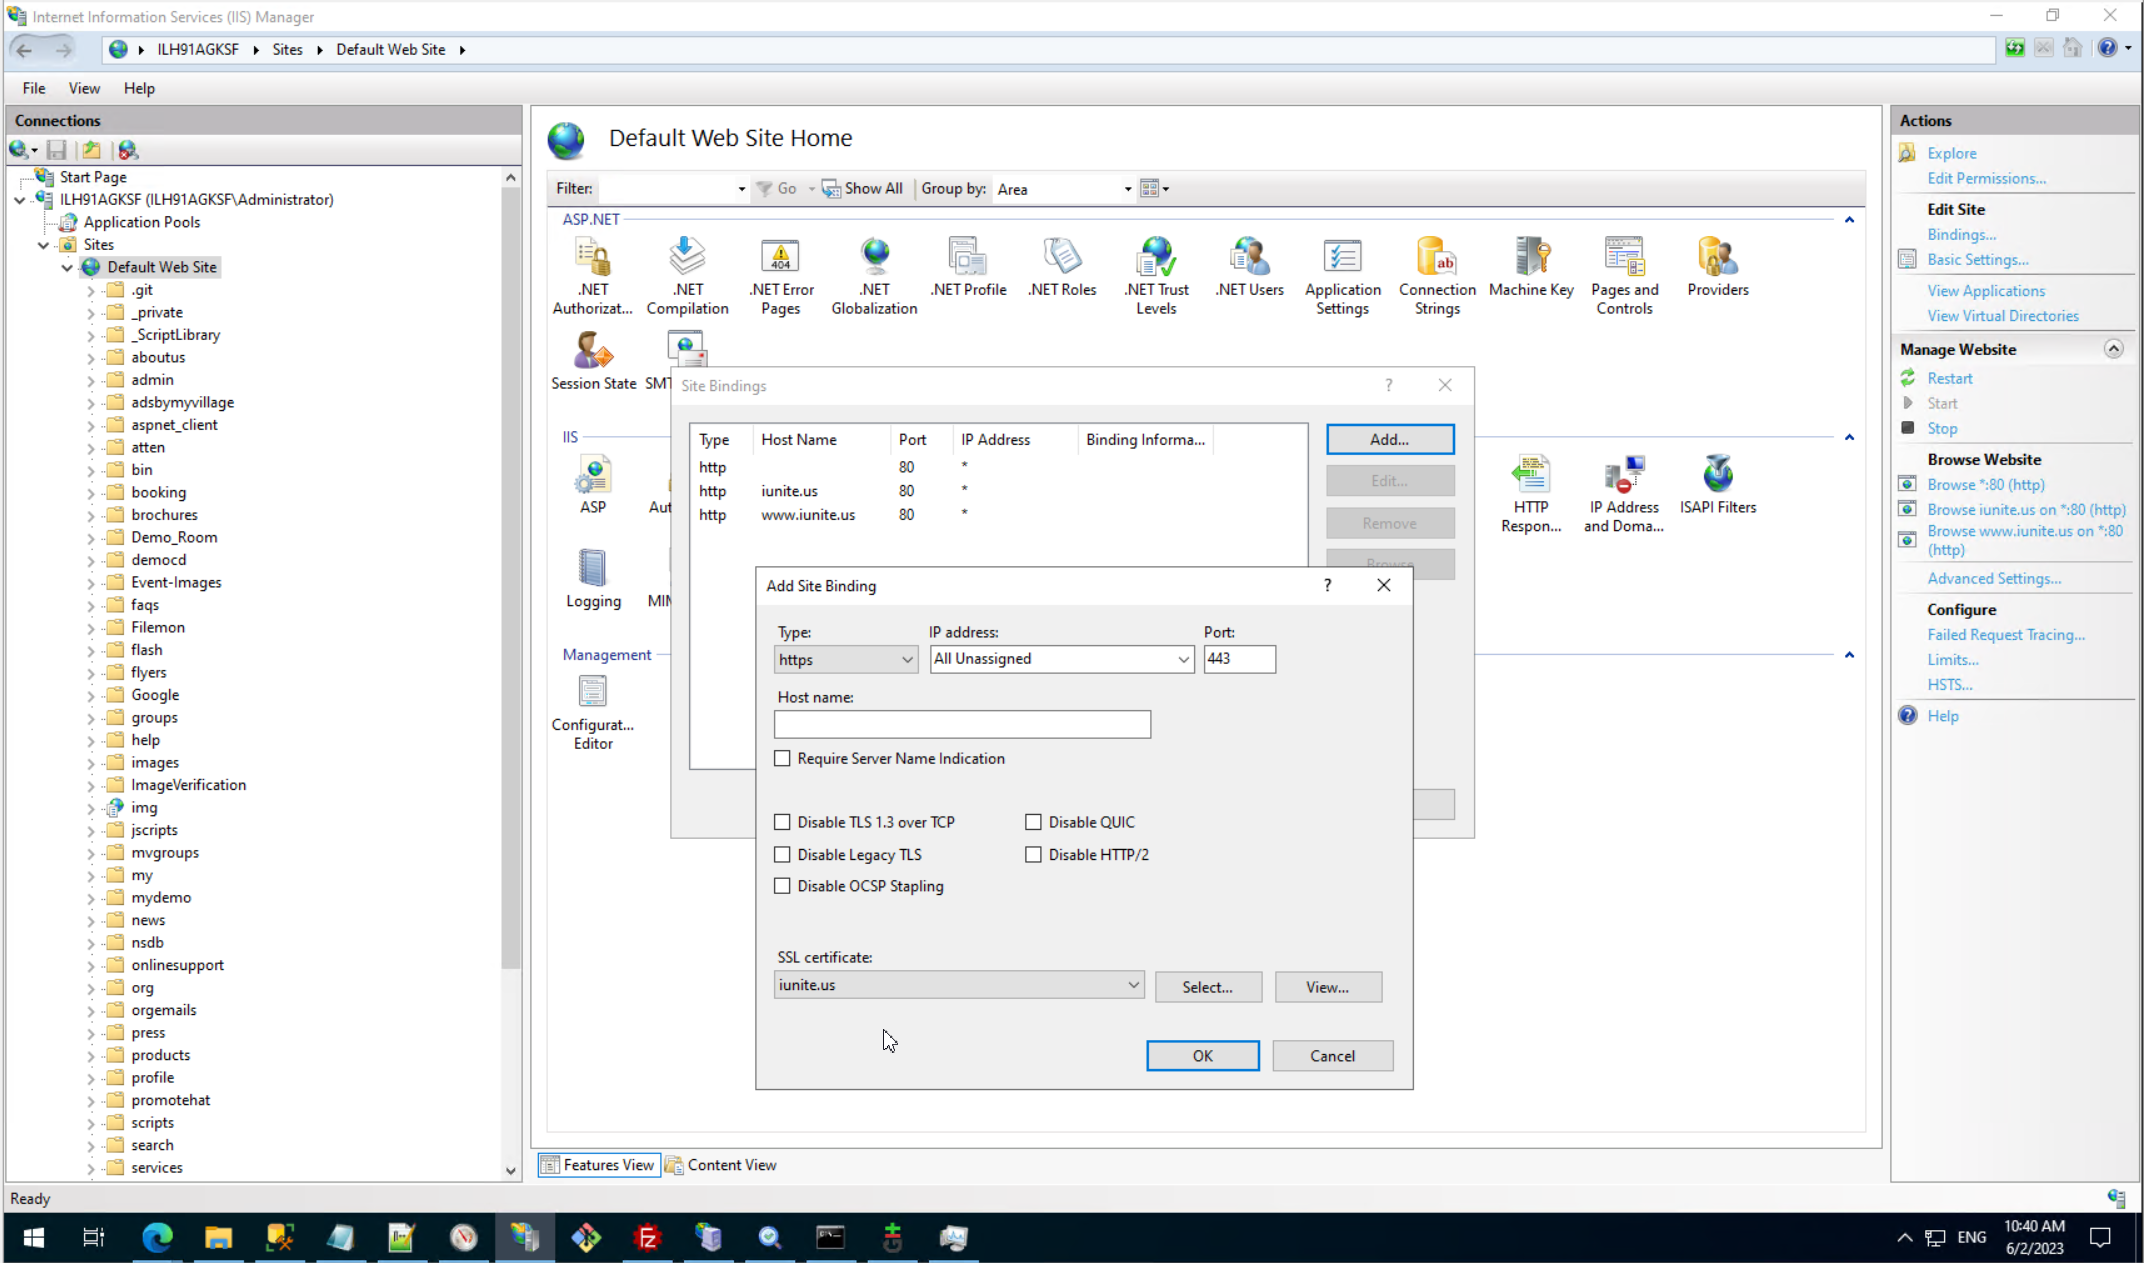
Step 3. Bind certificate to site.
We can avoid implicit upload certificate to IIS and can do this step explicitly from IIS management panel.

Than we can bind site to certificate.
This way is simplest and maybe impossible on reality. Usually we need share certificate to many nodes (this is possible only bu command way APPCMD and add support ancient cryptography protocol.
This is small list of more sophisticated certificates stories on my site.
Why certificates add to internet.
This is way to working with self-signing certificate in development time.
But any project usually finishing by deploying to production server and need to install SSL certificate.
For Linux this is pattern.
For IIS this is pattern to working with certificates.
- (2021) How to make WCF service public with Visual Studio, add SSL and debug WCF SSL REST service.
- (2017) Проблеми налаштування SSL на web-сервері.
- (2012) Установка SSL-сертификата Comodo WILDCARD.
And this is a couple words about client certificates.
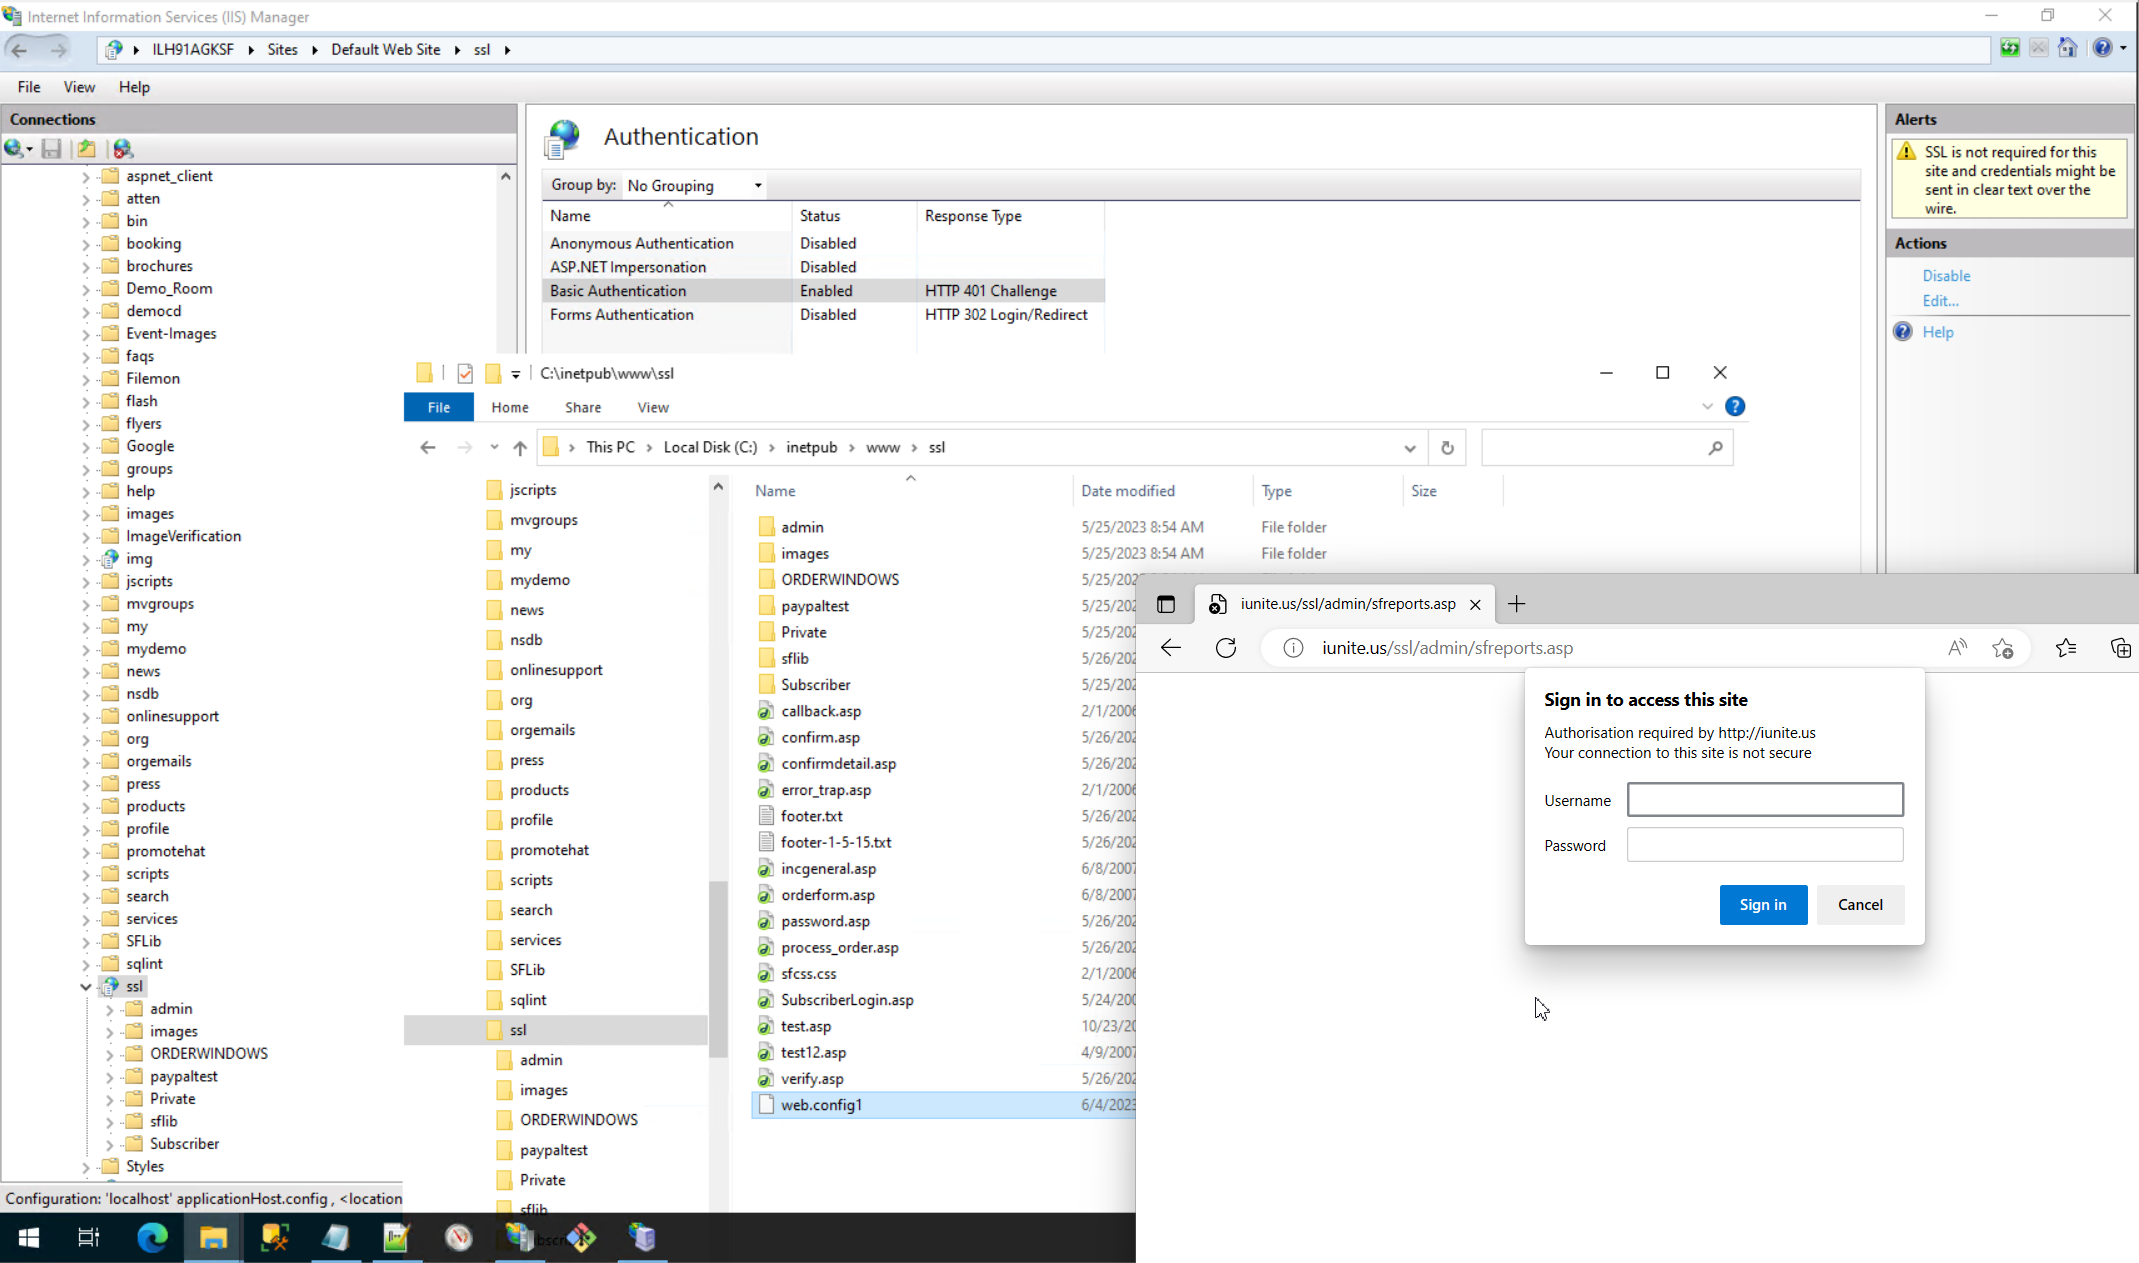
2. Add basic AU to IIS Virtual Directory.
In practice maybe there are nothing sites without VirtualDirectory with special requirements, for example my current site in simple, extremely simple, but it has four part, two separate parts on PHP (this need special tuning) and one part is ASP with additional Basic AU.
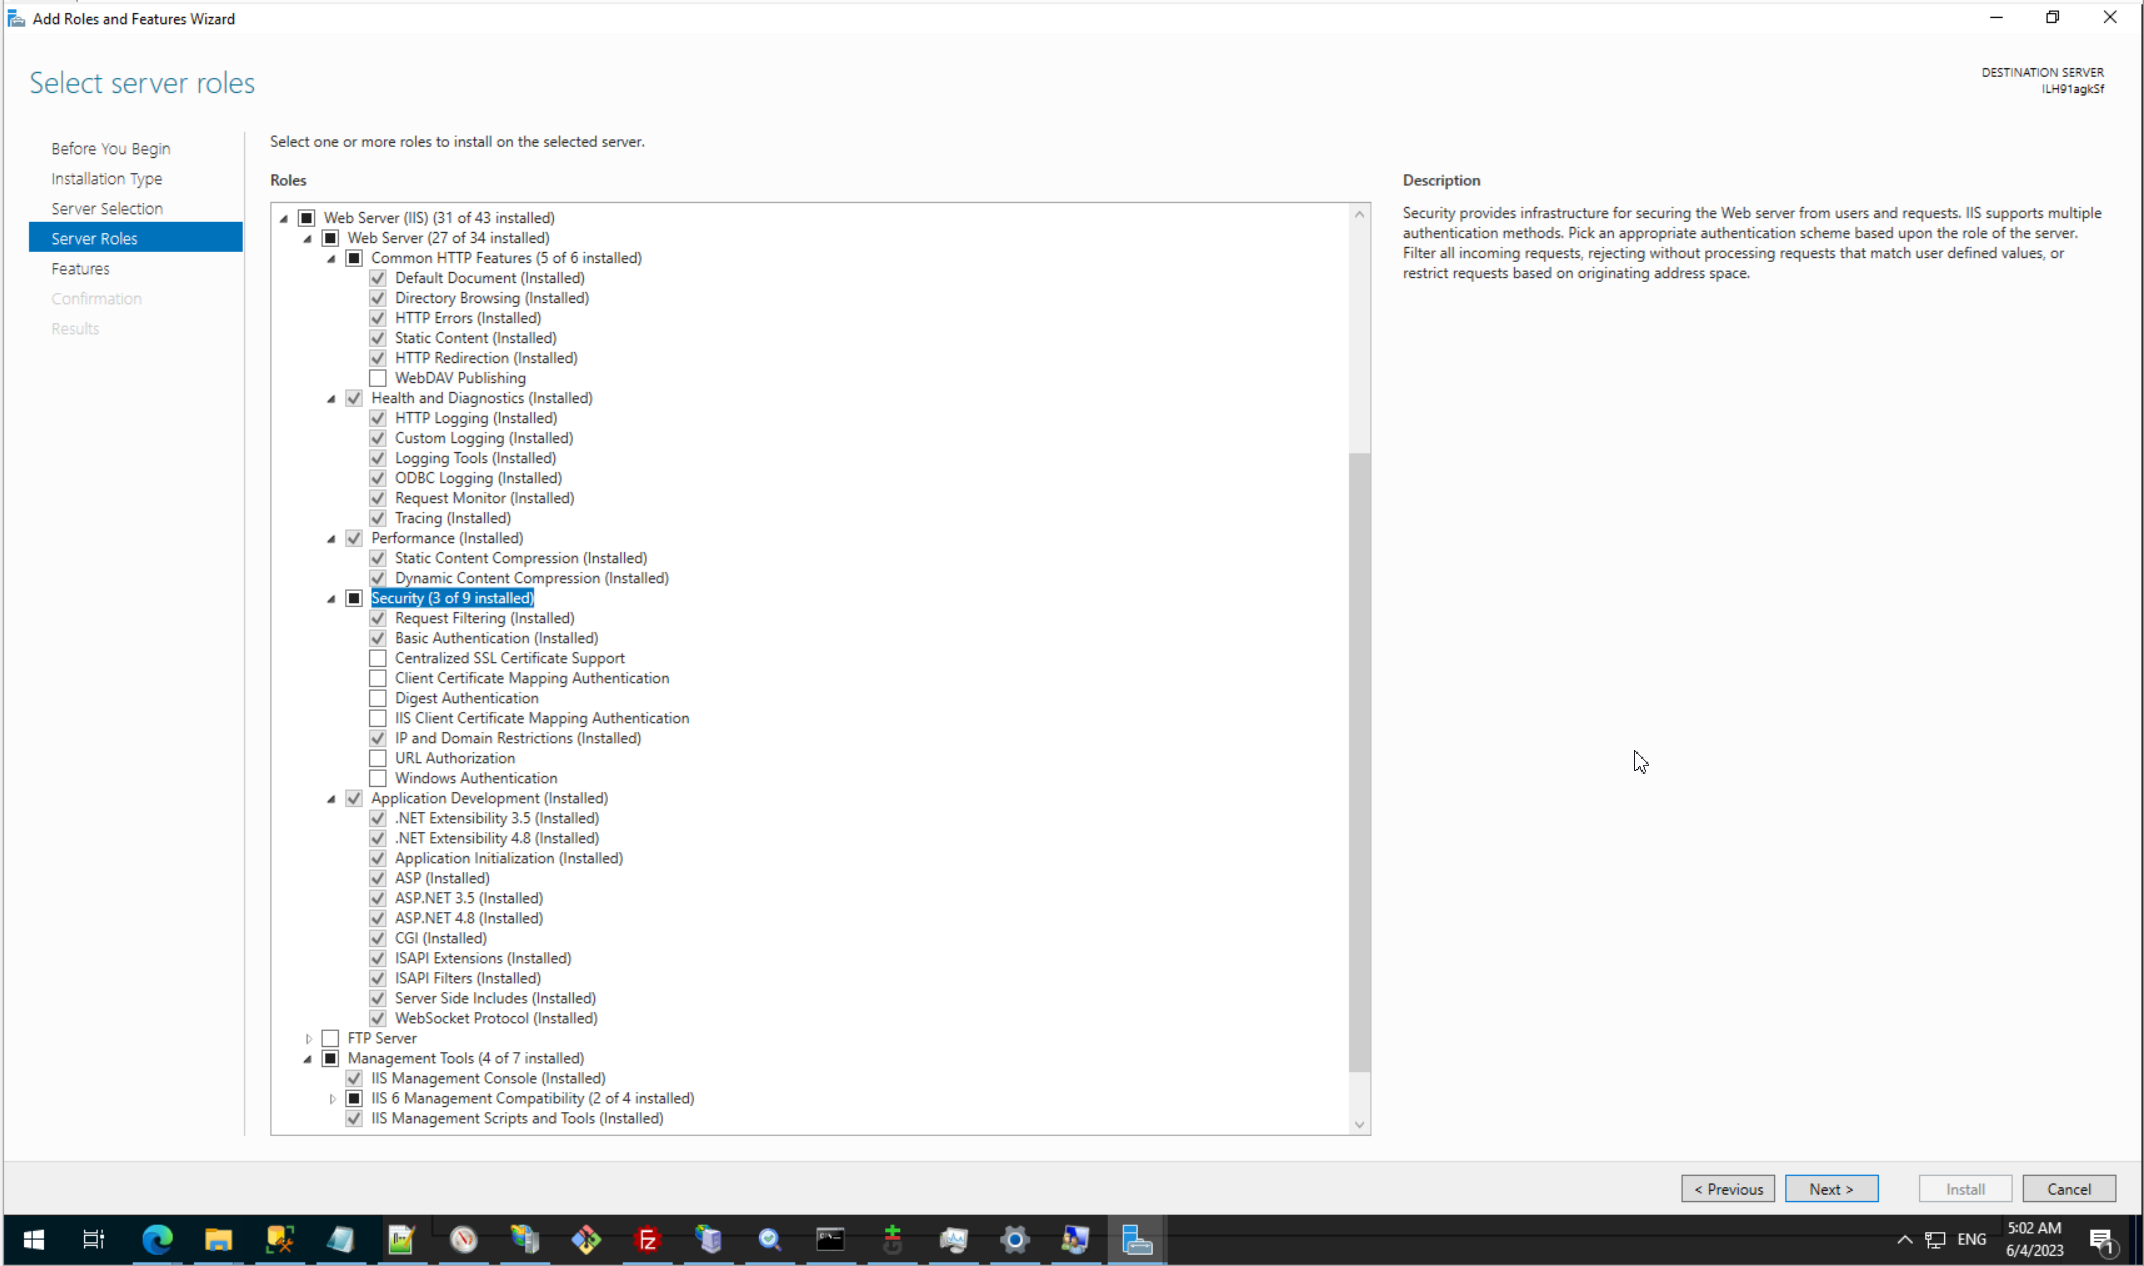
Of course, before we start we can be sure that Basic AU module is installed at all.
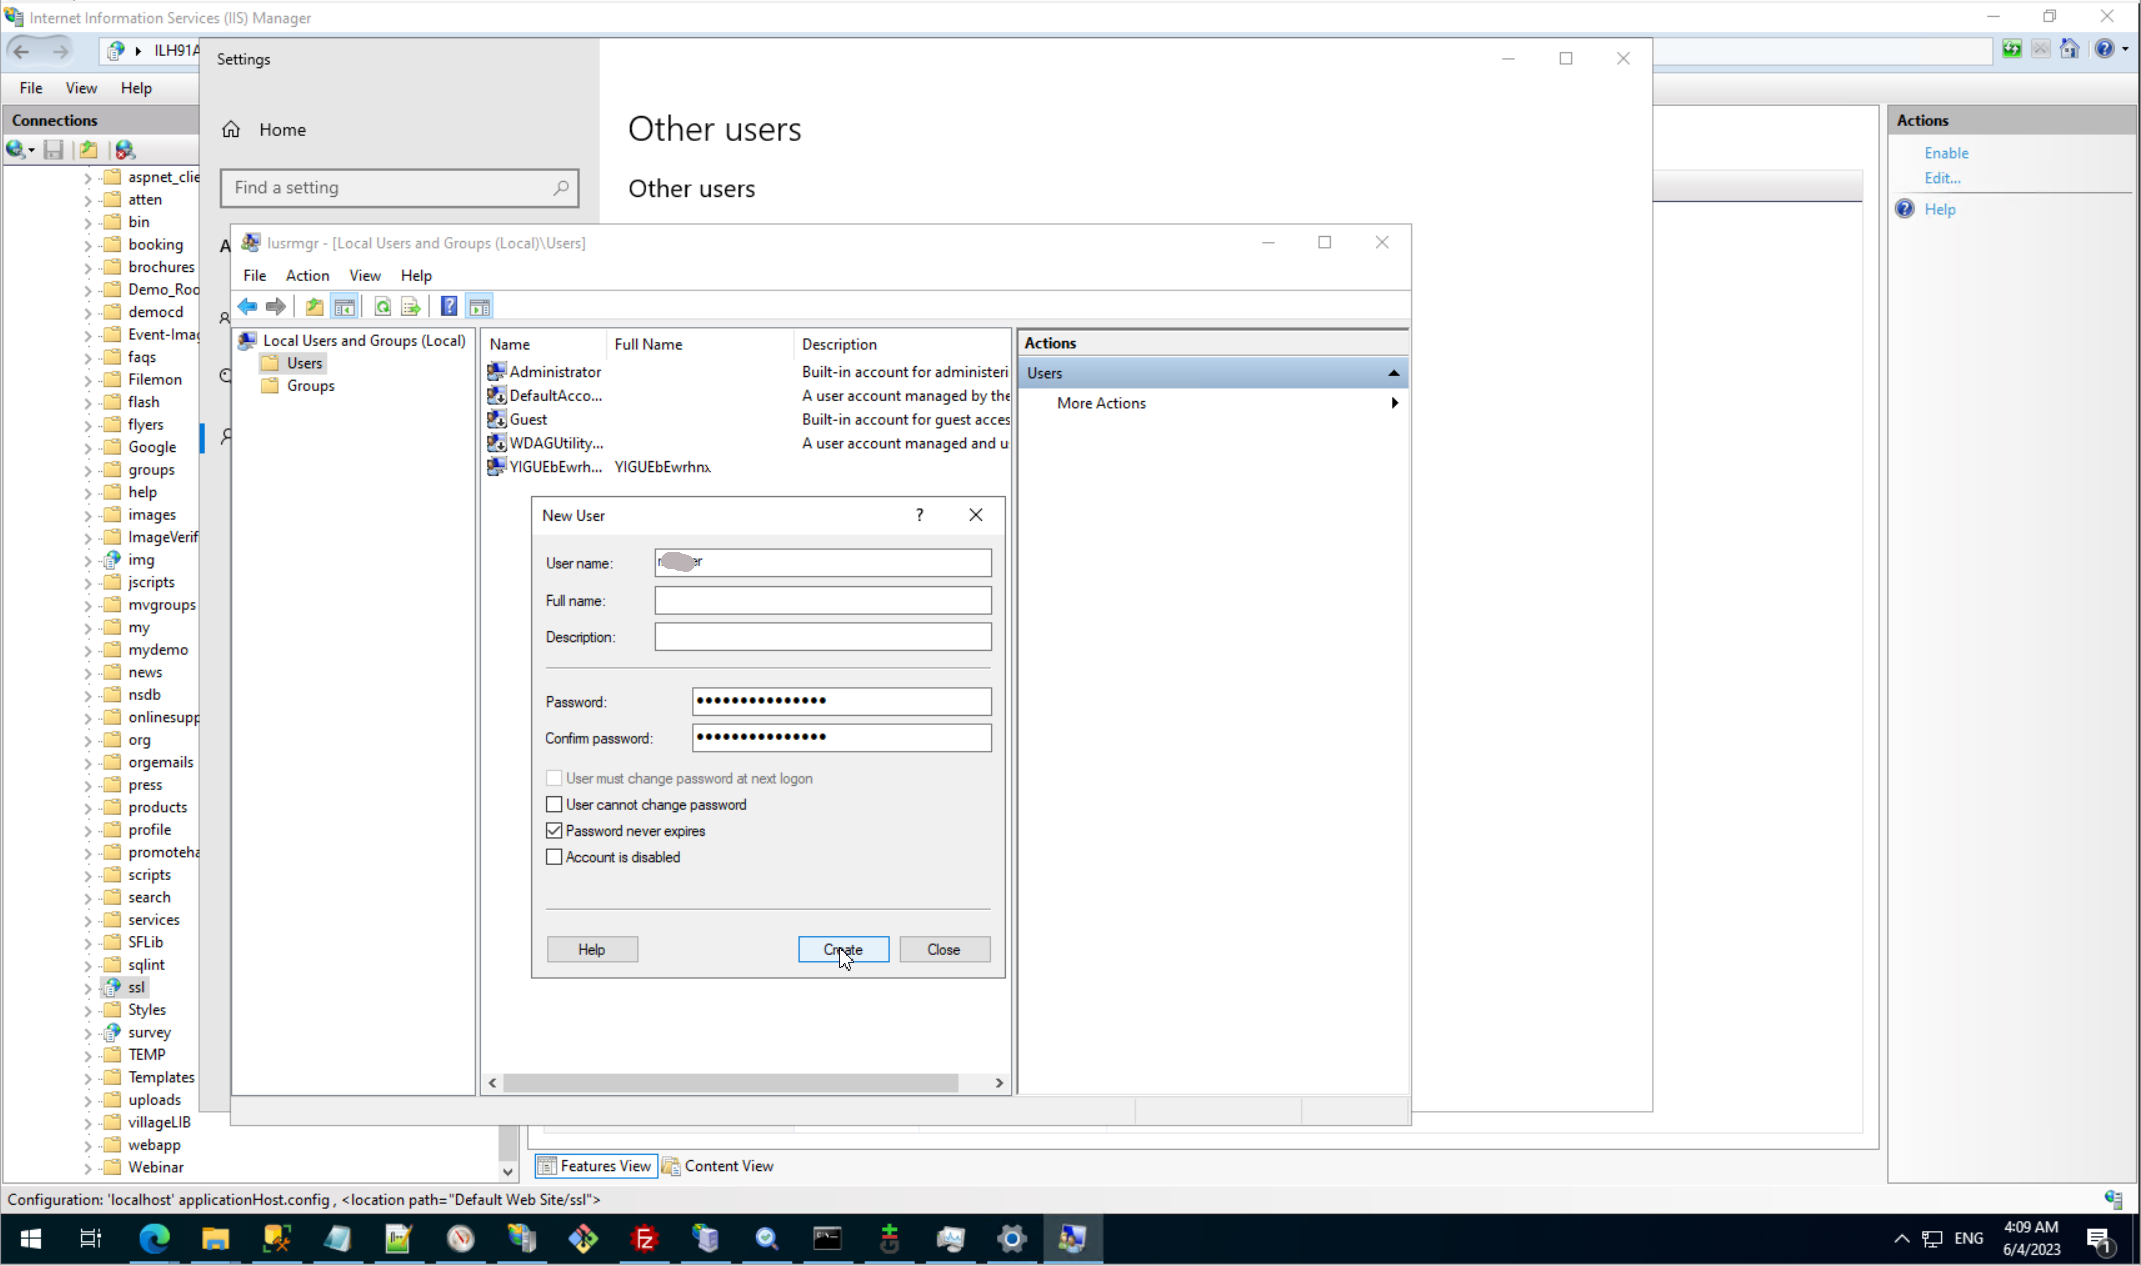
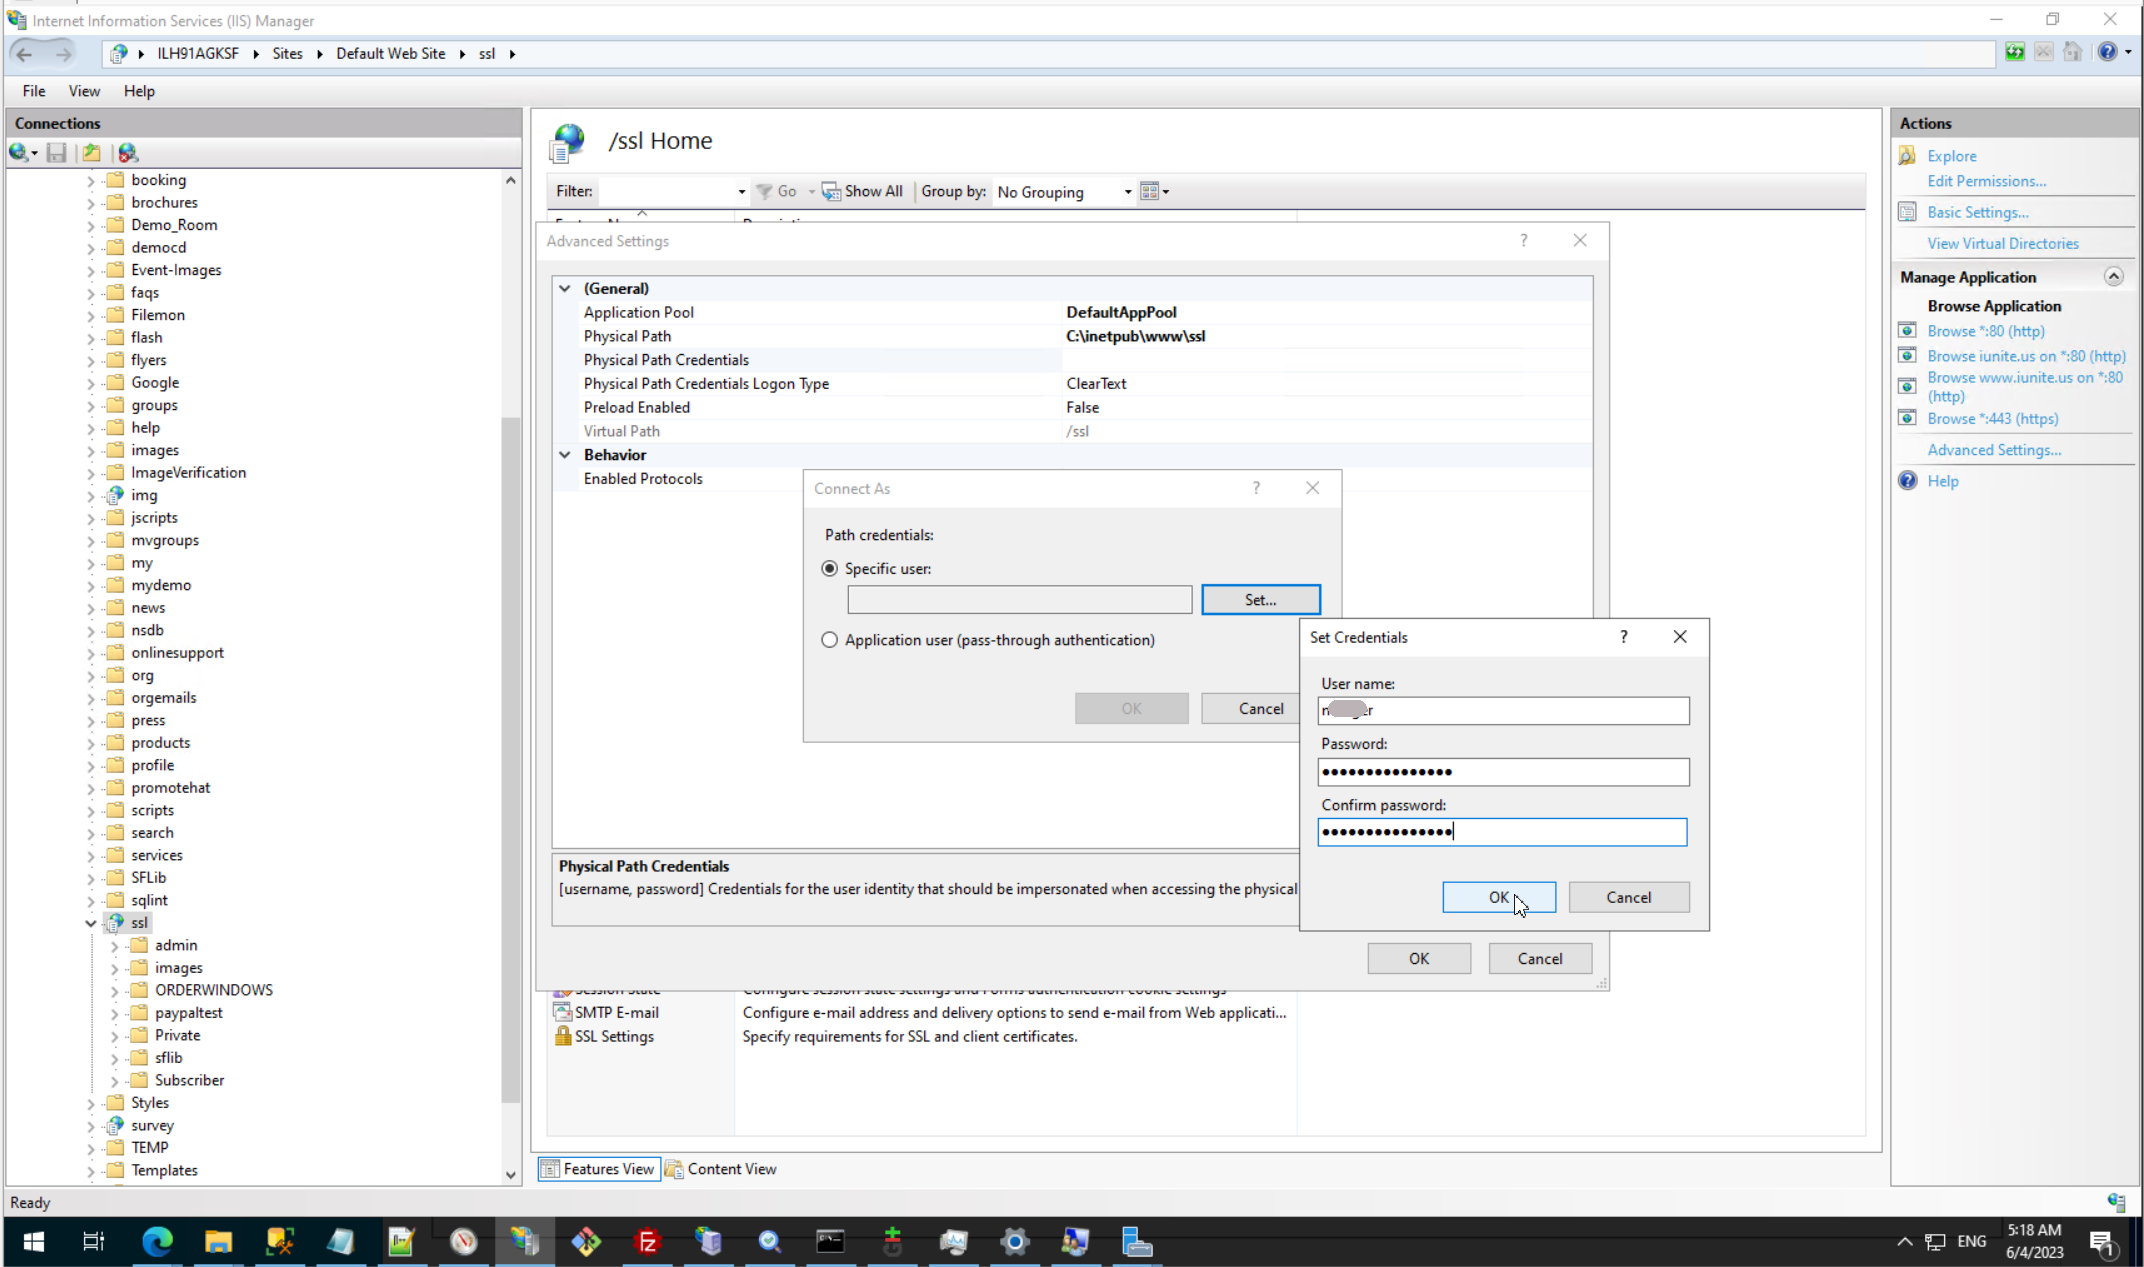
Step 1. Add new user.
So, firstly we need to add new user to server.
Step 2. Allow override security for Virtual Nodes.
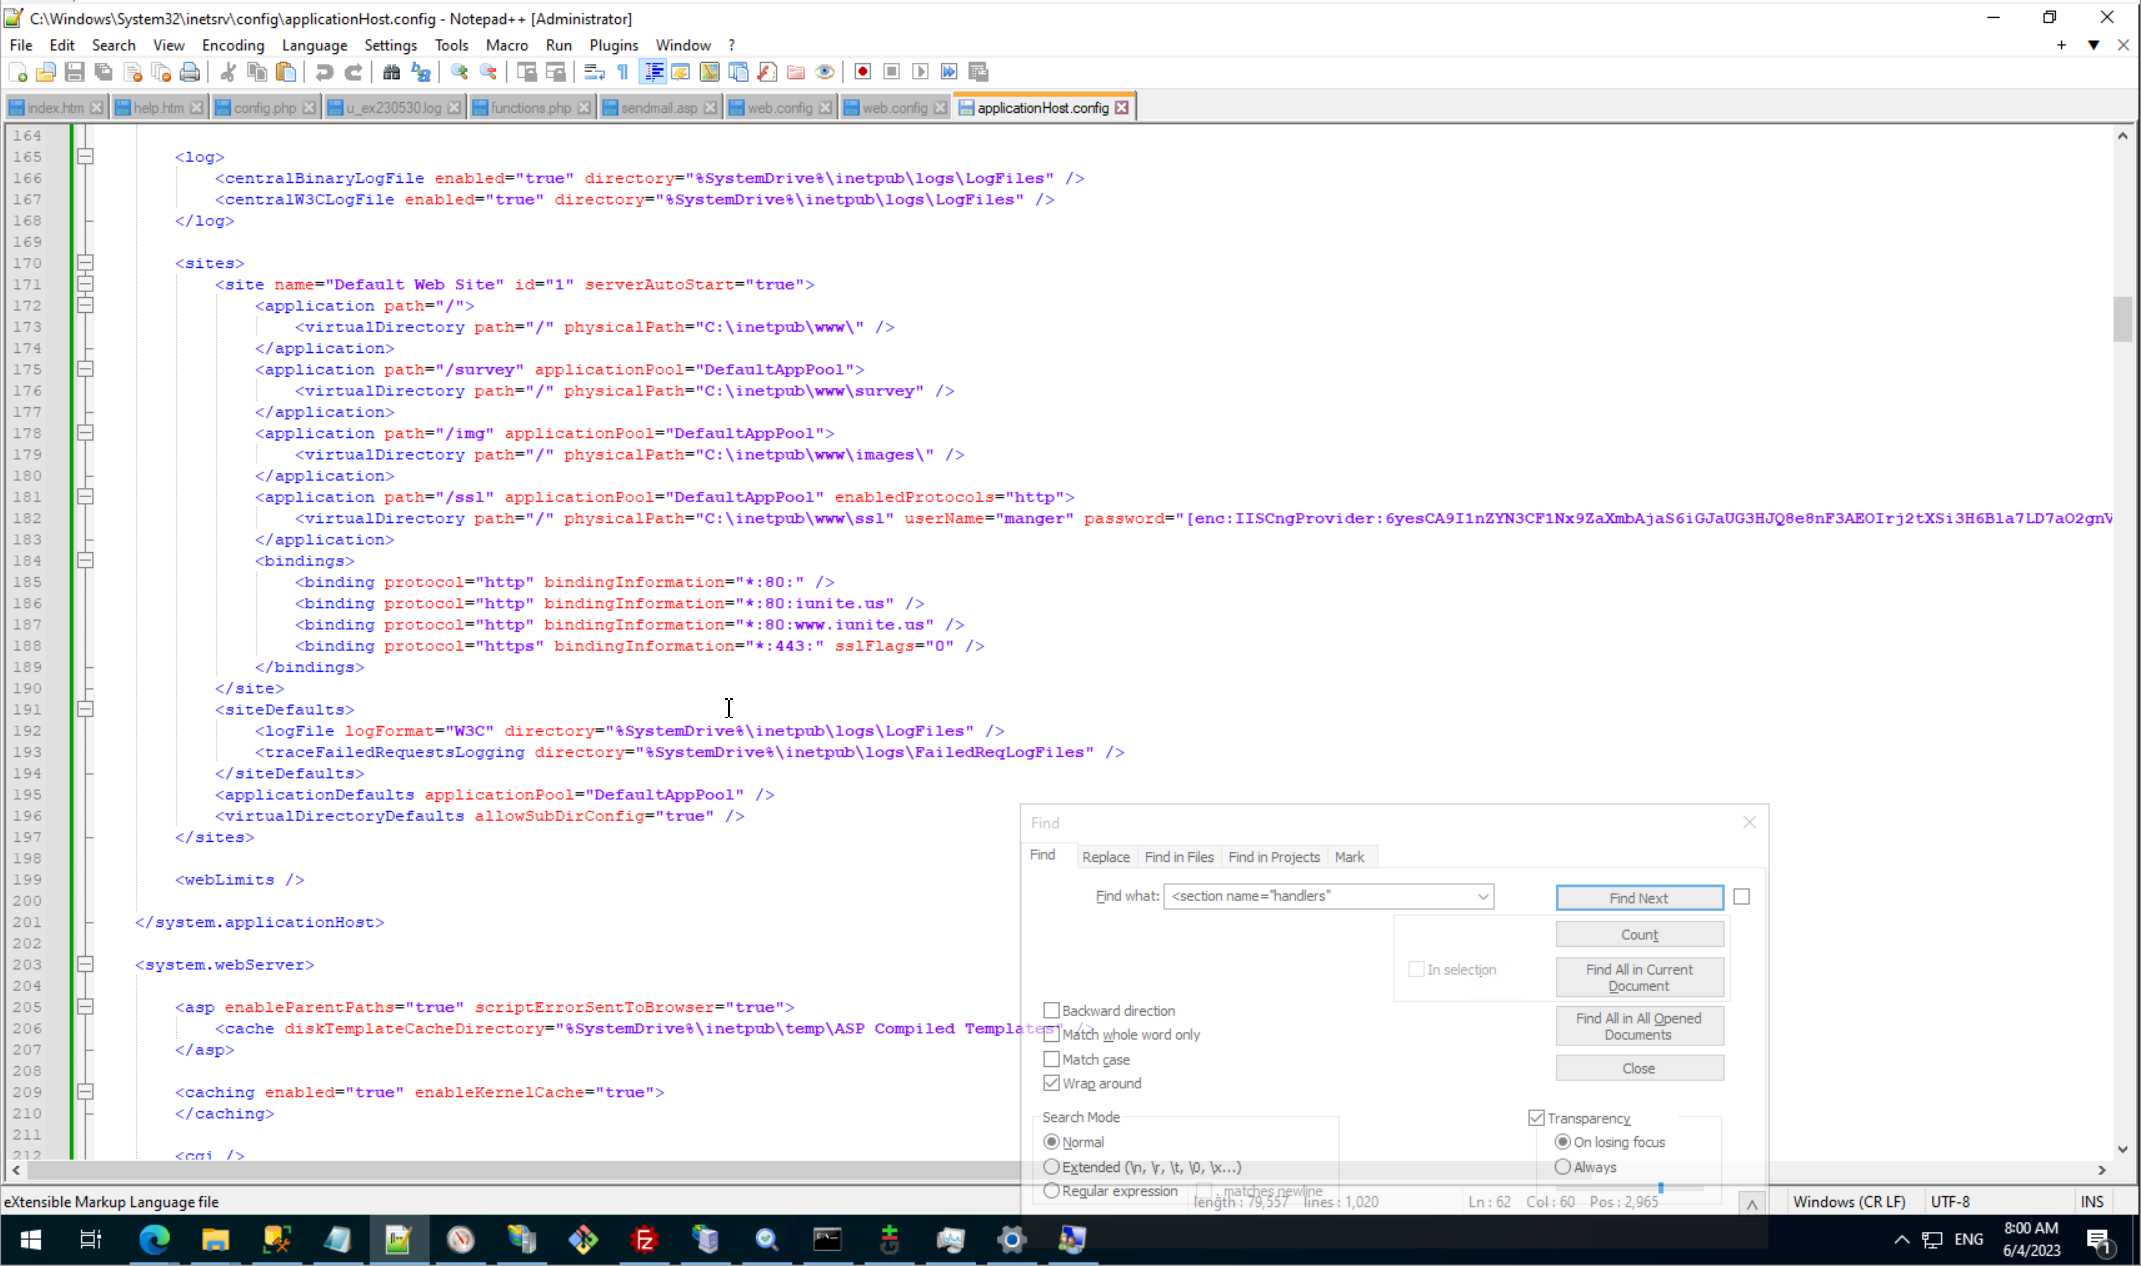
We need to understand hierarchy of web config and search main configuration of server.
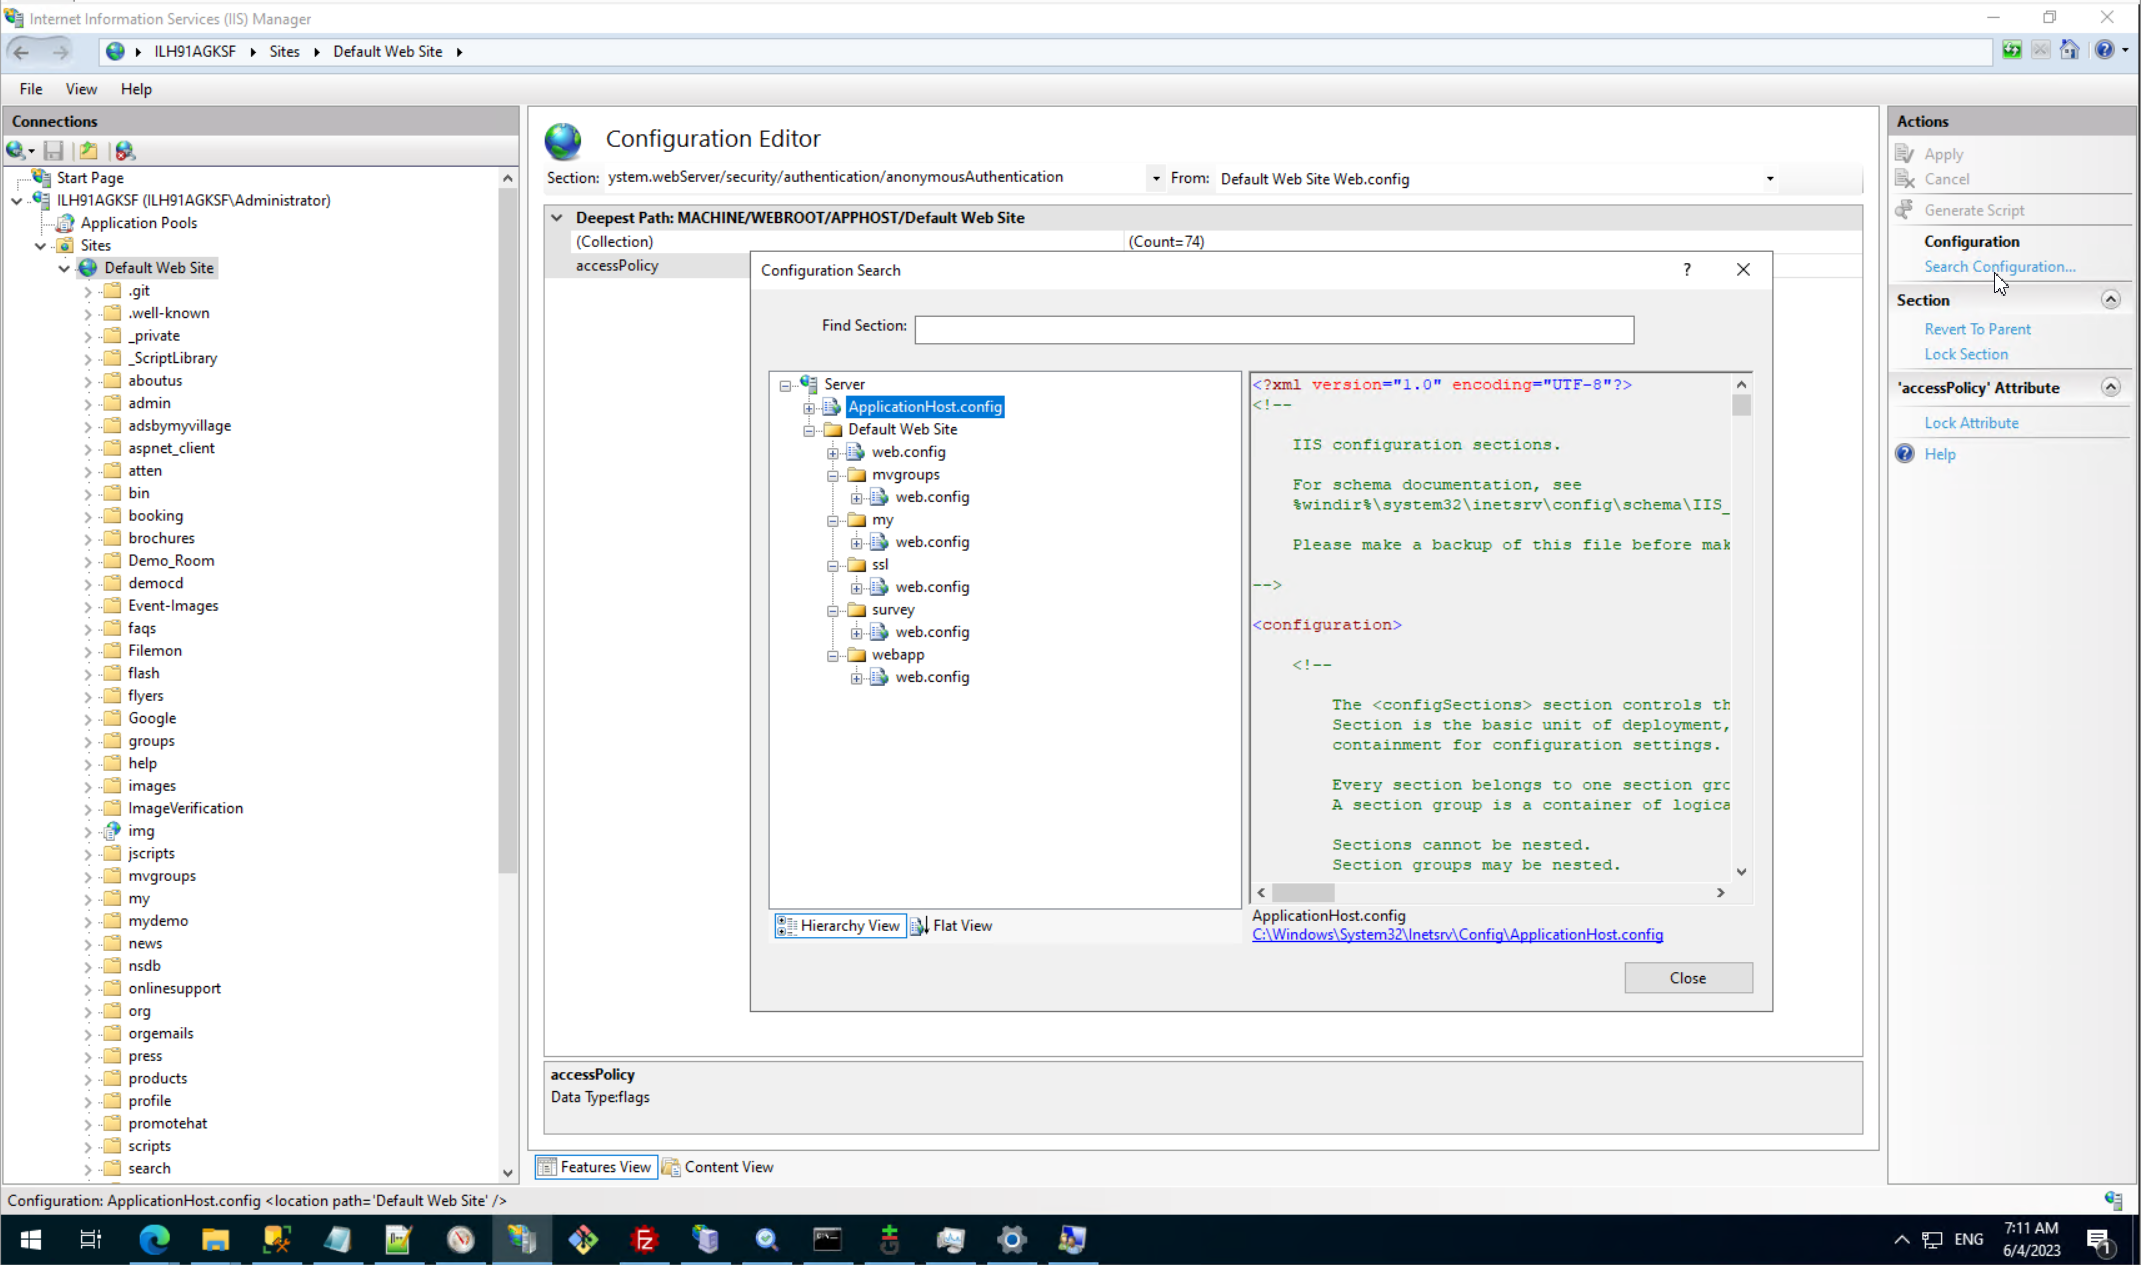
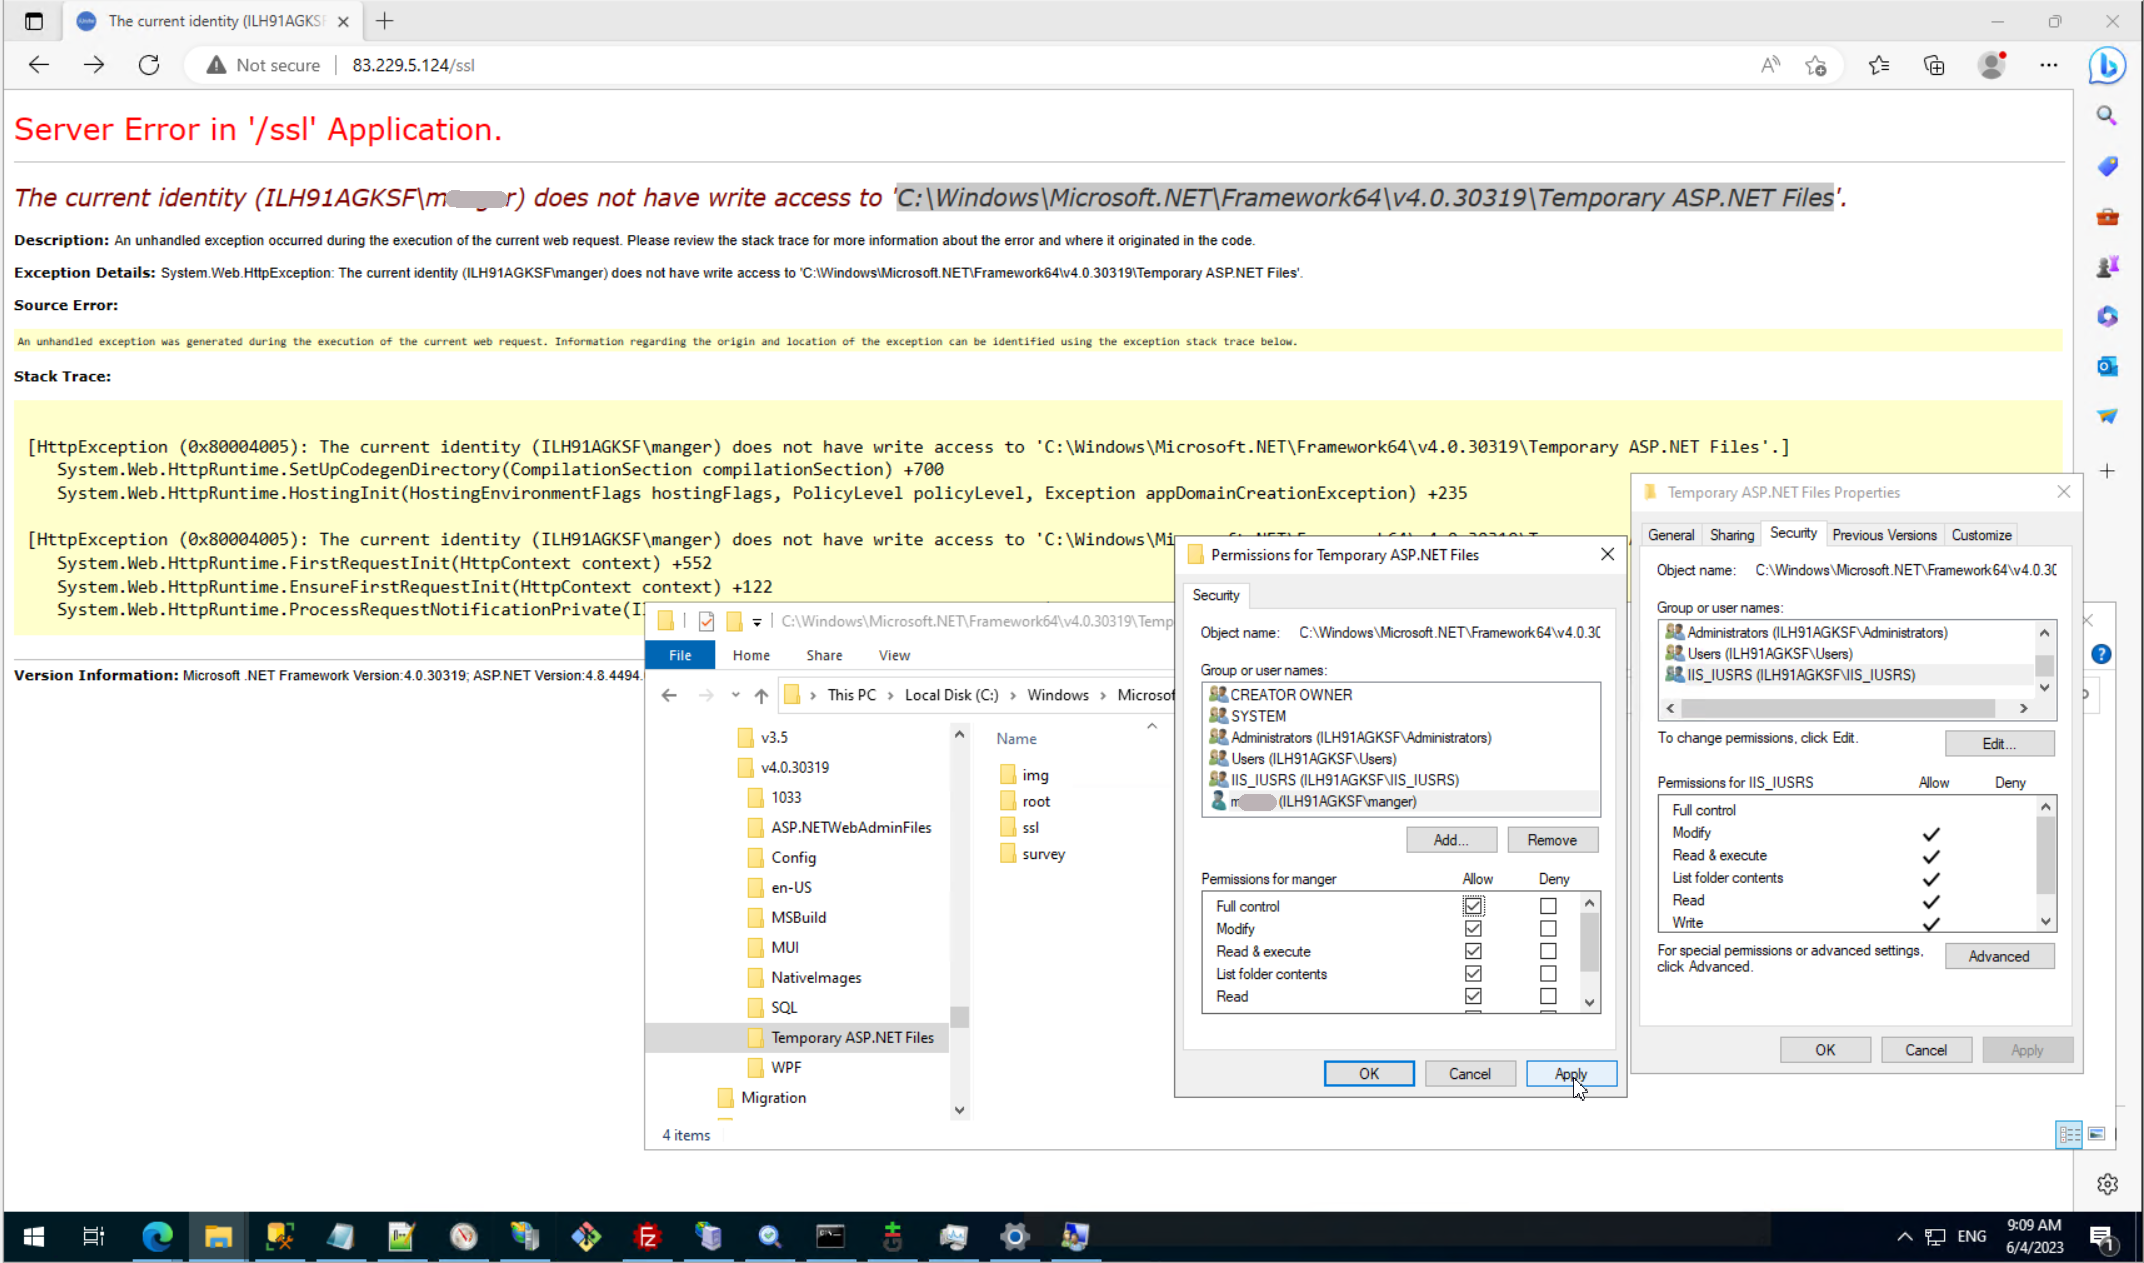
For me, old version of IIS allow directly changes AU on VistualNodes, but current version (IIS 10) forbid this, therefore first step need allow to override security for IIS node.
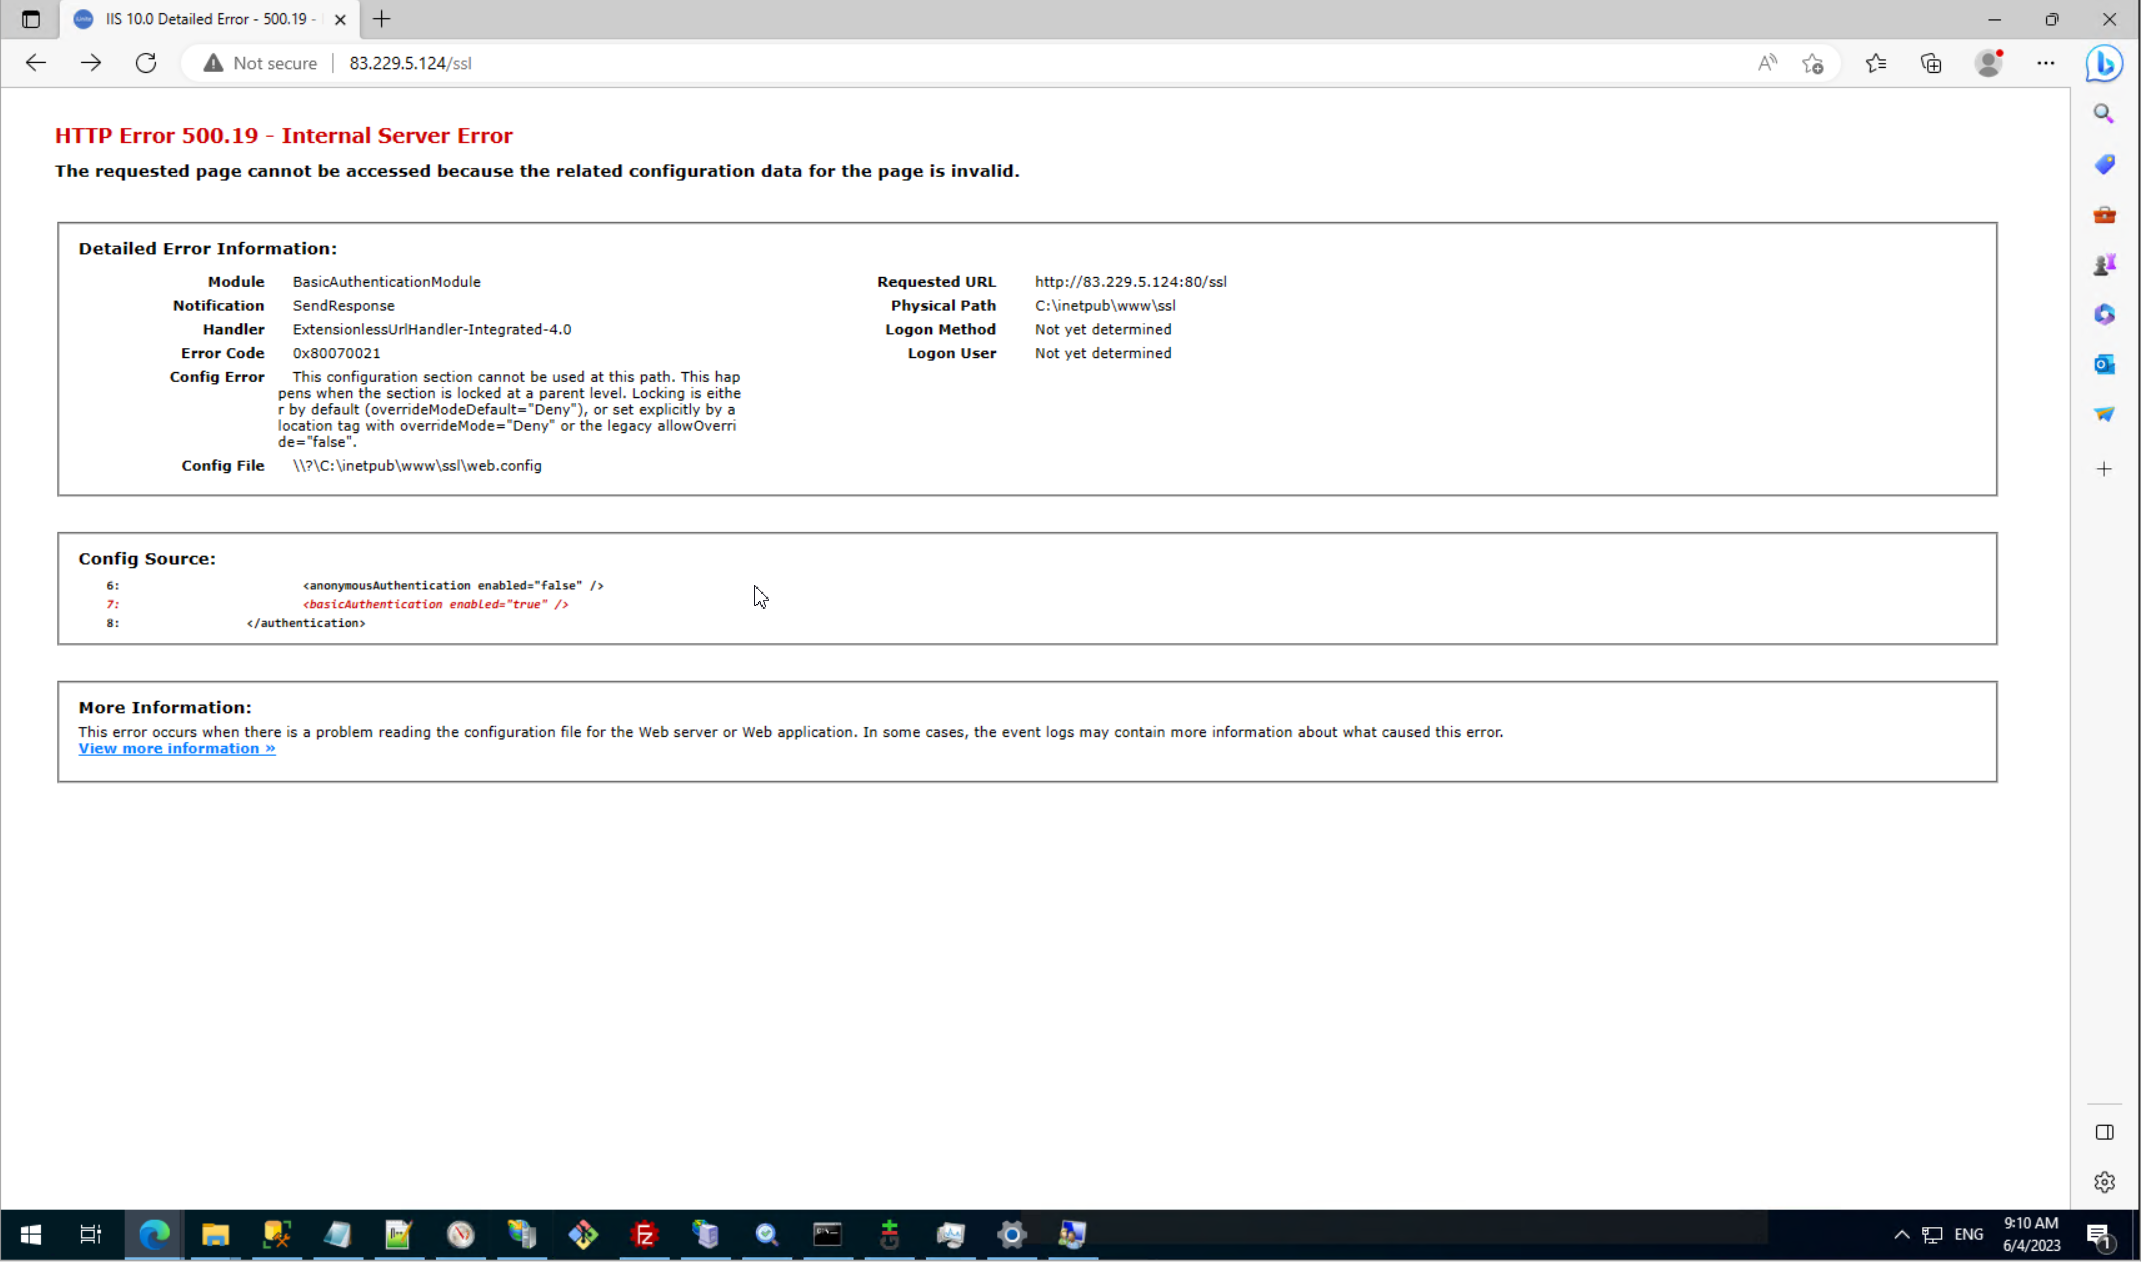
Without this point we always receive this error.
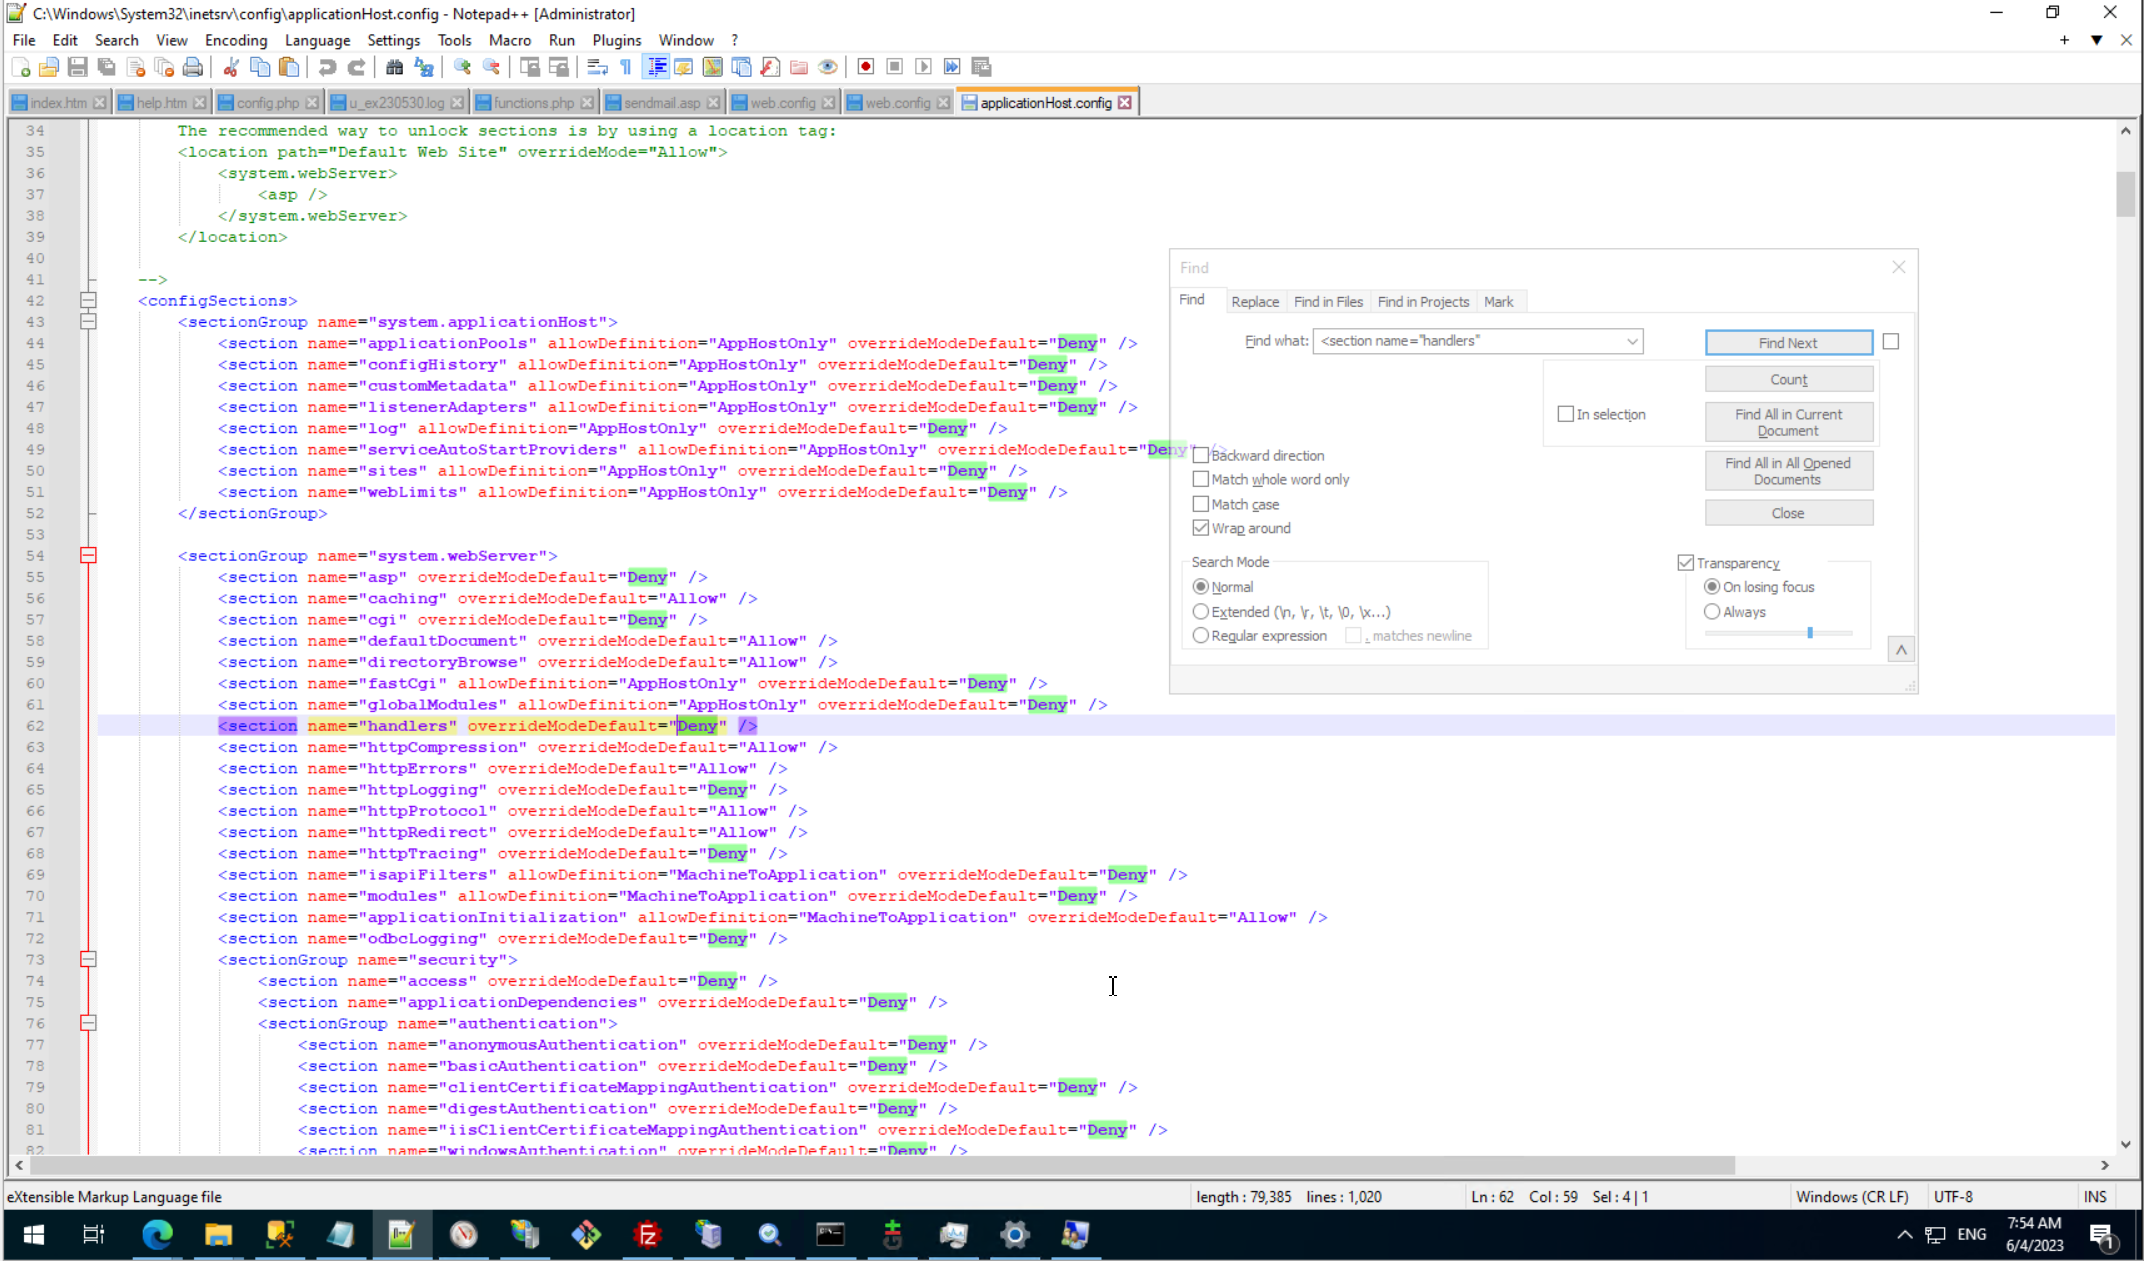
We need to override Handlers and Module.
Step 3. Delete anonymous access and Basic AU access for VirtualDirectory.
We don't need additional web-config on virtual node in this simple case.
Step 4. Add anonymous access to temp directory.
Usually we need to add access to temporary directory for new user.
Step 5. Additional restriction.
Above you can see simplest as possible pattern, usually in practice we need more sophisticated pattern started from restriction to directory with additional protection.
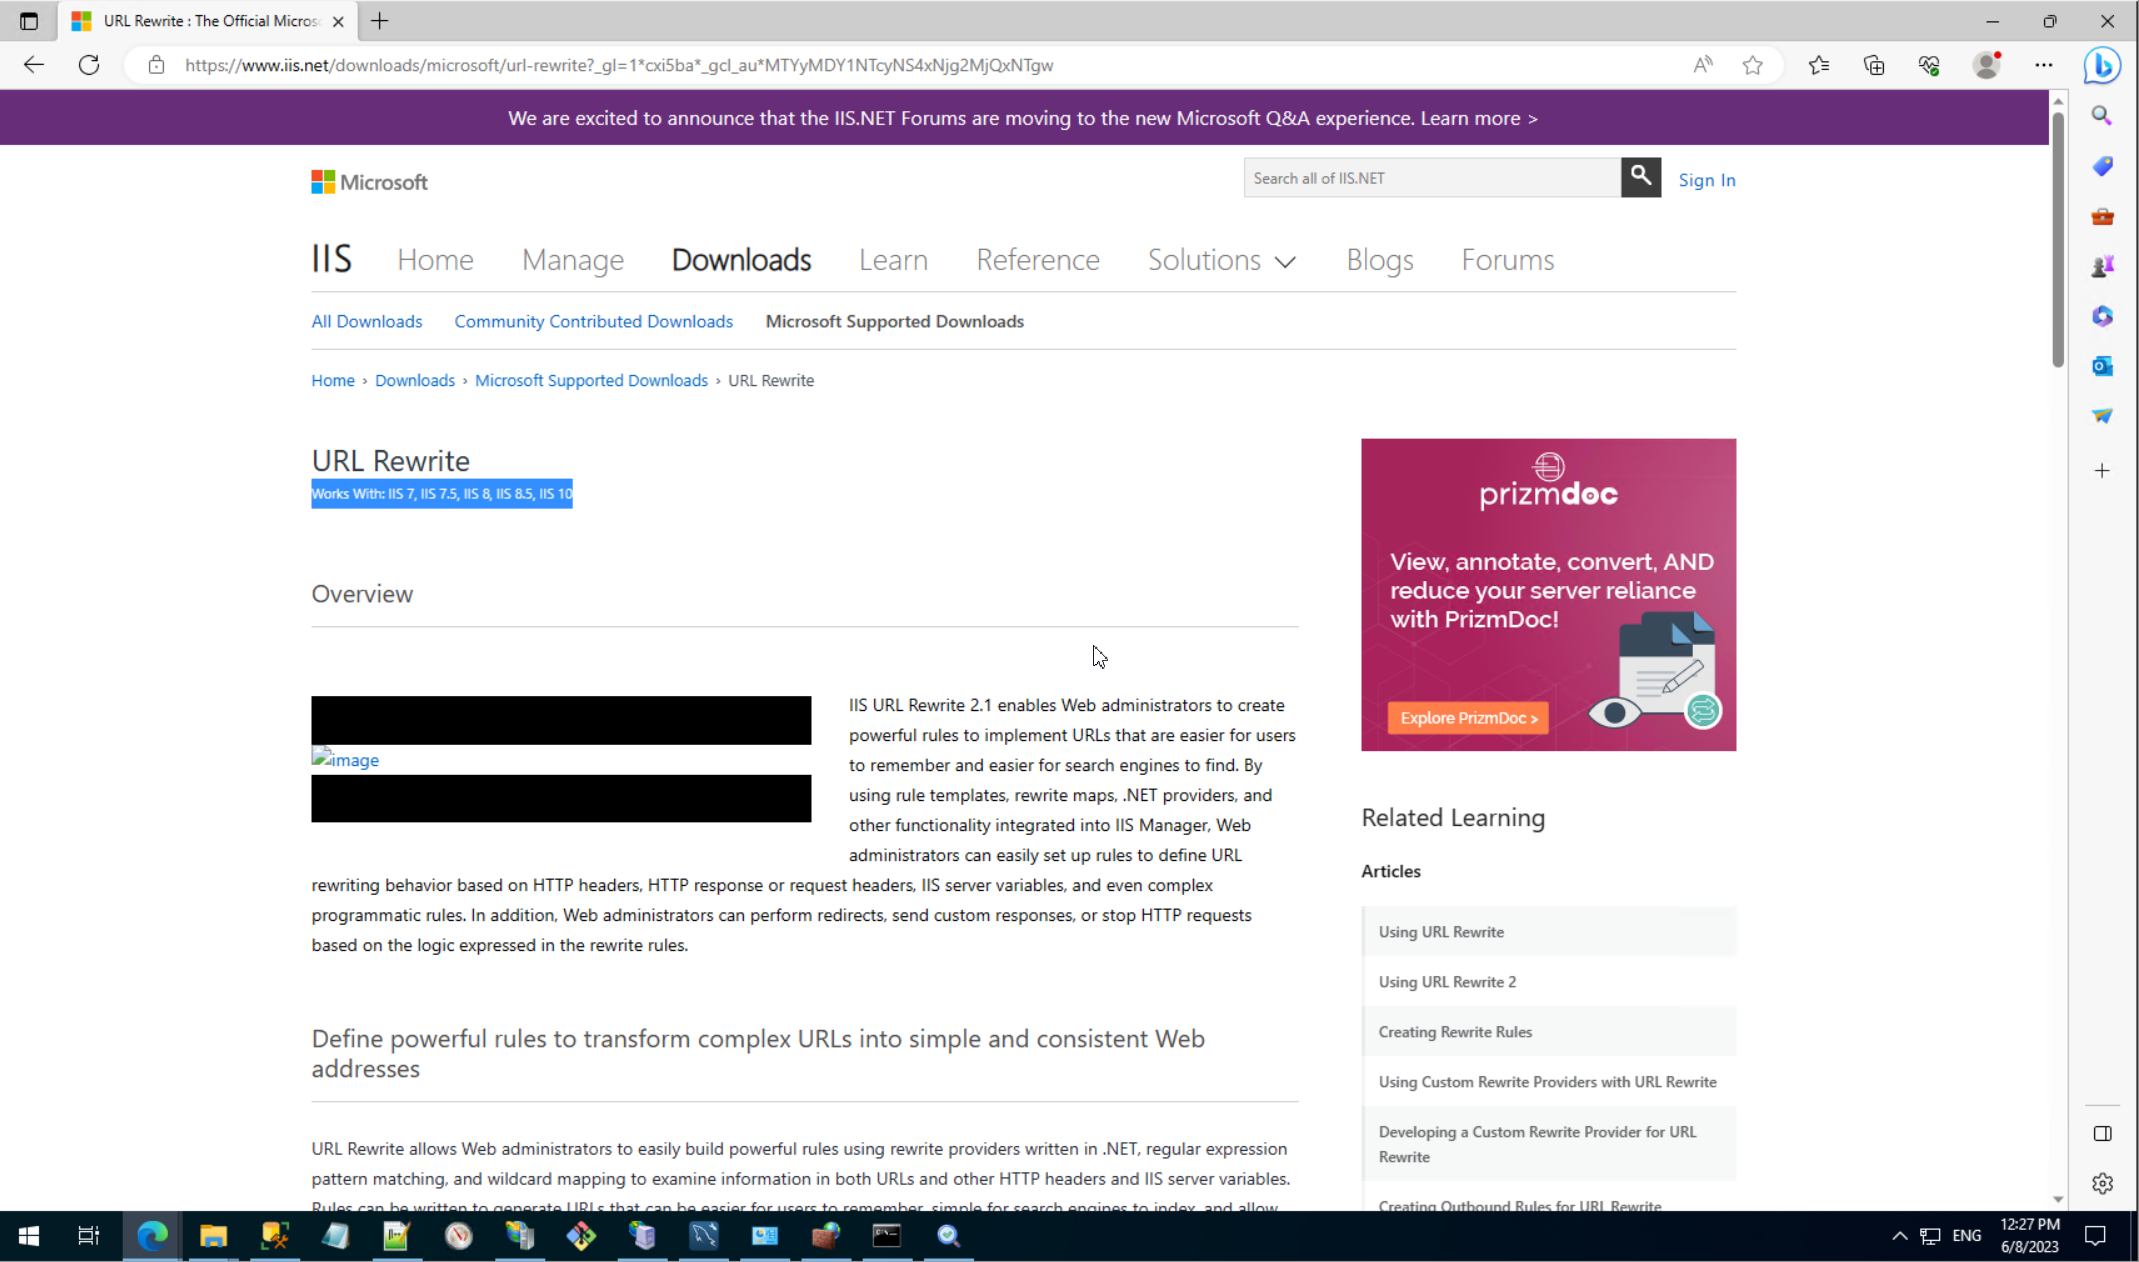
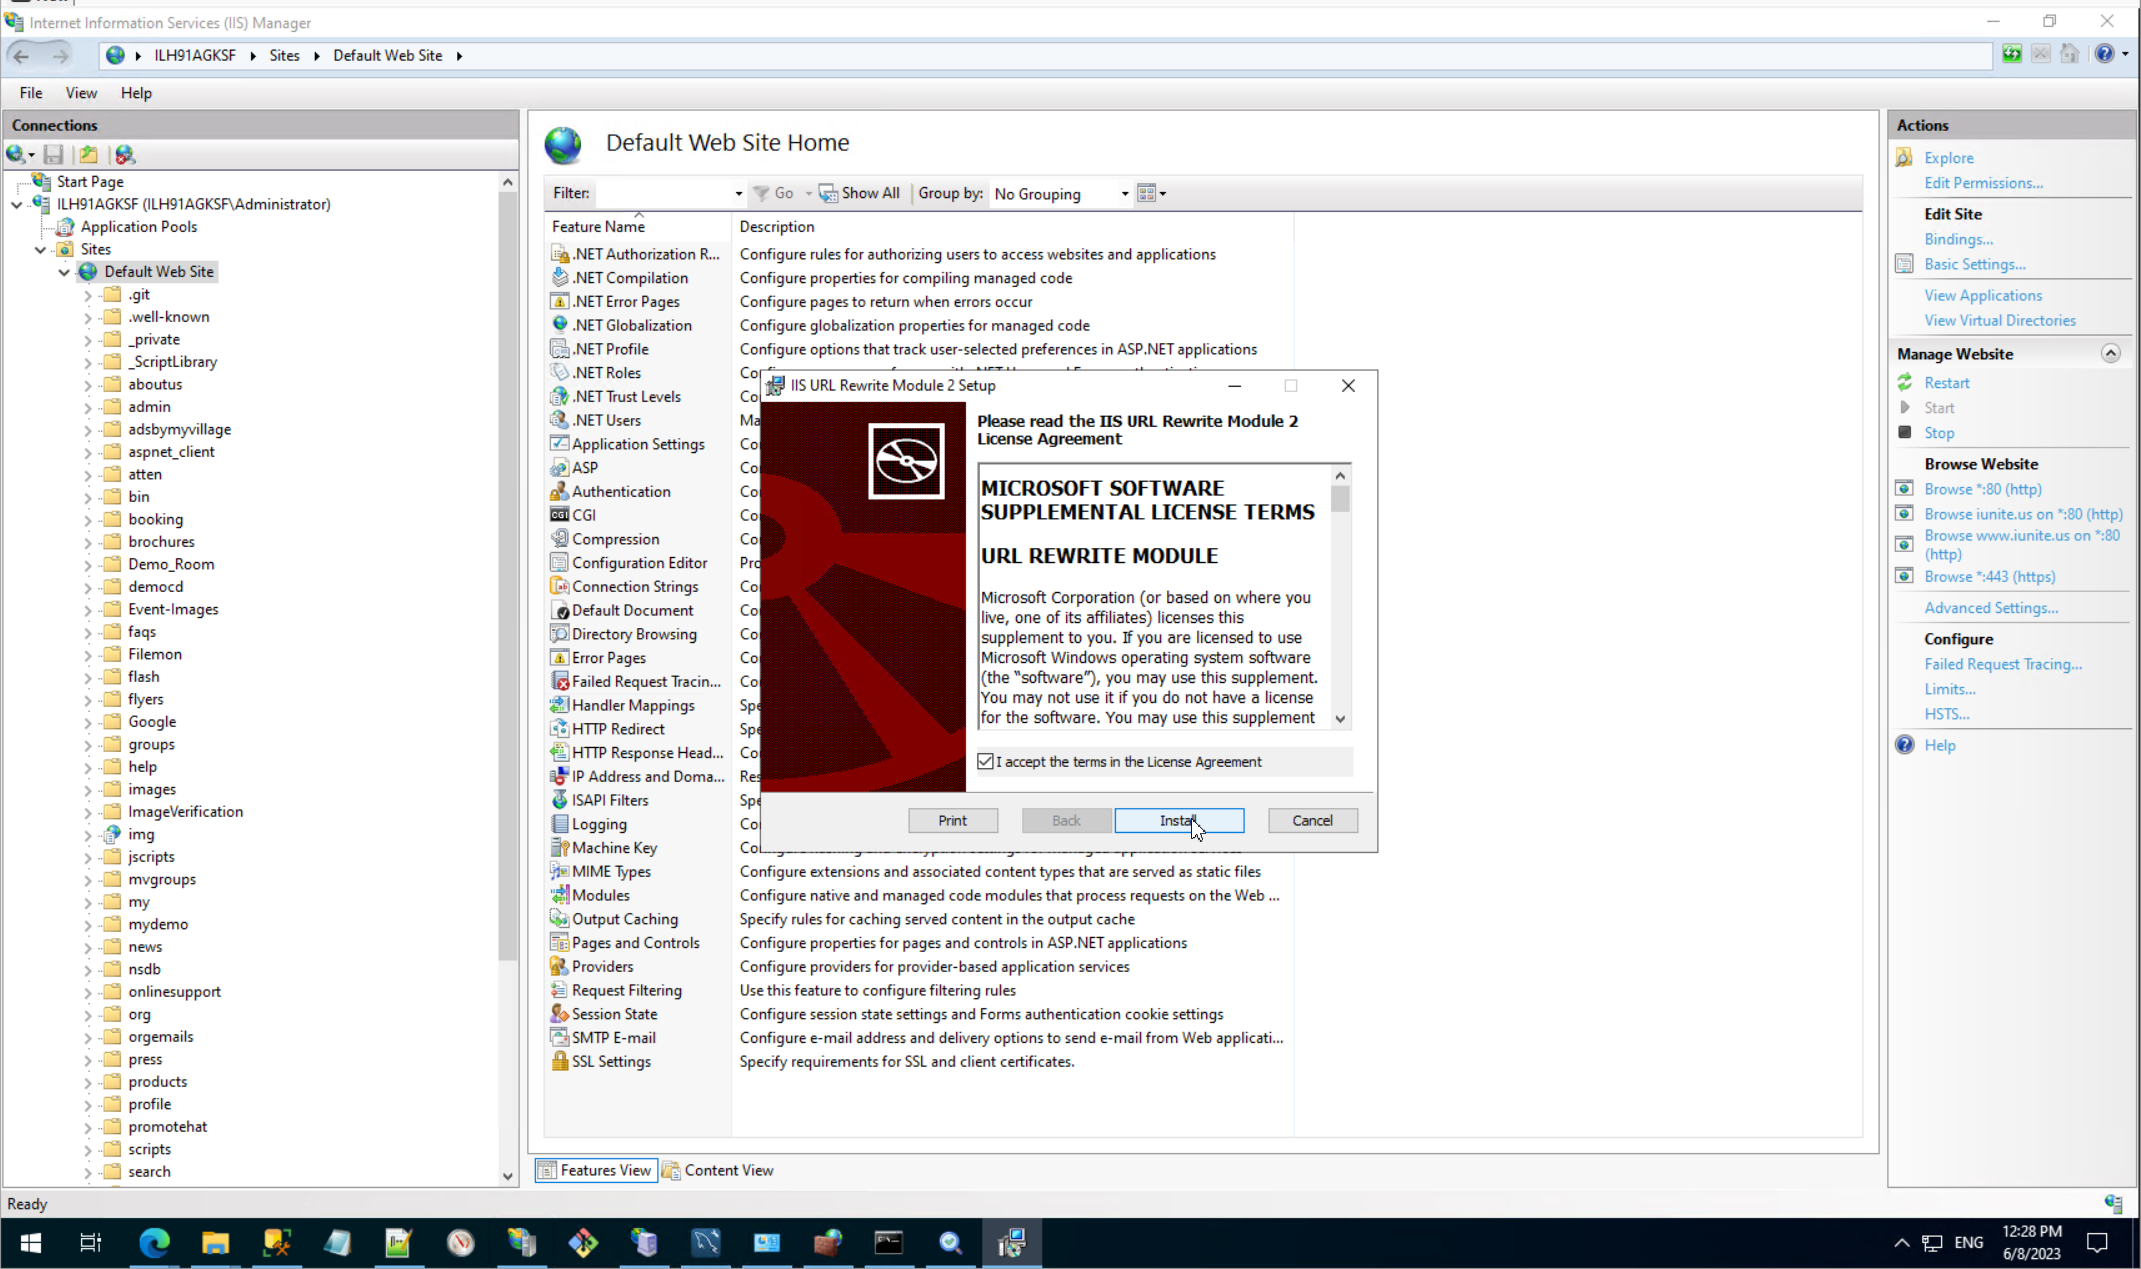
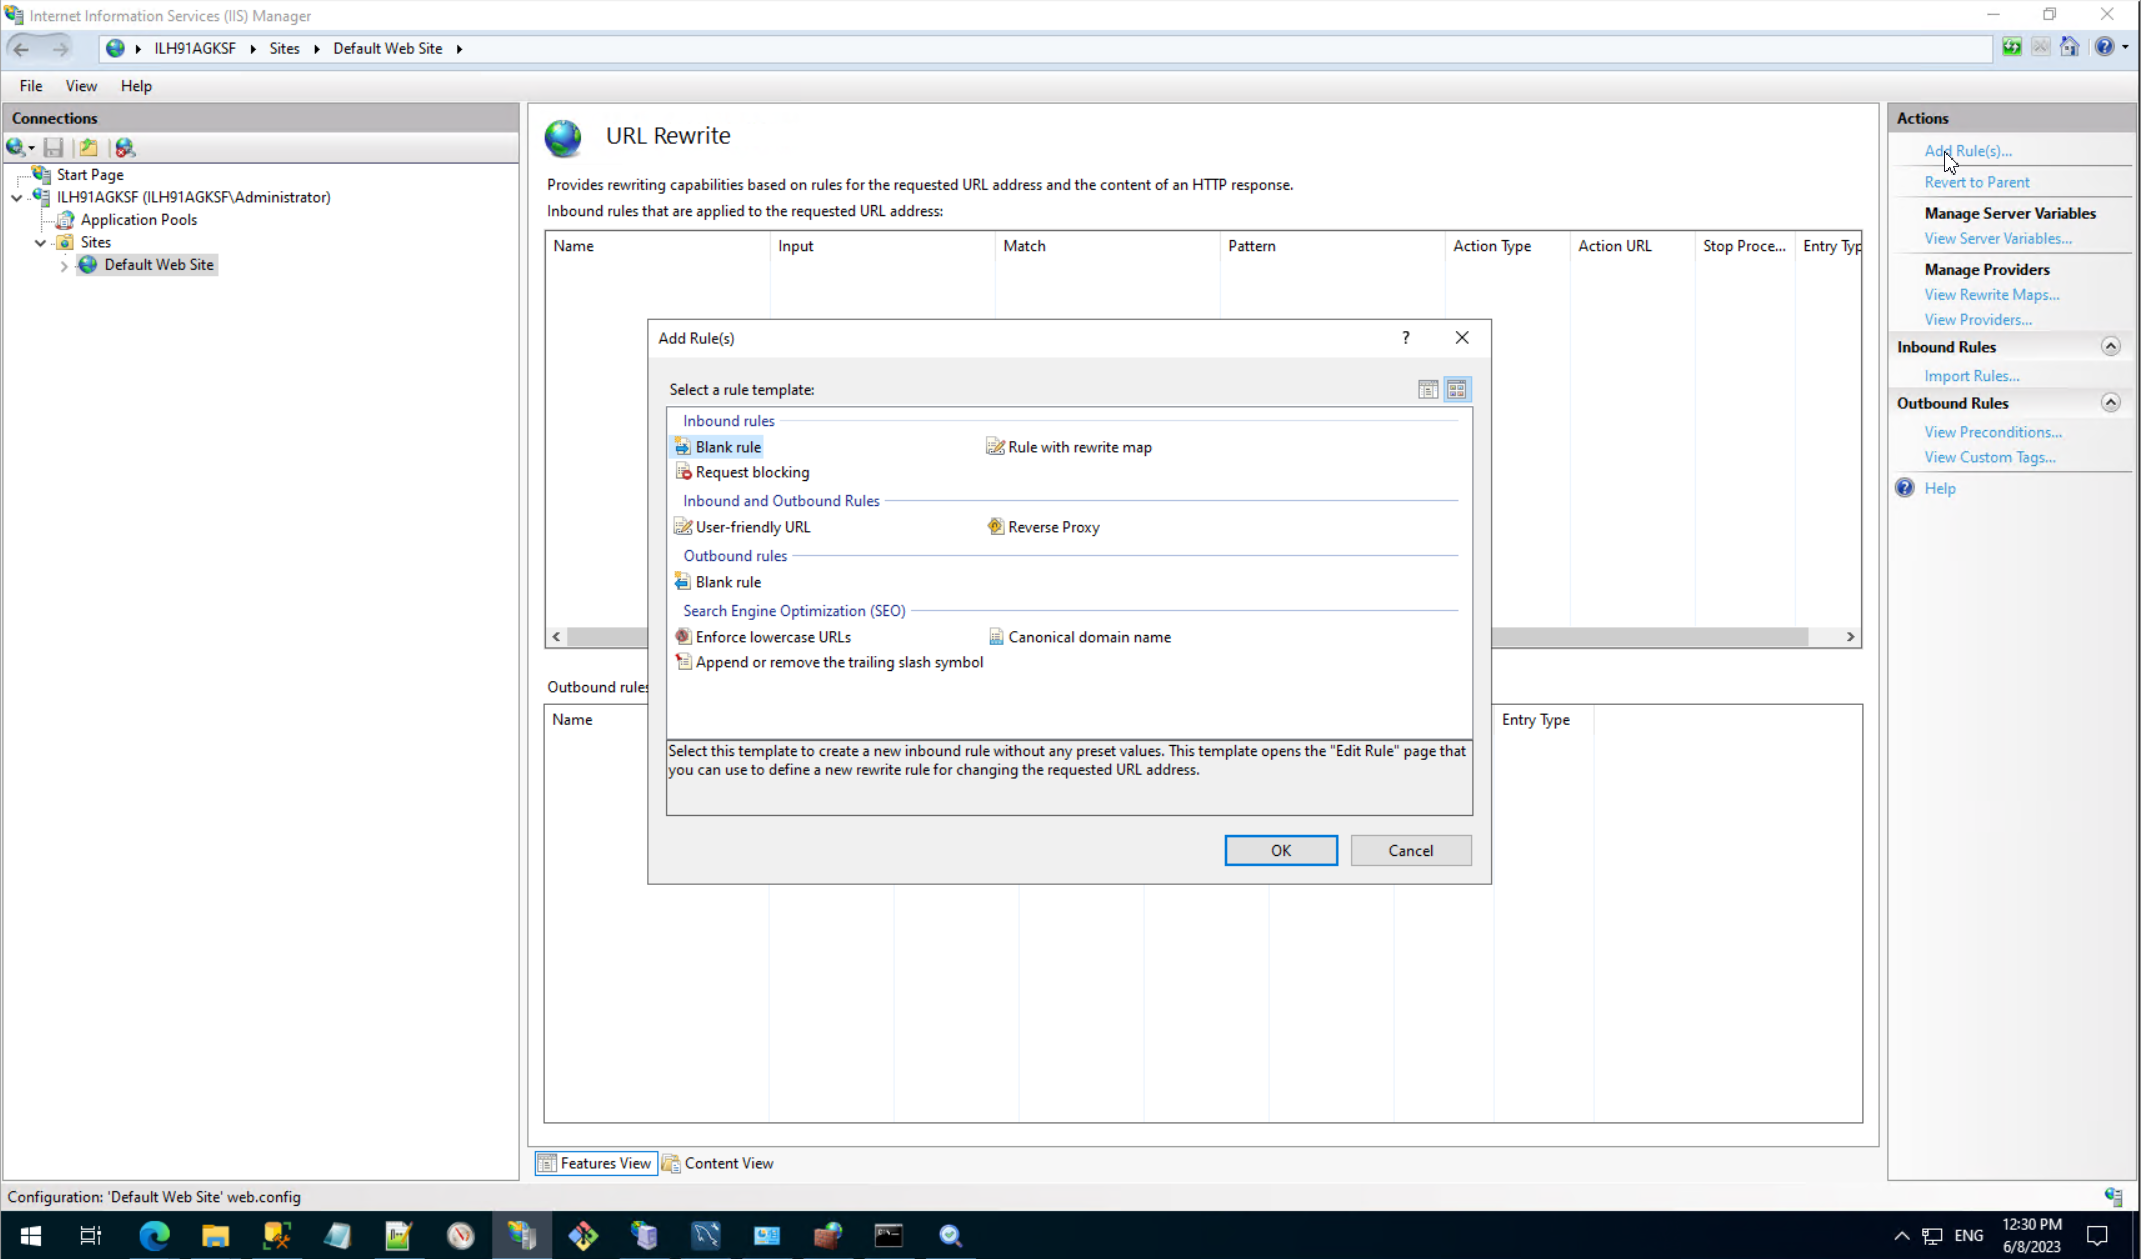
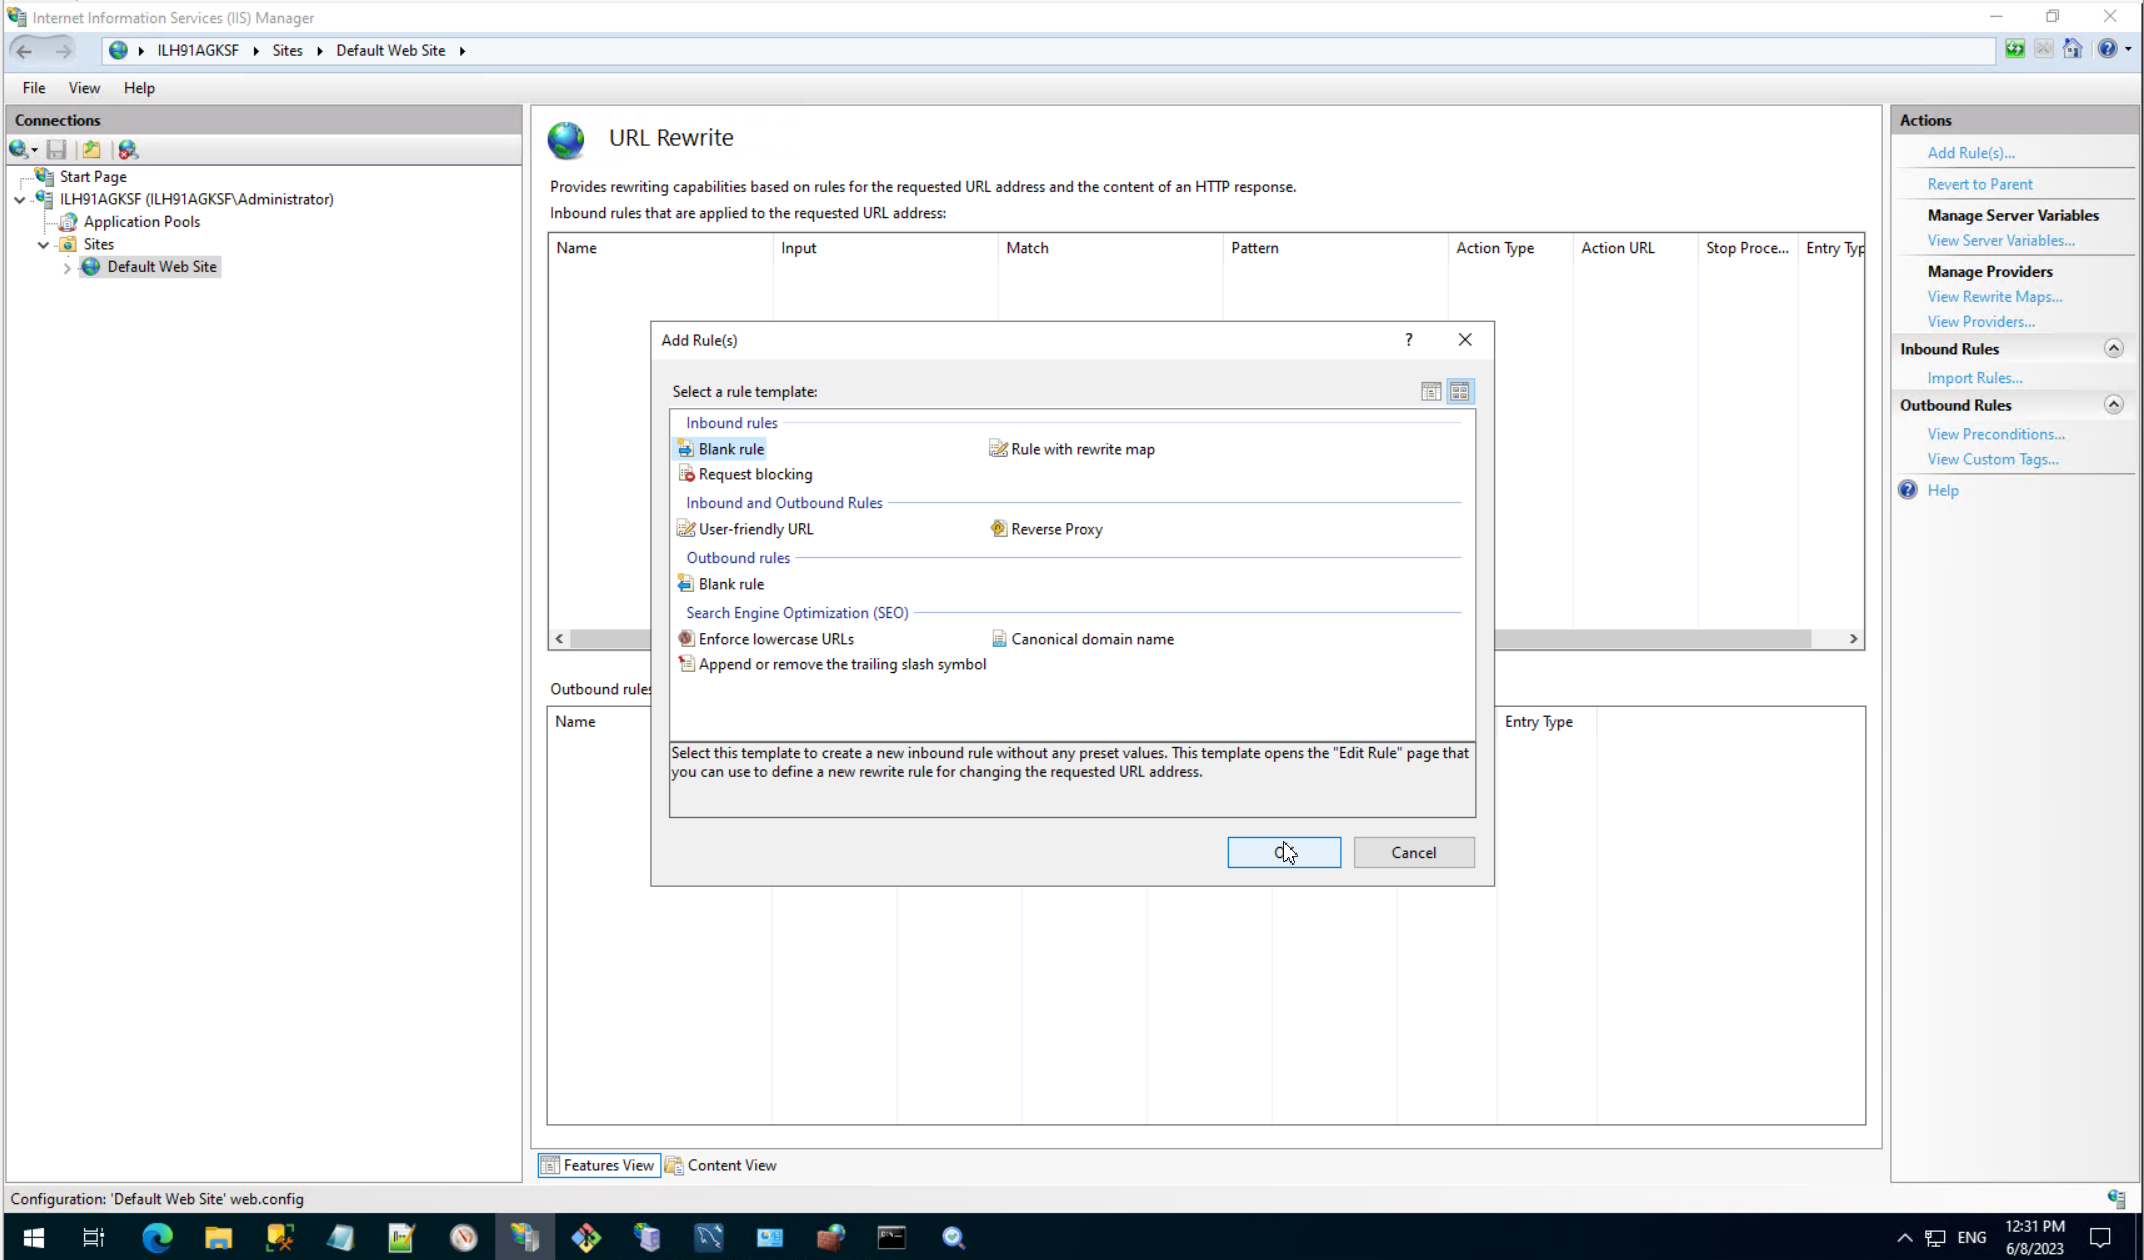
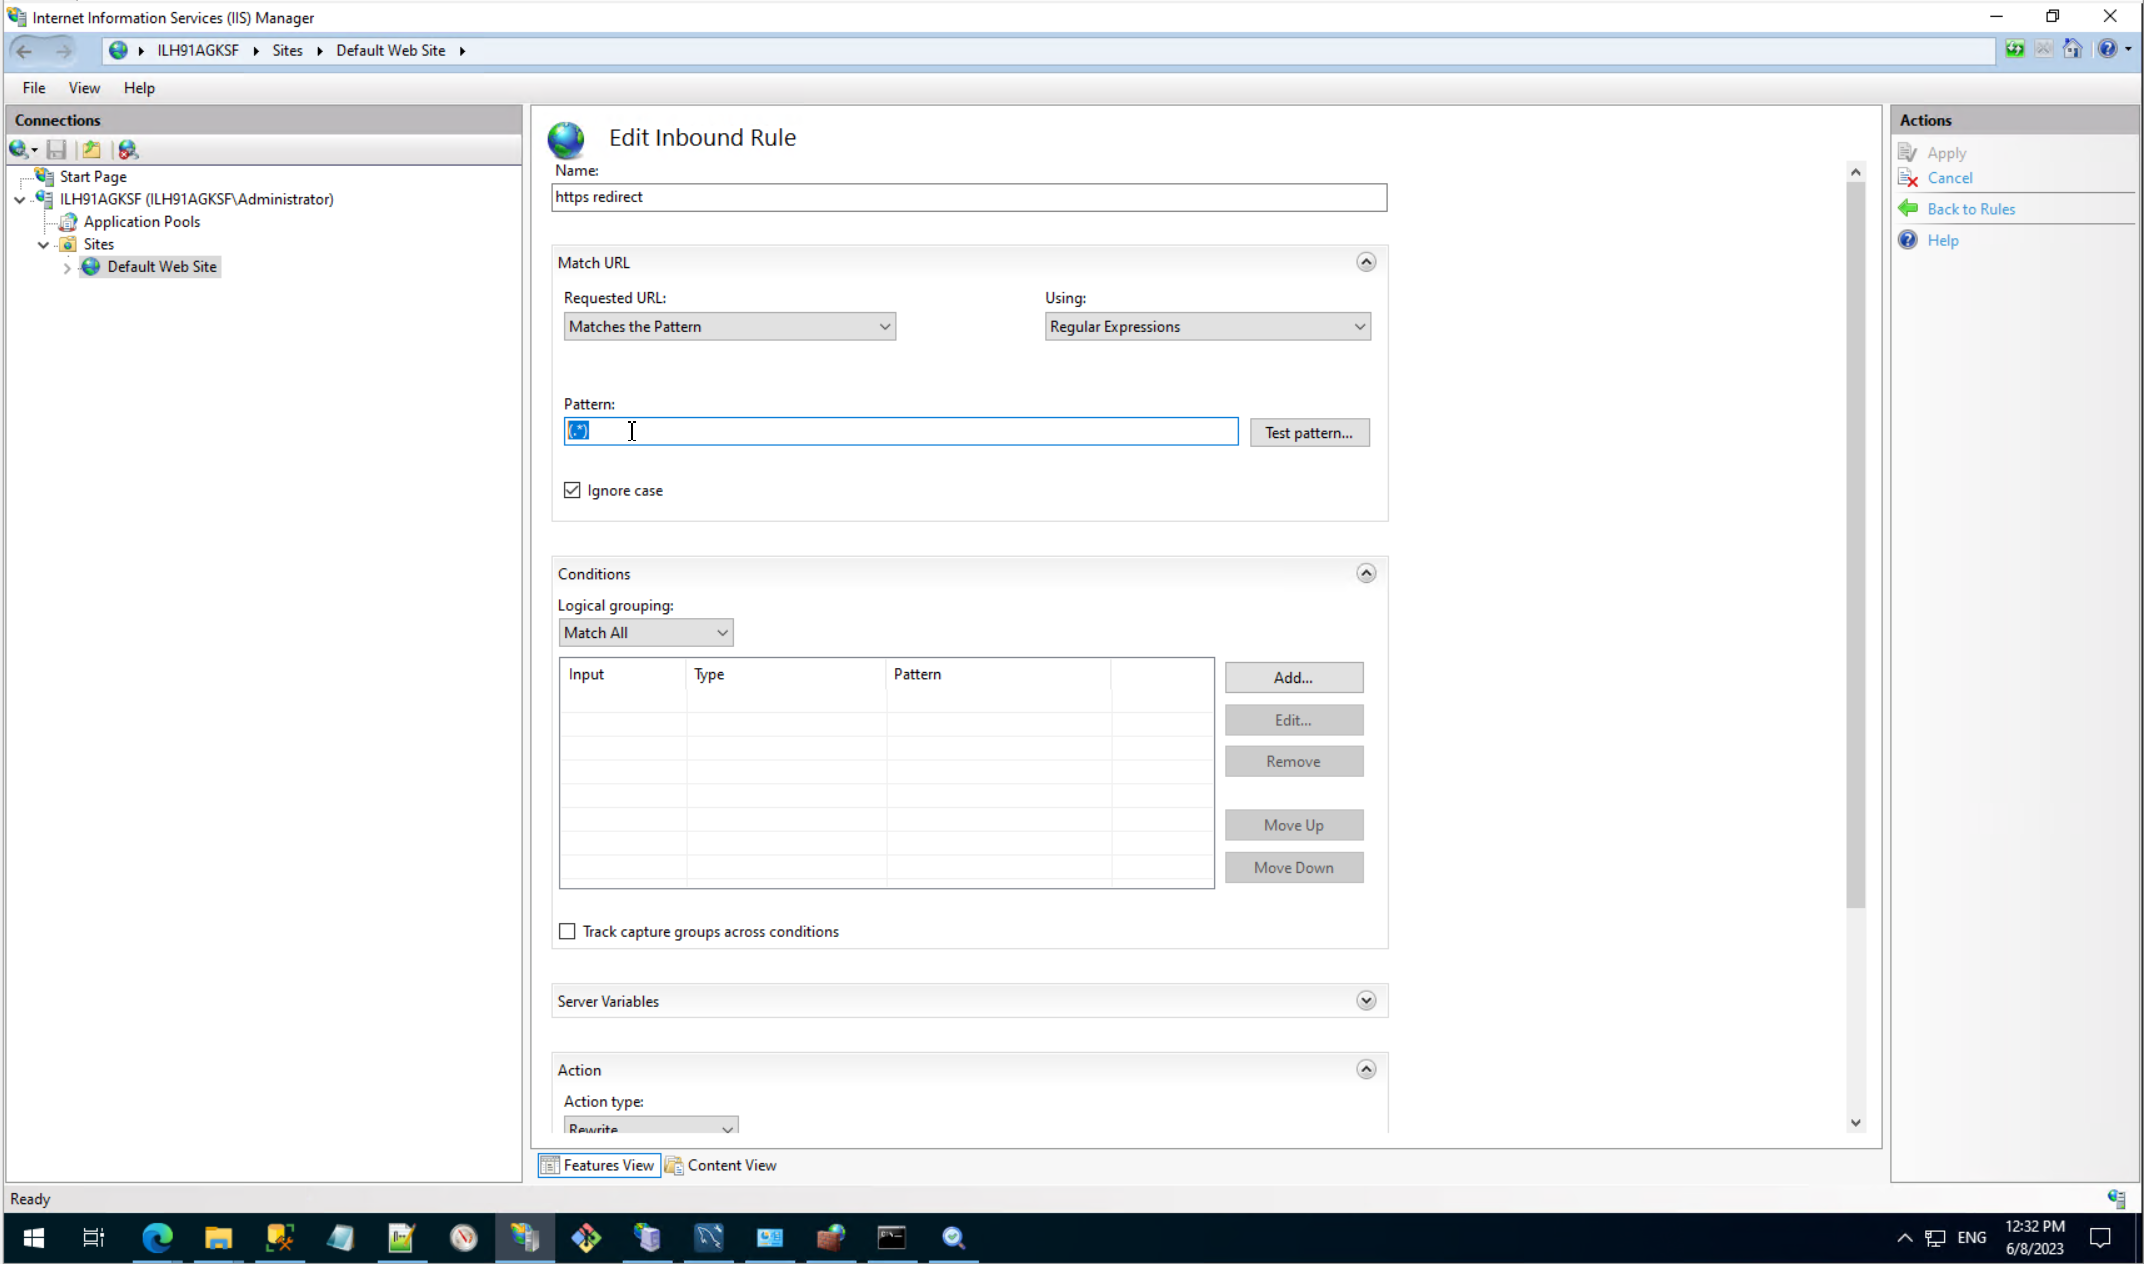
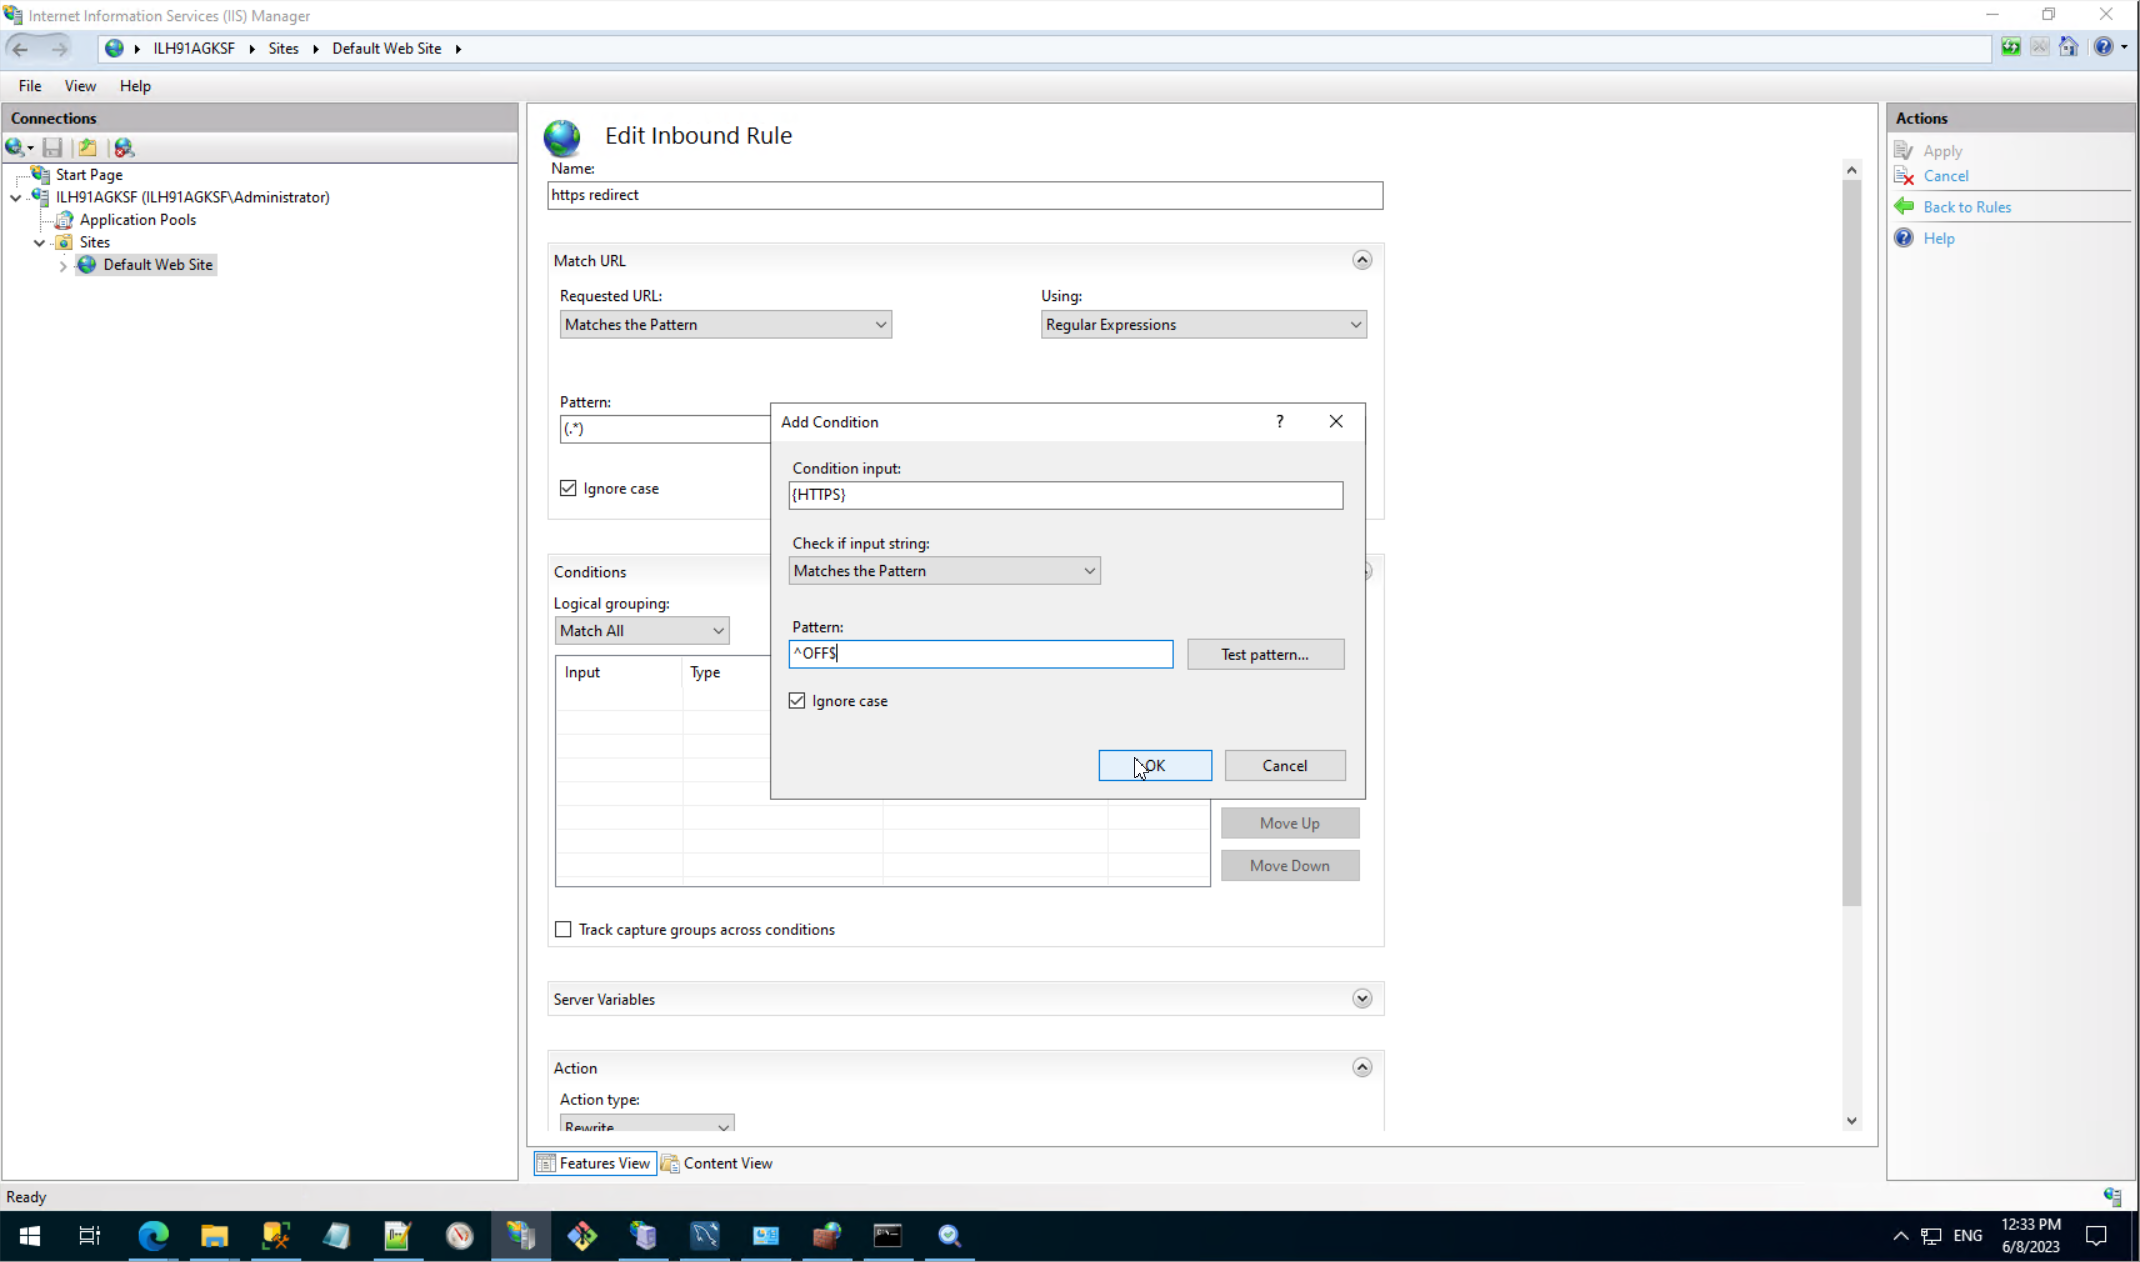
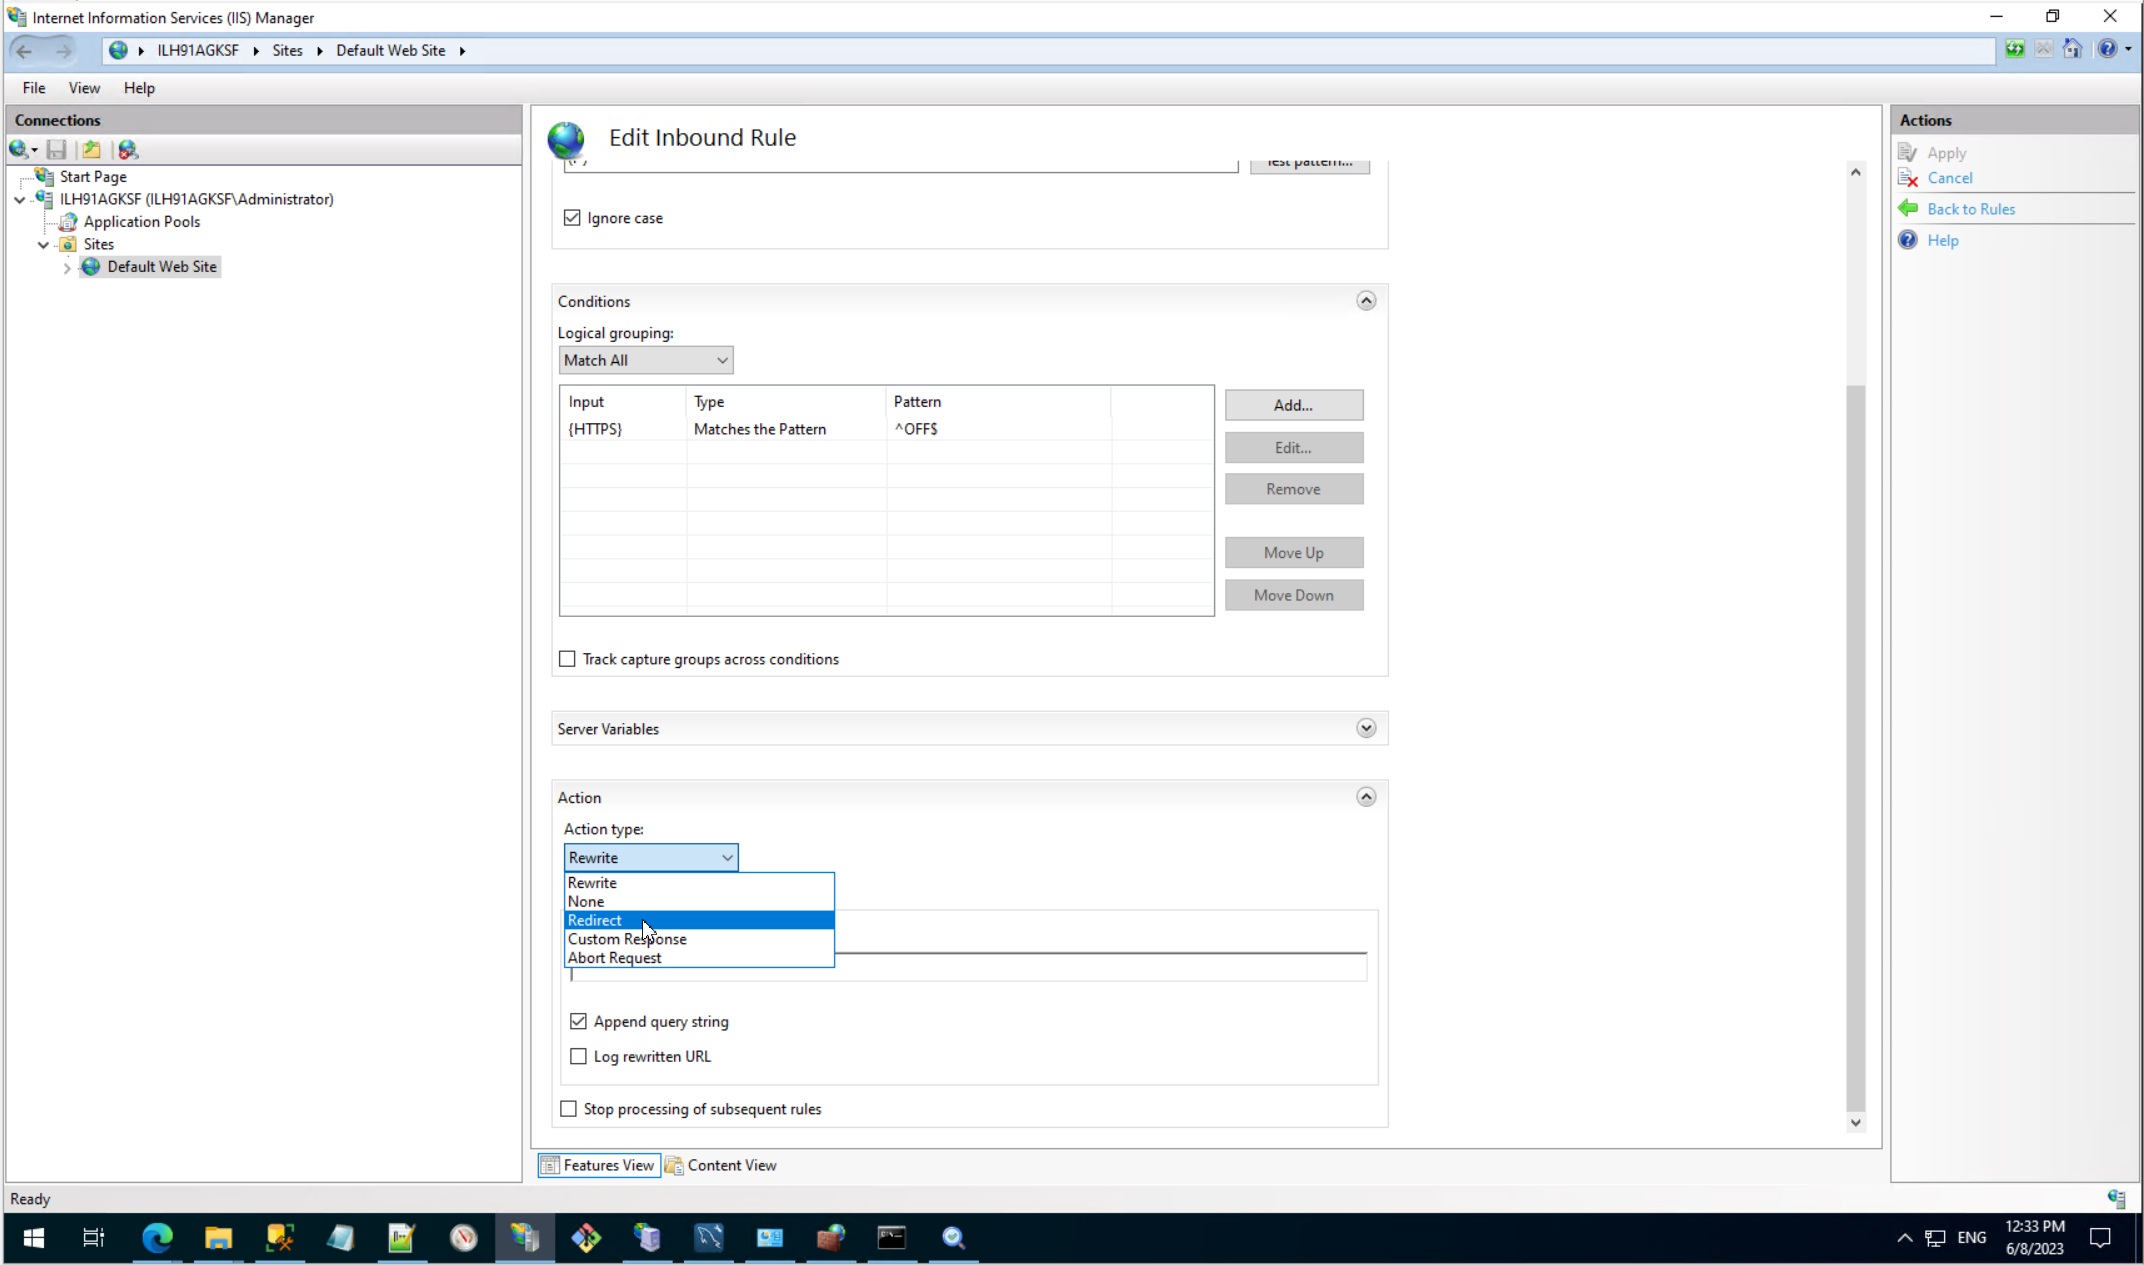
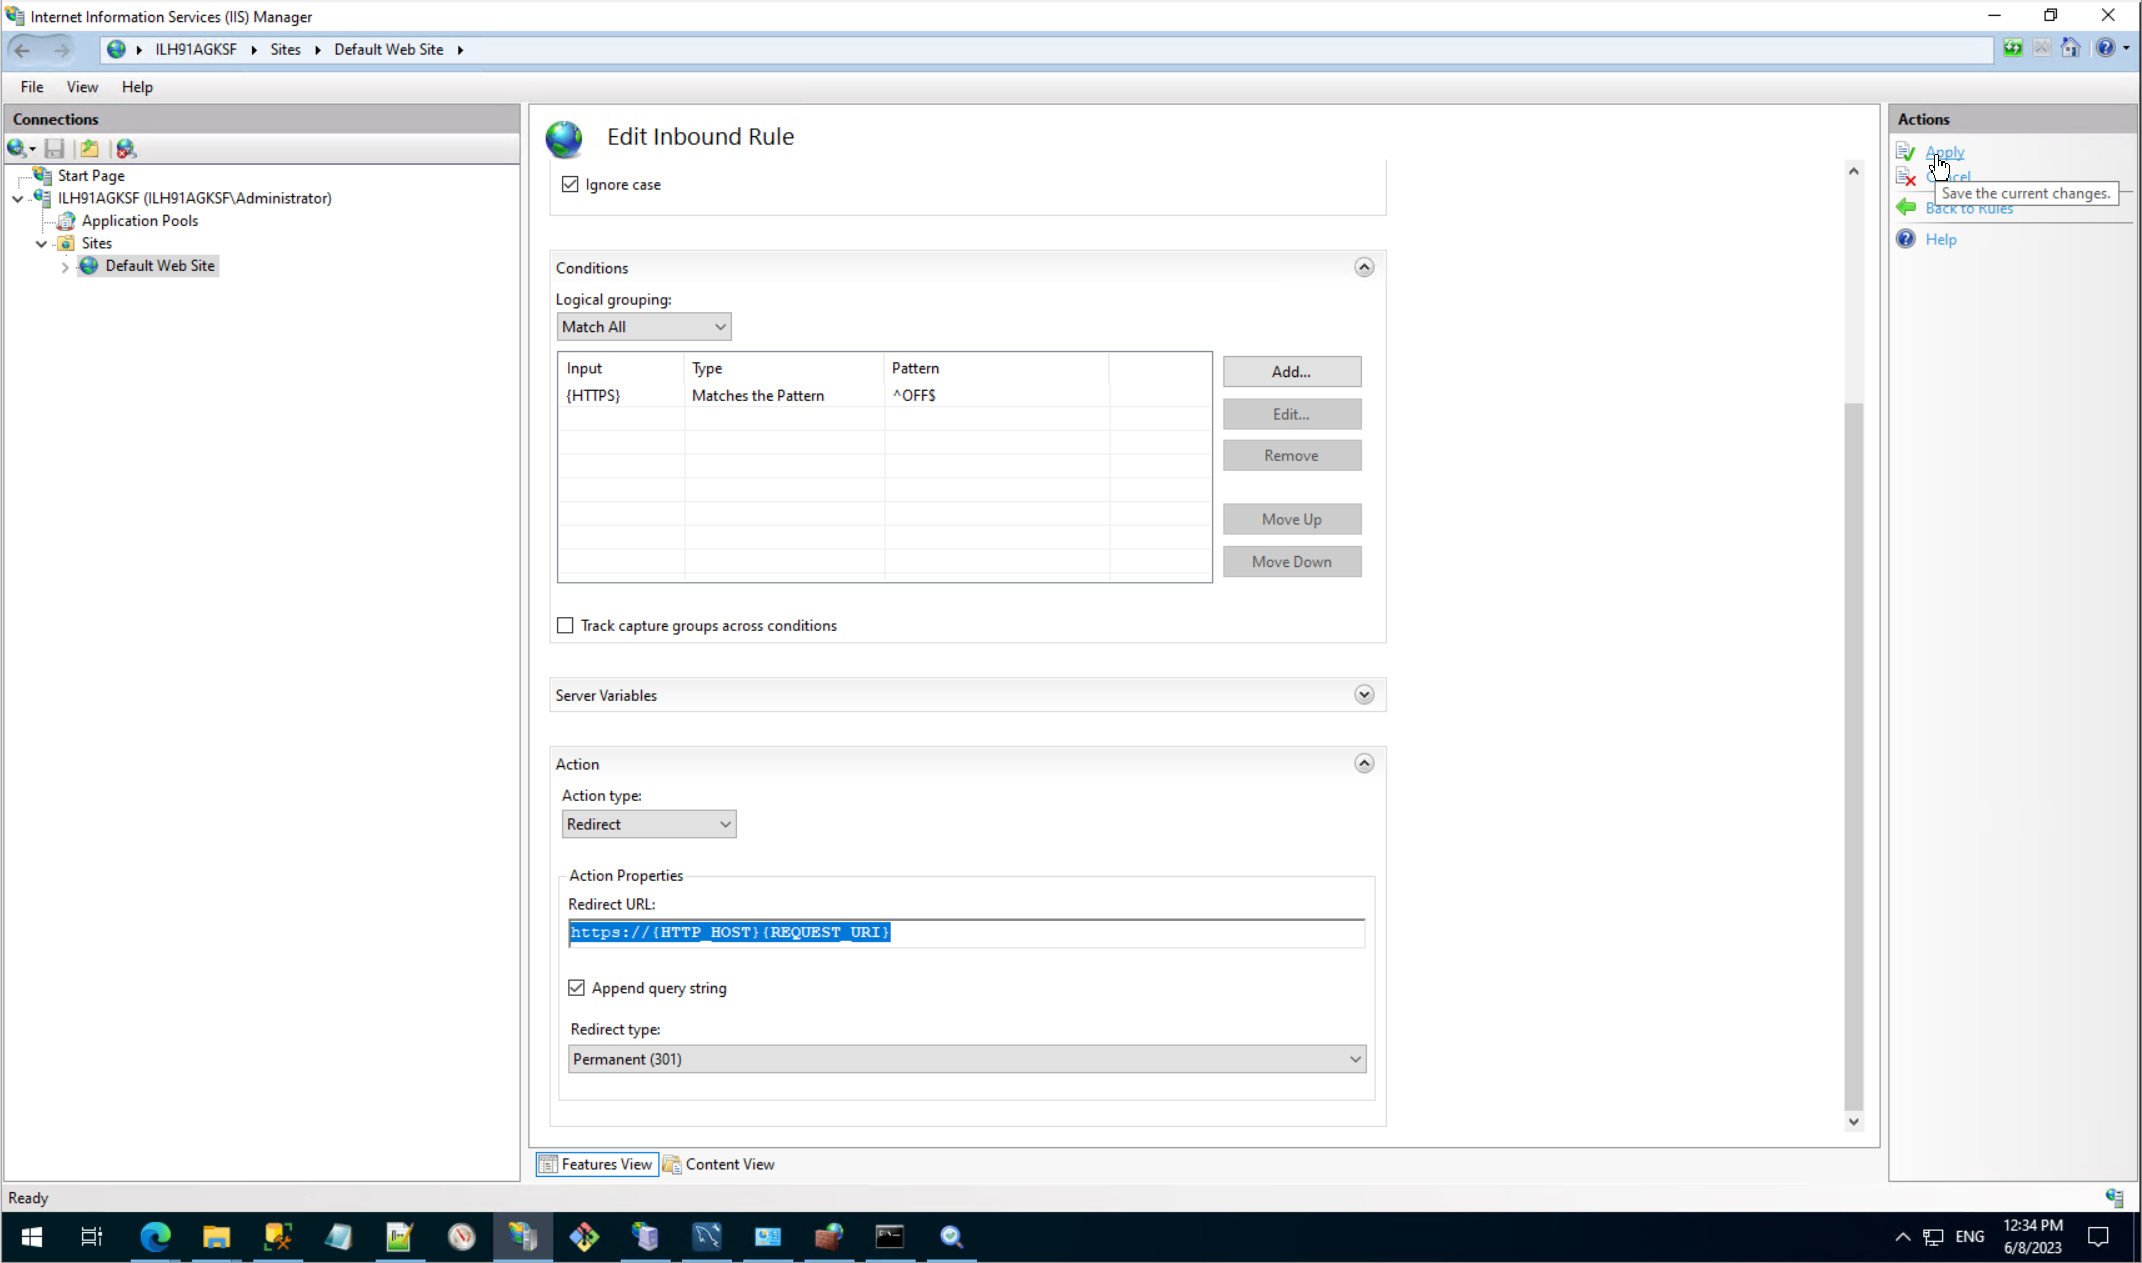
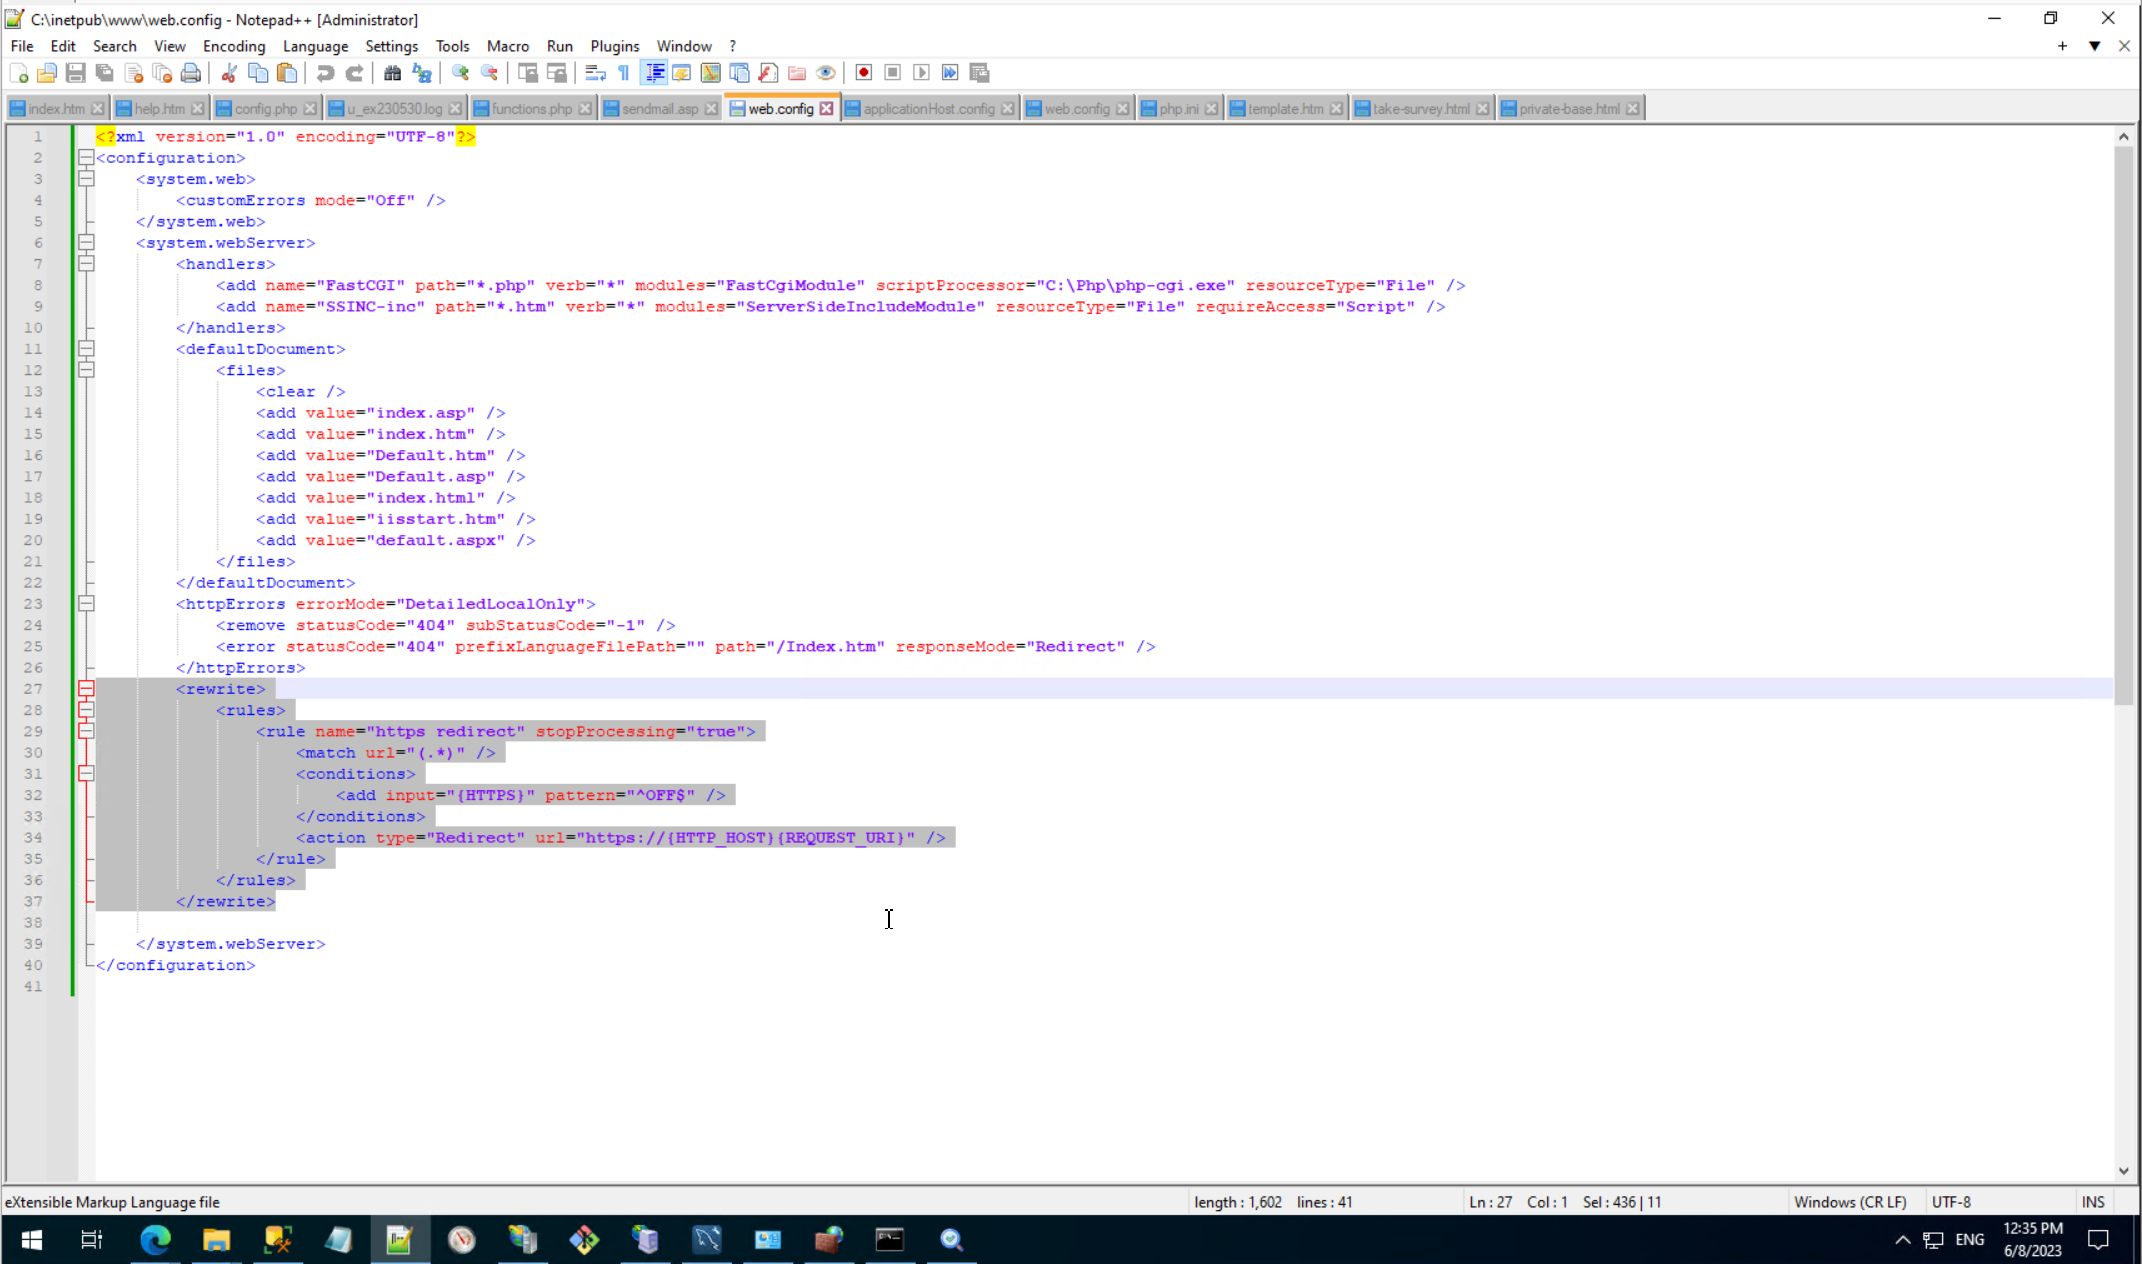
3. URL rewriter.
Embedded URL rewriter is common future of IIS, usually URL rewriting can be doing programmatically or by special IIS, read firstly this my topic about URL rewriting than MS documentation.
Below you can see third way - this is simple rewriter from HTTP to HTTPS, this is usual mandatory step after SSL certificate has been installed.

4. Enable parent root and send info to browser.
>C:\Windows\System32>%windir%\system32\inetsrv\appcmd set config -section:asp -scriptErrorSentToBrowser:true
Applied configuration changes to section "system.webServer/asp" for "MACHINE/WEBROOT/APPHOST" at configuration commit path "MACHINE/WEBROOT/APPHOST"

>C:\Windows\System32>%windir%\system32\inetsrv\appcmd set config -section:asp -enableParentPaths:true
Applied configuration changes to section "system.webServer/asp" for "MACHINE/WEBROOT/APPHOST" at configuration commit path "MACHINE/WEBROOT/APPHOST"
Ssl context:
WebServer context:
 )
)
|
|