Configuring Parameters for Web Package Deployment
by Jason Lee
This topic describes how to set parameter values, like Internet Information Services (IIS) web application names, connection strings, and service endpoints, when you deploy a web package to a remote IIS web server.
When you build a web application project, the build and packaging process generates three key files:
- A [project name].zip file. This is the web deployment package for your web application project. This package contains all the assemblies, files, database scripts, and resources required to recreate your web application on a remote IIS web server.
- A [project name].deploy.cmd file. This contains a set of parameterized Web Deploy (MSDeploy.exe) commands that publish your web deployment package to a remote IIS web server.
- A [project name].SetParameters.xml file. This provides a set of parameter values to the MSDeploy.exe command. You can update the values in this file and pass it to Web Deploy as a command-line parameter when you deploy your web package.
[!NOTE] For more information on the build and packaging process, see Building and Packaging Web Application Projects.
The SetParameters.xml file is dynamically generated from your web application project file and any configuration files within your project. When you build and package your project, the Web Publishing Pipeline (WPP) will automatically detect lots of the variables that are likely to change between deployment environments, like the destination IIS web application and any database connection strings. These values are automatically parameterized in the web deployment package and added to the SetParameters.xml file. For example, if you add a connection string to the web.config file in your web application project, the build process will detect this change and will add an entry to the SetParameters.xml file accordingly.
In a lot of cases, this automatic parameterization will be sufficient. However, if your users need to vary other settings between deployment environments, like application settings or service endpoint URLs, you need to tell the WPP to parameterize these values in the deployment package and add corresponding entries to the SetParameters.xml file. The sections that follow explain how to do this.
Automatic Parameterization
When you build and package a web application, the WPP will automatically parameterize these things:
- The destination IIS web application path and name.
- Any connection strings in your web.config file.
- Connection strings for any databases you add to the Package/Publish SQL tab in the project property pages.
For example, if you were to build and package the Contact Manager sample solution without touching the parameterization process in any way, the WPP would generate this ContactManager.Mvc.SetParameters.xml file:
[!code-xmlMain]
1: <parameters>
2: <setParameter
3: name="IIS Web Application Name"
4: value="Default Web Site/ContactManager.Mvc_deploy" />
5: <setParameter
6: name="ApplicationServices-Web.config Connection String"
7: value="Data Source=DEVWORKSTATION\SQLEXPRESS;Initial Catalog=CMAppServices;
8: Integrated Security=true;" />
9: </parameters>
In this case:
- The IIS Web Application Name parameter is the IIS path where you want to deploy the web application. The default value is taken from the Package/Publish Web page in the project property pages.
- The ApplicationServices-Web.config Connection String parameter was generated from a connectionStrings/add element in the web.config file. It represents the connection string that the application should use to contact the membership database. The value you provide here will be substituted into the deployed web.config file. The default value is taken from the pre-deployment web.config file.
The WPP also parameterizes these properties in the deployment package it generates. You can provide values for these properties when you install the deployment package. If you install the package manually through IIS Manager, as described in Manually Installing Web Packages, the installation wizard prompts you to provide values for any parameters. If you install the package remotely using the .deploy.cmd file, as described in Deploying Web Packages, Web Deploy will look to this SetParameters.xml file to provide the parameter values. You can edit the values in the SetParameters.xml file manually, or you can customize the file as part of an automated build and deployment process. This process is described in more detail later in this topic.
Custom Parameterization
In more complex deployment scenarios, you’ll often want to parameterize additional properties before you deploy your project. Generally speaking, you should parameterize any properties and settings that will vary between destination environments. These can include:
- Service endpoints in the web.config file.
- Application settings in the web.config file.
- Any other declarative properties that you want to prompt users to specify.
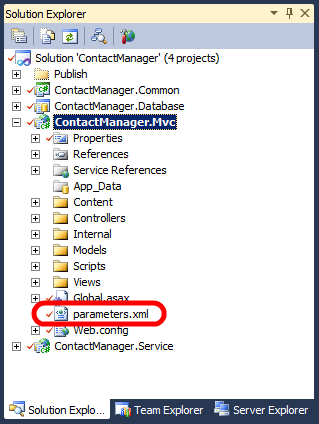
The easiest way to parameterize these properties is to add a parameters.xml file to the root folder of your web application project. For example, in the Contact Manager solution, the ContactManager.Mvc project includes a parameters.xml file in the root folder.
If you open this file, you’ll see that it contains a single parameter entry. The entry uses an XML Path Language (XPath) query to locate and parameterize the endpoint URL of the ContactService Windows Communication Foundation (WCF) service in the web.config file.
[!code-xmlMain]
1: <parameters>
2: <parameter name="ContactService Service Endpoint Address"
3: description="Specify the endpoint URL for the ContactService WCF
4: service in the destination environment"
5: defaultValue="http://localhost/ContactManagerService">
6: <parameterEntry kind="XmlFile" scope="Web.config"
7: match="/configuration/system.serviceModel/client
8: /endpoint[@name='BasicHttpBinding_IContactService']
9: /@address" />
10: </parameter>
11: </parameters>
In addition to parameterizing the endpoint URL in the deployment package, the WPP also adds a corresponding entry to the SetParameters.xml file that gets generated alongside the deployment package.
[!code-xmlMain]
1: <parameters>
2: ...
3: <setParameter
4: name="ContactService Service Endpoint Address"
5: value="http://localhost/ContactManagerService" />
6: ...
7: </parameters>
If you install the deployment package manually, IIS Manager will prompt you for the service endpoint address alongside the properties that were parameterized automatically. If you install the deployment package by running the .deploy.cmd file, you can edit the SetParameters.xml file to provide a value for the service endpoint address together with values for the properties that were parameterized automatically.
For full details on how to create a parameters.xml file, see How to: Use Parameters to Configure Deployment Settings When a Package is Installed. The procedure named To use deployment parameters for Web.config file settings provides step-by-step instructions.
Modifying the SetParameters.xml File
If you plan to deploy the web application package manually—either by running the .deploy.cmd file or by running MSDeploy.exe from the command line—there’s nothing to stop you manually editing the SetParameters.xml file prior to the deployment. However, if you’re working on an enterprise-scale solution, you may need to deploy a web application package as part of a larger, automated build and deployment process. In this scenario, you need the Microsoft Build Engine (MSBuild) to modify the SetParameters.xml file for you. You can do this by using the MSBuild XmlPoke task.
The Contact Manager sample solution illustrates this process. The code examples that follow have been edited to show only the details that are relevant to this example.
[!NOTE] For a broader overview of the project file model in the sample solution, and an introduction to custom project files in general, see Understanding the Project File and Understanding the Build Process.
First, the parameter values of interest are defined as properties in the environment-specific project file (for example, Env-Dev.proj).
[!code-xmlMain]
1: <PropertyGroup>
2: <ContactManagerIisPath Condition=" '$(ContactManagerIisPath)'=='' ">
3: DemoSite/ContactManager
4: </ContactManagerIisPath>
5: <ContactManagerTargetUrl Condition =" '$(ContactManagerTargetUrl)'=='' ">
6: http://localhost:85/ContactManagerService/ContactService.svc
7: </ContactManagerTargetUrl>
8: <MembershipConnectionString Condition=" '$(MembershipConnectionString)'=='' ">
9: Data Source=TESTDB1;Integrated Security=true;Initial Catalog=CMAppServices
10: </MembershipConnectionString>
11: </PropertyGroup>
[!NOTE] For guidance on how to customize the environment-specific project files for your own server environments, see Configure Deployment Properties for a Target Environment.
Next, the Publish.proj file imports these properties. Because each SetParameters.xml file is associated with a .deploy.cmd file, and we ultimately want the project file to invoke each .deploy.cmd file, the project file creates an MSBuild item for each .deploy.cmd file and defines the properties of interest as item metadata.
[!code-xmlMain]
1: <ItemGroup>
2: <PublishPackages Include="$(_ContactManagerDest)ContactManager.Mvc.deploy.cmd">
3: <ParametersXml>
4: $(_ContactManagerDest)ContactManager.Mvc.SetParameters.xml
5: </ParametersXml>
6: <IisWebAppName>
7: $(ContactManagerIisPath)
8: </IisWebAppName>
9: <MembershipDBConnectionName>
10: ApplicationServices-Web.config Connection String
11: </MembershipDBConnectionName>
12: <MembershipDBConnectionString>
13: $(MembershipConnectionString.Replace(";","%3b"))
14: </MembershipDBConnectionString>
15: <ServiceEndpointParamName>
16: ContactService Service Endpoint Address
17: </ServiceEndpointParamName>
18: <ServiceEndpointValue>
19: $(ContactManagerTargetUrl)
20: </ServiceEndpointValue>
21: </PublishPackages>
22: ...
23: </ItemGroup>
In this case:
- The ParametersXml metadata value indicates the location of the SetParameters.xml file.
- The IisWebAppName value is the IIS path to which you want to deploy the web application.
- The MembershipDBConnectionString value is the connection string for the membership database, and the MembershipDBConnectionName value is the name attribute of the corresponding parameter in the SetParameters.xml file.
- The ServiceEndpointValue value is the endpoint address for the WCF service on the destination server, and the ServiceEndpointParamName value is the name attribute of the corresponding parameter in the SetParameters.xml file.
Finally, in the Publish.proj file, the PublishWebPackages target uses the XmlPoke task to modify these values in the SetParameters.xml file.
[!code-xmlMain]
1: <Target Name="PublishWebPackages" Outputs="%(PublishPackages.Identity)">
2: <XmlPoke
3: XmlInputPath="%(PublishPackages.ParametersXml)"
4: Query="//parameters/setParameter[@name='%(PublishPackages.ConnectionName)']
5: /@value"
6: Value="%(PublishPackages.ConnectionString)"
7: Condition =" '%(PublishPackages.ConnectionName)'!=''"
8: />
9: <XmlPoke
10: XmlInputPath="%(PublishPackages.ParametersXml)"
11: Query="//parameters/setParameter
12: [@name='%(PublishPackages.MembershipDBConnectionName)']/@value"
13: Value='%(PublishPackages.MembershipDBConnectionString)'
14: Condition =" '%(PublishPackages.MembershipDBConnectionName)'!=''"
15: />
16: <XmlPoke
17: XmlInputPath="%(PublishPackages.ParametersXml)"
18: Query="//parameters/setParameter[@name='IIS Web Application Name']/@value"
19: Value="%(PublishPackages.IisWebAppName)"
20: Condition =" '%(PublishPackages.IisWebAppName)'!=''"
21: />
22: <XmlPoke
23: XmlInputPath="%(PublishPackages.ParametersXml)"
24: Query="//parameters/setParameter
25: [@name='%(PublishPackages.ServiceEndpointParamName)']/@value"
26: Value="%(PublishPackages.ServiceEndpointValue)"
27: Condition =" '%(PublishPackages.ServiceEndpointParamName)'!=''"
28: />
29: <!--Execute the .deploy.cmd file-->
30: ...
31: </Target>
You’ll notice that each XmlPoke task specifies four attribute values:
- The XmlInputPath attribute tells the task where to find the file you want to modify.
- The Query attribute is an XPath query that identifies the XML node you want to change.
- The Value attribute is the new value you want to insert into the selected XML node.
- The Condition attribute is the criteria on which the task should run or not run. In these cases, the condition ensures that you don’t try to insert a null or empty value into the SetParameters.xml file.
Conclusion
This topic described the role of the SetParameters.xml file and explained how it’s generated when you build a web application project. It explained how you can parameterize additional settings by adding a parameters.xml file to your project. It also described how you can modify the SetParameters.xml file as part of a larger, automated build process, by using the XmlPoke task in your project files.
The next topic, Deploying Web Packages, describes how you can deploy a web package either by running the .deploy.cmd file or by using MSDeploy.exe commands directly. In both cases, you can specify your SetParameters.xml file as a deployment parameter.
Further Reading
For information on how to create web packages, see Building and Packaging Web Application Projects. For guidance on how to actually deploy a web package, see Deploying Web Packages. For a step-by-step walkthrough on how to create a parameters.xml file, see How to: Use Parameters to Configure Deployment Settings When a Package is Installed.
For more general information on parameterization in Web Deploy, see Web Deploy Parameterization in Action (blog post).
 )
)
|
|