ASP.NET MVC 5 app with SMS and email Two-Factor Authentication
This tutorial shows you how to build an ASP.NET MVC 5 web app with Two-Factor Authentication. You should complete Create a secure ASP.NET MVC 5 web app with log in, email confirmation and password reset before proceeding. You can download the completed application here. The download contains debugging helpers that let you test email confirmation and SMS without setting up an email or SMS provider.
This tutorial was written by Rick Anderson ( Twitter: [@RickAndMSFT](https://twitter.com/RickAndMSFT) ).
- Create an ASP.NET MVC app
- Set up SMS for Two-factor authentication
- Enable Two-factor authentication
- Additional Resources
Start by installing and running Visual Studio Express 2013 for Web or Visual Studio 2013. Install Visual Studio 2013 Update 3 or higher.
[!NOTE] Warning: You should complete Create a secure ASP.NET MVC 5 web app with log in, email confirmation and password reset before proceeding. You must install Visual Studio 2013 Update 3 or higher to complete this tutorial.
- Create a new ASP.NET Web project and select the MVC template. Web Forms also supports ASP.NET Identity, so you could follow similar steps in a web forms app.

- Leave the default authentication as Individual User Accounts. If you’d like to host the app in Azure, leave the check box checked. Later in the tutorial we will deploy to Azure. You can open an Azure account for free.
- Set the project to use SSL.
## Set up SMS for Two-factor authentication
This tutorial provides instructions for using either Twilio or ASPSMS but you can use any other SMS provider.
- Creating a User Account with an SMS provider
Create a Twilio or an ASPSMS account. 2. Installing additional packages or adding service references
Twilio:
In the Package Manager Console, enter the following command:
Install-Package Twilio
ASPSMS:
The following service reference needs to be added:
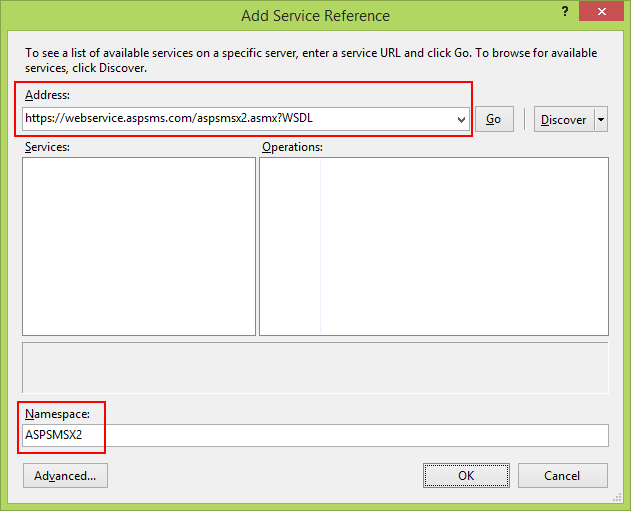 Address:
https://webservice.aspsms.com/aspsmsx2.asmx?WSDL
Namespace:
ASPSMSX2 3. Figuring out SMS Provider User credentials
Twilio:
From the Dashboard tab of your Twilio account, copy the Account SID and Auth token.
ASPSMS:
From your account settings, navigate to Userkey and copy it together with your self-defined Password.
We will later store these values in the web.config file within the keys "SMSAccountIdentification" and "SMSAccountPassword" . 4. Specifying SenderID / Originator
Twilio:
From the Numbers tab, copy your Twilio phone number.
ASPSMS:
Within the Unlock Originators Menu, unlock one or more Originators or choose an alphanumeric Originator (Not supported by all networks).
We will later store this value in the web.config file within the key "SMSAccountFrom" . 5. Transferring SMS provider credentials into app
Make the credentials and sender phone number available to the app. To keep things simple we will store these values in the web.config file. When we deploy to Azure, we can store the values securely in the app settings section on the web site configure tab.
[!code-xmlMain]
   1:  </connectionStrings>
   2:     <appSettings>
   3:        <add key="webpages:Version" value="3.0.0.0" />
   4:        <!-- Markup removed for clarity. -->
   5:        <!-- SendGrid-->
   6:        <add key="mailAccount" value="account" />
   7:        <add key="mailPassword" value="password" />
   8:        <add key="SMSAccountIdentification" value="My Identification" />
   9:        <add key="SMSAccountPassword" value="My Password" />
  10:        <add key="SMSAccountFrom" value="+12065551234" />
  11:     </appSettings>
  12:    <system.web>


> [!WARNING]
> Security - Never store sensitive data in your source code. The account and credentials are added to the code above to keep the sample simple. See [Best practices for deploying passwords and other sensitive data to ASP.NET and Azure](../../../identity/overview/features-api/best-practices-for-deploying-passwords-and-other-sensitive-data-to-aspnet-and-azure.md).- Implementation of data transfer to SMS provider
Configure the SmsService class in the App_Start.cs file.
Depending on the used SMS provider activate either the Twilio or the ASPSMS section:
[!code-csharpMain]
   1:  public class SmsService : IIdentityMessageService
   2:  {
   3:      public Task SendAsync(IdentityMessage message)
   4:      {
   5:          // Twilio Begin
   6:          // var Twilio = new TwilioRestClient(
   7:          //   System.Configuration.ConfigurationManager.AppSettings["SMSAccountIdentification"],
   8:          //   System.Configuration.ConfigurationManager.AppSettings["SMSAccountPassword"]);
   9:          // var result = Twilio.SendMessage(
  10:          //   System.Configuration.ConfigurationManager.AppSettings["SMSAccountFrom"],
  11:          //   message.Destination, message.Body
  12:          // );
  13:          // Status is one of Queued, Sending, Sent, Failed or null if the number is not valid
  14:          // Trace.TraceInformation(result.Status);
  15:          // Twilio doesn't currently have an async API, so return success.
  16:          // return Task.FromResult(0);
  17:          // Twilio End
  18:
  19:          // ASPSMS Begin
  20:          // var soapSms = new MvcPWx.ASPSMSX2.ASPSMSX2SoapClient("ASPSMSX2Soap");
  21:          // soapSms.SendSimpleTextSMS(
  22:          //   System.Configuration.ConfigurationManager.AppSettings["SMSAccountIdentification"],
  23:          //   System.Configuration.ConfigurationManager.AppSettings["SMSAccountPassword"],
  24:          //   message.Destination,
  25:          //   System.Configuration.ConfigurationManager.AppSettings["SMSAccountFrom"],
  26:          //   message.Body);
  27:          // soapSms.Close();
  28:          // return Task.FromResult(0);
  29:          // ASPSMS End
  30:      }
  31:  }
Update the Views.cshtml Razor view: (note: don’t just remove the comments in the exiting code, use the code below.)
[!code-cshtmlMain]1: @model MvcPWy.Models.IndexViewModel
2: @{
3: ViewBag.Title = "Manage";
4: }5: <h2>@ViewBag.Title.</h2>
6: <p class="text-success">@ViewBag.StatusMessage</p>
7: <div>8: <h4>Change your account settings</h4>9: <hr />10: <dl class="dl-horizontal">
11: <dt>Password:</dt>12: <dd>13: [14: @if (Model.HasPassword)
15: {16: @Html.ActionLink("Change your password", "ChangePassword")
17: }18: else
19: {20: @Html.ActionLink("Create", "SetPassword")
21: }22: ]23: </dd>24: <dt>External Logins:</dt>25: <dd>26: @Model.Logins.Count [
27: @Html.ActionLink("Manage", "ManageLogins") ]
28: </dd>29: <dt>Phone Number:</dt>30: <dd>31: @(Model.PhoneNumber ?? "None") [
32: @if (Model.PhoneNumber != null)
33: {34: @Html.ActionLink("Change", "AddPhoneNumber")
35: @: |
36: @Html.ActionLink("Remove", "RemovePhoneNumber")
37: }38: else
39: {40: @Html.ActionLink("Add", "AddPhoneNumber")
41: }42: ]43: </dd>44: <dt>Two-Factor Authentication:</dt>45: <dd>46: @if (Model.TwoFactor)
47: {48: using (Html.BeginForm("DisableTwoFactorAuthentication", "Manage", FormMethod.Post, new { @class = "form-horizontal", role = "form" }))
49: {50: @Html.AntiForgeryToken()
51: <text>Enabled52: <input type="submit" value="Disable" class="btn btn-link" />
53: </text>54: }55: }56: else
57: {58: using (Html.BeginForm("EnableTwoFactorAuthentication", "Manage", FormMethod.Post, new { @class = "form-horizontal", role = "form" }))
59: {60: @Html.AntiForgeryToken()
61: <text>Disabled62: <input type="submit" value="Enable" class="btn btn-link" />
63: </text>64: }65: }66: </dd>67: </dl>68: </div>Verify the
[!code-csharpMain]EnableTwoFactorAuthenticationandDisableTwoFactorAuthenticationaction methods in theManageControllerhave the[ValidateAntiForgeryToken] attribute:1: //
2: // POST: /Manage/EnableTwoFactorAuthentication
3: [HttpPost,ValidateAntiForgeryToken]4: public async Task<ActionResult> EnableTwoFactorAuthentication()
5: {6: await UserManager.SetTwoFactorEnabledAsync(User.Identity.GetUserId(), true);
7: var user = await UserManager.FindByIdAsync(User.Identity.GetUserId());8: if (user != null)
9: {10: await SignInAsync(user, isPersistent: false);
11: }12: return RedirectToAction("Index", "Manage");
13: }14: //
15: // POST: /Manage/DisableTwoFactorAuthentication
16: [HttpPost, ValidateAntiForgeryToken]17: public async Task<ActionResult> DisableTwoFactorAuthentication()
18: {19: await UserManager.SetTwoFactorEnabledAsync(User.Identity.GetUserId(), false);
20: var user = await UserManager.FindByIdAsync(User.Identity.GetUserId());21: if (user != null)
22: {23: await SignInAsync(user, isPersistent: false);
24: }25: return RedirectToAction("Index", "Manage");
26: }- Run the app and log in with the account you previously registered.
- Click on your User ID, which activates the
Indexaction method inManagecontroller.

- Click Add.

The
AddPhoneNumberaction method displays a dialog box to enter a phone number that can receive SMS messages.[!code-csharpMain]
1: // GET: /Account/AddPhoneNumber
2: public ActionResult AddPhoneNumber()
3: {4: return View();
5: }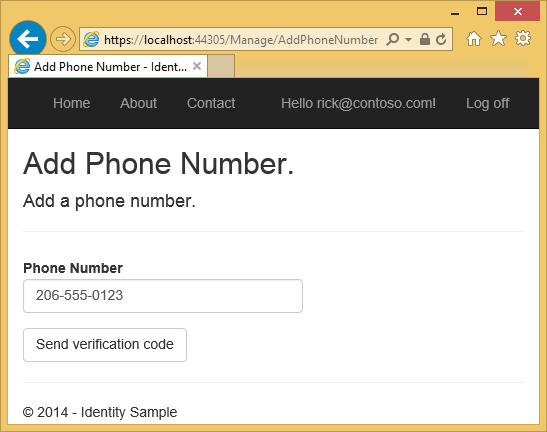
- In a few seconds you will get a text message with the verification code. Enter it and press Submit.
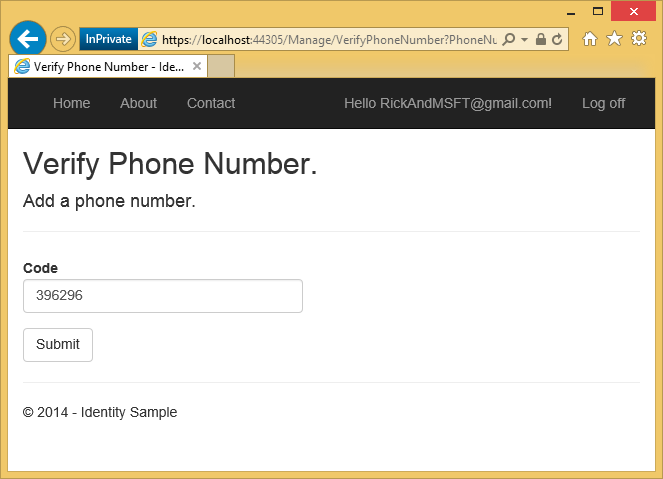
The Manage view shows your phone number was added.
## Enable two-factor authentication
In the template generated app, you need to use the UI to enable two-factor authentication (2FA). To enable 2FA, click on your user ID (email alias) in the navigation bar.

Click on enable 2FA.

Logout, then log back in. If you’ve enabled email (see my previous tutorial), you can select the SMS or email for 2FA.

The Verify Code page is displayed where you can enter the code (from SMS or email).
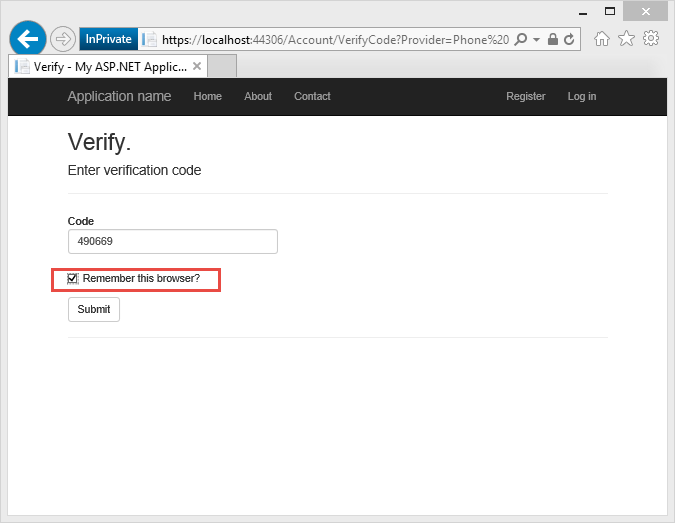
Clicking on the Remember this browser check box will exempt you from needing to use 2FA to log in when using the browser and device where you checked the box. As long as malicious users can’t gain access to your device, enabling 2FA and clicking on the Remember this browser will provide you with convenient one step password access, while still retaining strong 2FA protection for all access from non-trusted devices. You can do this on any private device you regularly use.
This tutorial provides a quick introduction to enabling 2FA on a new ASP.NET MVC app. My tutorial Two-factor authentication using SMS and email with ASP.NET Identity goes into detail on the code behind the sample.
- Two-factor authentication using SMS and email with ASP.NET Identity Goes into detail on Two-factor authentication
- Links to ASP.NET Identity Recommended Resources
- Account Confirmation and Password Recovery with ASP.NET Identity Goes into more detail on password recovery and account confirmation.
- MVC 5 App with Facebook, Twitter, LinkedIn and Google OAuth2 Sign-on This tutorial shows you how to write an ASP.NET MVC 5 app with Facebook and Google OAuth 2 authorization. It also shows how to add additional data to the Identity database.
- Deploy a Secure ASP.NET MVC app with Membership, OAuth, and SQL Database to Azure Web. This tutorial adds Azure deployment, how to secure your app with roles, how to use the membership API to add users and roles, and additional security features.
- Creating a Google app for OAuth 2 and connecting the app to the project
- Creating the app in Facebook and connecting the app to the project
- Setting up SSL in the Project
 )
)
|
|