ASP.NET MVC provides Action Filters for executing filtering logic either before or after an action method is called. Action Filters are custom attributes that provide declarative means to add pre-action and post-action behavior to the controller’s action methods.
In this Hands-on Lab you will create a custom action filter attribute into MvcMusicStore solution to catch controller’s requests and log the activity of a site into a database table. You will be able to add your logging filter by injection to any controller or action. Finally, you will see the log view that shows the list of visitors.
[!NOTE] This Hands-on Lab assumes you have basic knowledge of ASP.NET MVC. If you have not used ASP.NET MVC before, we recommend you to go over ASP.NET MVC 4 Fundamentals Hands-on Lab.
### Objectives
In this Hands-On Lab, you will learn how to:
Create a custom action filter attribute to extend filtering capabilities
Apply a custom filter attribute by injection to a specific level
Register a custom action filters globally
### Prerequisites
You must have the following items to complete this lab:
For convenience, much of the code you will be managing along this lab is available as Visual Studio code snippets. To install the code snippets run ..vsi file.
If you are not familiar with the Visual Studio Code Snippets, and want to learn how to use them, you can refer to the appendix from this document “Appendix C: Using Code Snippets”.
## Exercises
This Hands-On Lab is comprised by the following exercises:
[!NOTE] Each exercise is accompanied by an End folder containing the resulting solution you should obtain after completing the exercises. You can use this solution as a guide if you need additional help working through the exercises.
### Exercise 1: Logging Actions
In this exercise, you will learn how to create a custom action log filter by using ASP.NET MVC 4 Filter Providers. For that purpose you will apply a logging filter to the MusicStore site that will record all the activities in the selected controllers.
The filter will extend ActionFilterAttributeClass and override OnActionExecuting method to catch each request and then perform the logging actions. The context information about HTTP requests, executing methods, results and parameters will be provided by ASP.NET MVC ActionExecutingContext class .
[!NOTE] ASP.NET MVC 4 also has default filters providers you can use without creating a custom filter. ASP.NET MVC 4 provides the following types of filters:
Authorization filter, which makes security decisions about whether to execute an action method, such as performing authentication or validating properties of the request.
Action filter, which wraps the action method execution. This filter can perform additional processing, such as providing extra data to the action method, inspecting the return value, or canceling execution of the action method
Result filter, which wraps execution of the ActionResult object. This filter can perform additional processing of the result, such as modifying the HTTP response.
Exception filter, which executes if there is an unhandled exception thrown somewhere in action method, starting with the authorization filters and ending with the execution of the result. Exception filters can be used for tasks such as logging or displaying an error page.
#### About MVC Music Store Application logging feature
This Music Store solution has a new data model table for site logging, ActionLog, with the following fields: Name of the controller that received a request, Called action, Client IP and Time stamp.
Data model. ActionLog table.
Data model - ActionLog table
The solution provides an ASP.NET MVC View for the Action log that can be found at MvcMusicStores/Views/ActionLog:
Action Log view
Action Log view
With this given structure, all the work will be focused on interrupting controller’s request and performing the logging by using custom filtering.
#### Task 1 - Creating a Custom Filter to Catch a Controller’s Request
In this task you will create a custom filter attribute class that will contain the logging logic. For that purpose you will extend ASP.NET MVC ActionFilterAttribute Class and implement the interface IActionFilter.
[!NOTE] The ActionFilterAttribute is the base class for all the attribute filters. It provides the following methods to execute a specific logic after and before controller action’s execution:
OnActionExecuting(ActionExecutingContext filterContext): Just before the action method is called.
OnActionExecuted(ActionExecutedContext filterContext): After the action method is called and before the result is executed (before view render).
OnResultExecuting(ResultExecutingContext filterContext): Just before the result is executed (before view render).
OnResultExecuted(ResultExecutedContext filterContext): After the result is executed (after the view is rendered).
By overriding any of these methods into a derived class, you can execute your own filtering code.
Open the Begin solution located at **01-LoggingActions* folder.
You will need to download some missing NuGet packages before you continue. To do this, click the Project menu and select Manage NuGet Packages.
In the Manage NuGet Packages dialog, click Restore in order to download missing packages.
Finally, build the solution by clicking Build | Build Solution.
[!NOTE] One of the advantages of using NuGet is that you don’t have to ship all the libraries in your project, reducing the project size. With NuGet Power Tools, by specifying the package versions in the Packages.config file, you will be able to download all the required libraries the first time you run the project. This is why you will have to run these steps after you open an existing solution from this lab.
Make CustomActionFilter class override the method OnActionExecuting and add the necessary logic to log the filter’s execution. To do this, add the following highlighted code within CustomActionFilter class.
[!NOTE] OnActionExecuting method is using Entity Framework to add a new ActionLog register. It creates and fills a new entity instance with the context information from filterContext.
You can read more about ControllerContext class at msdn.
#### Task 2 - Injecting a Code Interceptor into the Store Controller Class
In this task you will add the custom filter by injecting it to all controller classes and controller actions that will be logged. For the purpose of this exercise, the Store Controller class will have a log.
The method OnActionExecuting from ActionLogFilterAttribute custom filter runs when an injected element is called.
It is also possible to intercept a specific controller method.
Open the StoreController at MvcMusicStore* and add a reference to the Filters** namespace:
[!NOTE] When a filter is injected into a controller class, all its actions are also injected. If you would like to apply the filter only for a set of actions, you would have to inject [CustomActionFilter] to each one of them:
In this task, you will test that the logging filter is working. You will start the application and visit the store, and then you will check logged activities.
Press F5 to run the application.
Browse to /ActionLog to see log view initial state:
Log tracker status before page activity
Log tracker status before page activity
[!NOTE] By default, it will always show one item that is generated when retrieving the existing genres for the menu.
For simplicity purposes we’re cleaning up the ActionLog table each time the application runs so it will only show the logs of each particular task’s verification.
You might need to remove the following code from the Session_Start method (in the Global.asax class), in order to save an historical log for all the actions executed within the Store Controller.
2: MusicStoreEntities storeDB = new MusicStoreEntities();
3: foreach (var log in
4:
5: storeDB.ActionLogs.ToList())
6: {
7: storeDB.ActionLogs.Remove(log);
8: }
9:
10: storeDB.SaveChanges();
Click one of the Genres from the menu and perform some actions there, like browsing an available album.
Browse to /ActionLog and if the log is empty press F5 to refresh the page. Check that your visits were tracked:
Action log with activity logged
Action log with activity logged
### Exercise 2: Managing Multiple Action Filters
In this exercise you will add a second Custom Action Filter to the StoreController class and define the specific order in which both filters will be executed. Then you will update the code to register the filter Globally.
There are different options to take into account when defining the Filters’ execution order. For example, the Order property and the Filters’ scope:
You can define a Scope for each of the Filters, for example, you could scope all the Action Filters to run within the Controller Scope, and all Authorization Filters to run in Global scope. The scopes have a defined execution order.
Additionally, each action filter has an Order property which is used to determine the execution order in the scope of the filter.
In this task, you will create a new Custom Action Filter to inject into the StoreController class, learning how to manage the execution order of the filters.
Open the Begin solution located at 02-ManagingMultipleActionFilters* folder. Otherwise, you might continue using the End** solution obtained by completing the previous exercise.
If you opened the provided Begin solution, you will need to download some missing NuGet packages before continue. To do this, click the Project menu and select Manage NuGet Packages.
In the Manage NuGet Packages dialog, click Restore in order to download missing packages.
Finally, build the solution by clicking Build | Build Solution.
[!NOTE] One of the advantages of using NuGet is that you don’t have to ship all the libraries in your project, reducing the project size. With NuGet Power Tools, by specifying the package versions in the Packages.config file, you will be able to download all the required libraries the first time you run the project. This is why you will have to run these steps after you open an existing solution from this lab.
[!NOTE] This Custom Action Filter is almost the same than the one you created in the previous exercise. The main difference is that it has the “Logged By” attribute updated with this new class’ name to identify wich filter registered the log.
#### Task 2: Injecting a new Code Interceptor into the StoreController Class
In this task, you will add a new custom filter into the StoreController Class and run the solution to verify how both filters work together.
Open the StoreController class located at MvcMusicStore* and inject the new custom filter MyNewCustomActionFilter** into StoreController class like is shown in the following code.
Now, verify how the filters are executed depending on its Order property’s value. You will find that the filter with the smallest Order value (CustomActionFilter) is the first one that is executed. Press F5 and wait until the application starts.
Browse to /ActionLog to see log view initial state.
Log tracker status before page activityLog tracker status before page activity
Click one of the Genres from the menu and perform some actions there, like browsing an available album.
Check that this time, your visits were tracked ordered by the filters’ Order value: CustomActionFilter logs’ first.
Action log with activity loggedAction log with activity logged
Now, you will update the Filters’ order value and verify how the logging order changes. In the StoreController class, update the Filters’ Order value like shown below.
Click one of the Genres from the menu and perform some actions there, like browsing an available album.
Check that this time, the logs created by MyNewCustomActionFilter filter appears first.
Action log with activity logged
Action log with activity logged
#### Task 4: Registering Filters Globally
In this task, you will update the solution to register the new filter (MyNewCustomActionFilter) as a global filter. By doing this, it will be triggered by all the actions perfomed in the application and not only in the StoreController ones as in the previous task.
In StoreController class, remove [MyNewCustomActionFilter] attribute and the order property from [CustomActionFilter]. It should look like the following:
Open Global.asax file and locate the Application_Start method. Notice that each thime the application starts it is registering the global filters by calling RegisterGlobalFilters method within FilterConfig class.
Registering Global Filters in Global.asaxRegistering Global Filters in Global.asax
Open FilterConfig.cs file within App_Start folder.
Add a reference to using System.Web.Mvc; using MvcMusicStore.Filters; namespace.
By completing this Hands-On Lab you have learned how to extend an action filter to execute custom actions. You have also learned how to inject any filter to your page controllers. The following concepts were used:
How to create Custom Action filters with the ASP.NET MVC ActionFilterAttribute class
How to inject filters into ASP.NET MVC controllers
How to manage filter ordering using the Order property
How to register filters globally
## Appendix A: Installing Visual Studio Express 2012 for Web
You can install Microsoft Visual Studio Express 2012 for Web or another “Express” version using the Microsoft Web Platform Installer. The following instructions guide you through the steps required to install Visual studio Express 2012 for Web using Microsoft Web Platform Installer.
Click on Install Now. If you do not have Web Platform Installer you will be redirected to download and install it first.
Once Web Platform Installer is open, click Install to start the setup.
Install Visual Studio ExpressInstall Visual Studio Express
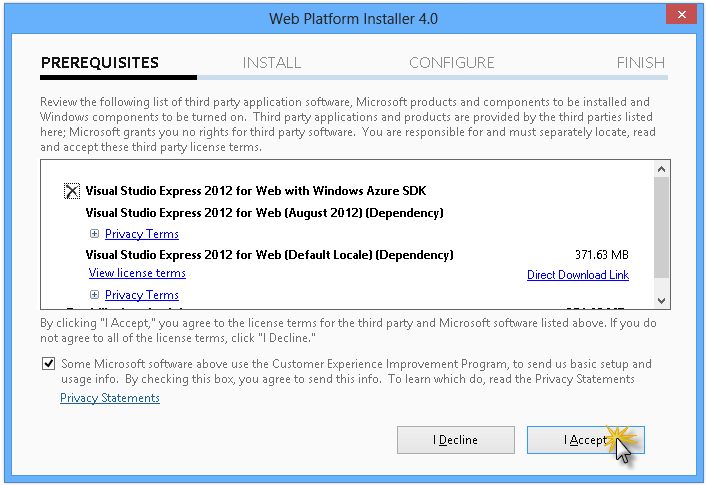
Read all the products’ licenses and terms and click I Accept to continue.
Accepting the license termsAccepting the license terms
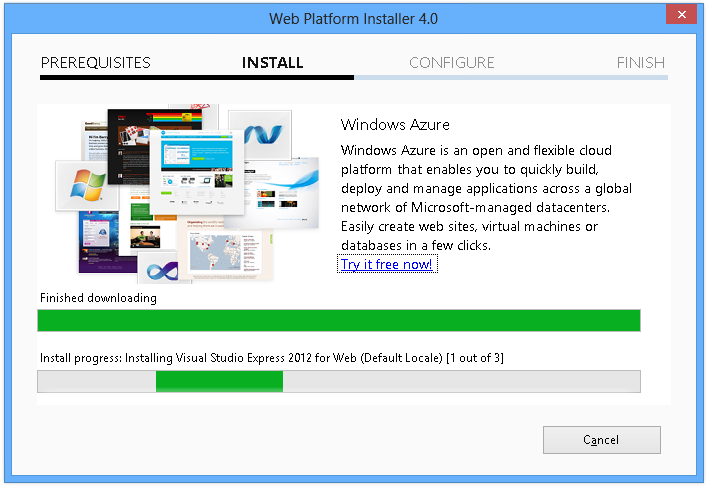
Wait until the downloading and installation process completes.
Installation progressInstallation progress
When the installation completes, click Finish.
Installation completedInstallation completed
Click Exit to close Web Platform Installer.
To open Visual Studio Express for Web, go to the Start screen and start writing “VS Express”, then click on the VS Express for Web tile.
VS Express for Web tile
VS Express for Web tile
## Appendix B: Publishing an ASP.NET MVC 4 Application using Web Deploy
This appendix will show you how to create a new web site from the Windows Azure Management Portal and publish the application you obtained by following the lab, taking advantage of the Web Deploy publishing feature provided by Windows Azure.
#### Task 1 - Creating a New Web Site from the Windows Azure Portal
[!NOTE] With Windows Azure you can host 10 ASP.NET Web Sites for free and then scale as your traffic grows. You can sign up here.
Log on to Windows Azure portalLog on to Windows Azure Management Portal
Click New on the command bar.
Creating a new Web SiteCreating a new Web Site
Click Compute | Web Site. Then select Quick Create option. Provide an available URL for the new web site and click Create Web Site.
[!NOTE] A Windows Azure Web Site is the host for a web application running in the cloud that you can control and manage. The Quick Create option allows you to deploy a completed web application to the Windows Azure Web Site from outside the portal. It does not include steps for setting up a database.
Creating a new Web Site using Quick CreateCreating a new Web Site using Quick Create
Wait until the new Web Site is created.
Once the Web Site is created click the link under the URL column. Check that the new Web Site is working.
Browsing to the new web site
Browsing to the new web site
Web site runningWeb site running
Go back to the portal and click the name of the web site under the Name column to display the management pages.
Opening the web site management pagesOpening the Web Site management pages
In the Dashboard page, under the quick glance section, click the Download publish profile link.
[!NOTE] The publish profile contains all of the information required to publish a web application to a Windows Azure website for each enabled publication method. The publish profile contains the URLs, user credentials and database strings required to connect to and authenticate against each of the endpoints for which a publication method is enabled. Microsoft WebMatrix 2, Microsoft Visual Studio Express for Web and Microsoft Visual Studio 2012 support reading publish profiles to automate configuration of these programs for publishing web applications to Windows Azure websites.
Downloading the web site publish profileDownloading the Web Site publish profile
Download the publish profile file to a known location. Further in this exercise you will see how to use this file to publish a web application to a Windows Azure Web Sites from Visual Studio.
Saving the publish profile file
Saving the publish profile file
#### Task 2 - Configuring the Database Server
If your application makes use of SQL Server databases you will need to create a SQL Database server. If you want to deploy a simple application that does not use SQL Server you might skip this task.
You will need a SQL Database server for storing the application database. You can view the SQL Database servers from your subscription in the Windows Azure Management portal at Sql Databases | Servers | Server’s Dashboard. If you do not have a server created, you can create one using the Add button on the command bar. Take note of the server name and URL, administrator login name and password, as you will use them in the next tasks. Do not create the database yet, as it will be created in a later stage.
SQL Database Server DashboardSQL Database Server Dashboard
In the next task you will test the database connection from Visual Studio, for that reason you need to include your local IP address in the server’s list of Allowed IP Addresses. To do that, click Configure, select the IP address from Current Client IP Address and paste it on the Start IP Address and End IP Address text boxes and click the button.
Adding Client IP AddressAdding Client IP Address
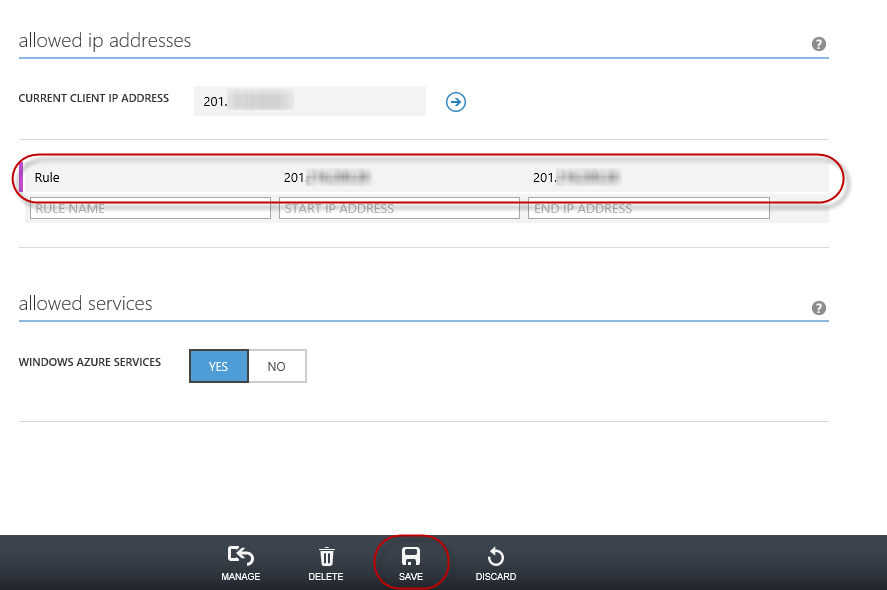
Once the Client IP Address is added to the allowed IP addresses list, click on Save to confirm the changes.
Confirm Changes
Confirm Changes
#### Task 3 - Publishing an ASP.NET MVC 4 Application using Web Deploy
Go back to the ASP.NET MVC 4 solution. In the Solution Explorer, right-click the web site project and select Publish.
Publishing the ApplicationPublishing the web site
Import the publish profile you saved in the first task.
Importing the publish profileImporting publish profile
Click Validate Connection. Once Validation is complete click Next.
[!NOTE] Validation is complete once you see a green checkmark appear next to the Validate Connection button.
Validating connectionValidating connection
In the Settings page, under the Databases section, click the button next to your database connection’s textbox (i.e. DefaultConnection).
Web deploy configurationWeb deploy configuration
Configure the database connection as follows:
In the Server name type your SQL Database server URL using the tcp: prefix.
In User name type your server administrator login name.
In Password type your server administrator login password.
Then click OK. When prompted to create the database click Yes.
Creating the databaseCreating the database
The connection string you will use to connect to SQL Database in Windows Azure is shown within Default Connection textbox. Then click Next.
Connection string pointing to SQL DatabaseConnection string pointing to SQL Database
In the Preview page, click Publish.
Publishing the web applicationPublishing the web application
Once the publishing process finishes, your default browser will open the published web site.
## Appendix C: Using Code Snippets
With code snippets, you have all the code you need at your fingertips. The lab document will tell you exactly when you can use them, as shown in the following figure.
Using Visual Studio code snippets to insert code into your project
Using Visual Studio code snippets to insert code into your project
To add a code snippet using the keyboard (C# only)
Place the cursor where you would like to insert the code.
Start typing the snippet name (without spaces or hyphens).
Watch as IntelliSense displays matching snippets’ names.
Select the correct snippet (or keep typing until the entire snippet’s name is selected).
Press the Tab key twice to insert the snippet at the cursor location.
Start typing the snippet name
Start typing the snippet name
Press Tab to select the highlighted snippet
Press Tab to select the highlighted snippet
Press Tab again and the snippet will expand
Press Tab again and the snippet will expand
To add a code snippet using the mouse (C#, Visual Basic and XML) 1. Right-click where you want to insert the code snippet.
Select Insert Snippet followed by My Code Snippets.
Pick the relevant snippet from the list, by clicking on it.
Right-click where you want to insert the code snippet and select Insert Snippet
Right-click where you want to insert the code snippet and select Insert Snippet
Pick the relevant snippet from the list, by clicking on it
Pick the relevant snippet from the list, by clicking on it


 button.
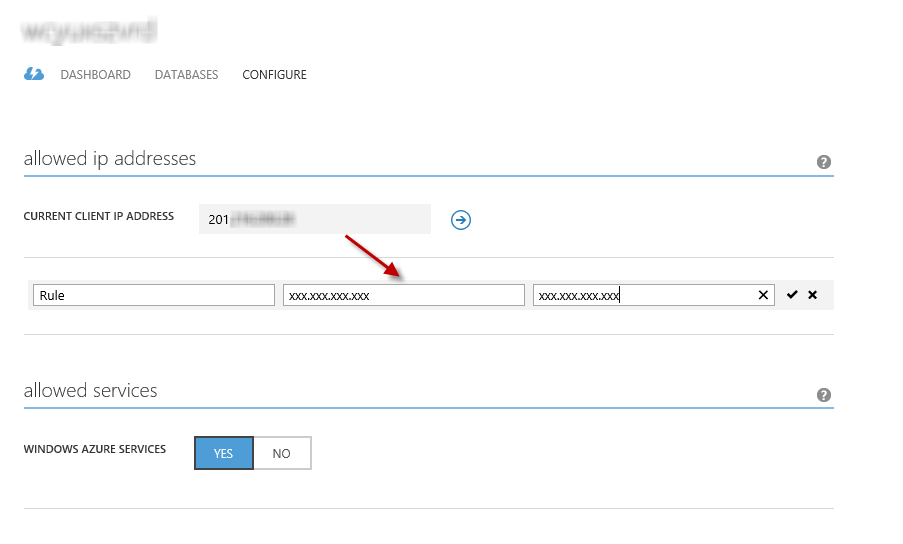


 )
)