The Contoso University sample web application demonstrates how to create ASP.NET MVC 5 applications using the Entity Framework 6 and Visual Studio 2013. This tutorial uses the Code First workflow. For information about how to choose between Code First, Database First, and Model First, see Entity Framework Development Workflows.
The sample application is a web site for a fictional Contoso University. It includes functionality such as student admission, course creation, and instructor assignments. This tutorial series explains how to build the Contoso University sample application. You can download the completed application.
If you run into a problem you can’t resolve, you can generally find the solution to the problem by comparing your code to the completed project that you can download. For some common errors and how to solve them, see Common errors, and solutions or workarounds for them.
The Contoso University Web Application
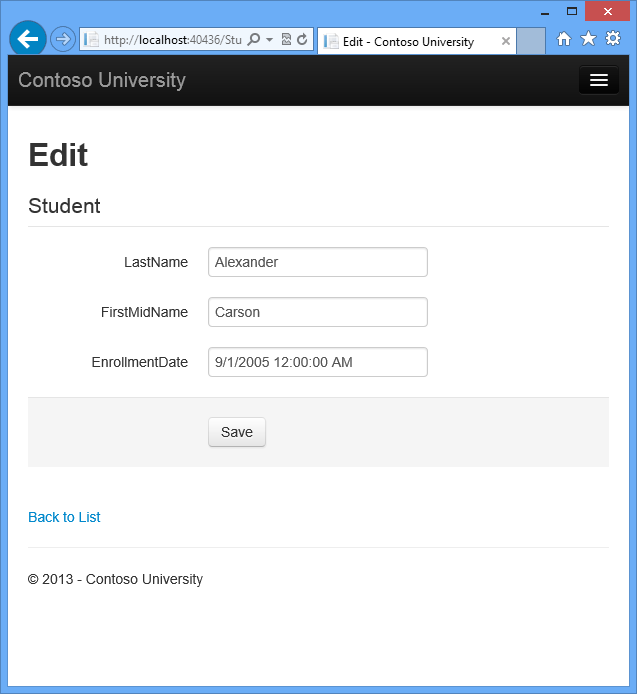
The application you’ll be building in these tutorials is a simple university web site.
Users can view and update student, course, and instructor information. Here are a few of the screens you’ll create.
Students_Index_pageEdit Student
The UI style of this site has been kept close to what’s generated by the built-in templates, so that the tutorial can focus mainly on how to use the Entity Framework.
Prerequisites
See Software Versions at the top of the page. Entity Framework 6 is not a prerequisite because you install the EF NuGet package as part of the tutorial.
Create an MVC Web Application
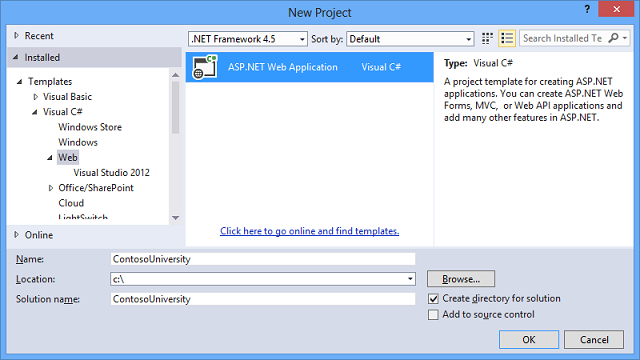
Open Visual Studio and create a new C# Web project named “ContosoUniversity”.
New_project_dialog_box
In the New ASP.NET Project dialog box select the MVC template.
If the Host in the cloud check box in the Microsoft Azure section is selected, clear it.
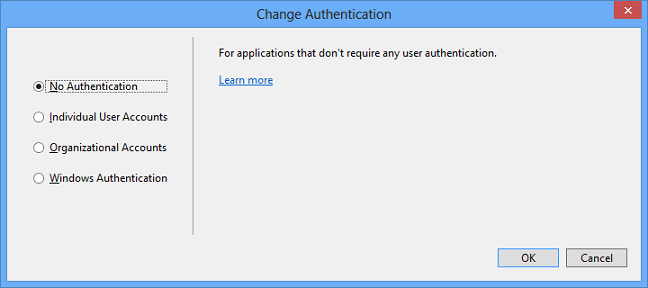
Click Change Authentication.
New_project_dialog_box
In the Change Authentication dialog box, select No Authentication, and then click OK. For this tutorial you won’t be requiring users to log on or restricting access based on who’s logged on.
New_project_dialog_box
Back in the New ASP.NET Project dialog box, click OK to create the project.
Set Up the Site Style
A few simple changes will set up the site menu, layout, and home page.
Open *Views\_Layout.cshtml*, and make the following changes:
Change each occurrence of “My ASP.NET Application” and “Application name” to “Contoso University”.
Add menu entries for Students, Courses, Instructors, and Departments, and delete the Contact entry.
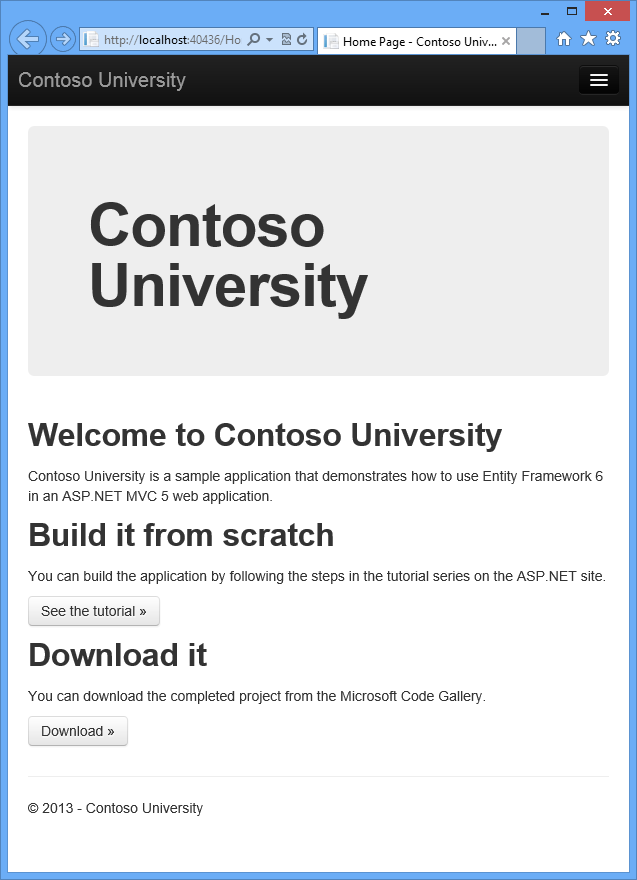
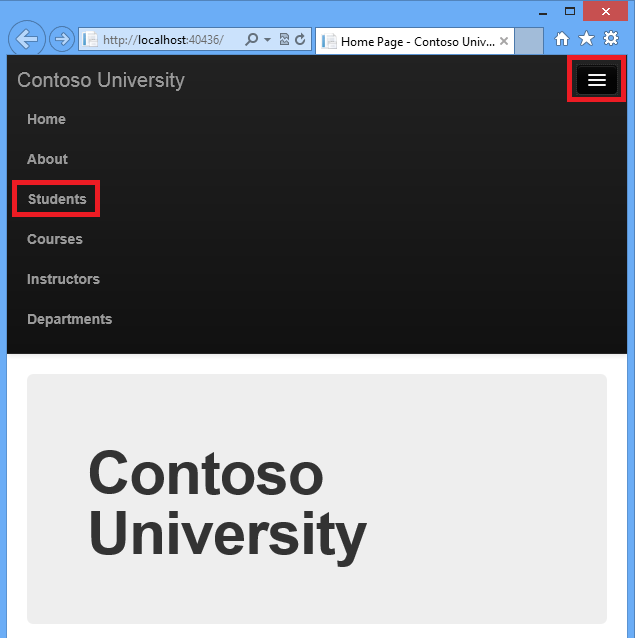
Press CTRL+F5 to run the site. You see the home page with the main menu.
Contoso_University_home_page
Install Entity Framework 6
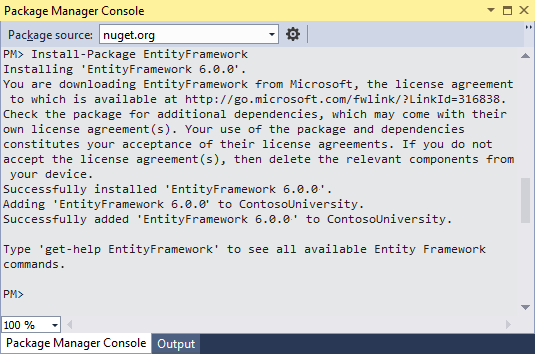
From the Tools menu click NuGet Package Manager and then click Package Manager Console.
In the Package Manager Console window enter the following command:
Install-Package EntityFramework
EF installed
The image shows 6.0.0 being installed, but NuGet will install the latest version of Entity Framework (excluding pre-release versions), which as of the most recent update to the tutorial is 6.1.1.
This step is one of a few steps that this tutorial has you do manually, but which could have been done automatically by the ASP.NET MVC scaffolding feature. You’re doing them manually so that you can see the steps required to use the Entity Framework. You’ll use scaffolding later to create the MVC controller and views. An alternative is to let scaffolding automatically install the EF NuGet package, create the database context class, and create the connection string. When you’re ready to do it that way, all you have to do is skip those steps and scaffold your MVC controller after you create your entity classes.
Create the Data Model
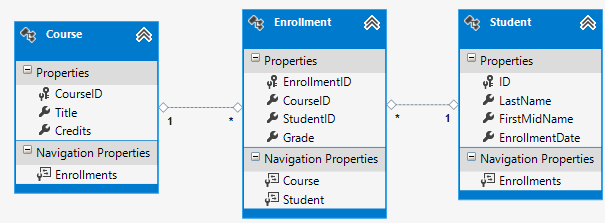
Next you’ll create entity classes for the Contoso University application. You’ll start with the following three entities:
Class_diagram
There’s a one-to-many relationship between Student and Enrollment entities, and there’s a one-to-many relationship between Course and Enrollment entities. In other words, a student can be enrolled in any number of courses, and a course can have any number of students enrolled in it.
In the following sections you’ll create a class for each one of these entities.
[!NOTE] If you try to compile the project before you finish creating all of these entity classes, you’ll get compiler errors.
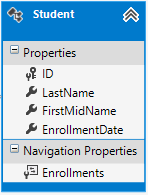
The Student Entity
Student_entity
In the Models folder, create a class file named Student.cs and replace the template code with the following code:
The ID property will become the primary key column of the database table that corresponds to this class. By default, the Entity Framework interprets a property that’s named ID or classnameID as the primary key.
The Enrollments property is a navigation property. Navigation properties hold other entities that are related to this entity. In this case, the Enrollments property of a Student entity will hold all of the Enrollment entities that are related to that Student entity. In other words, if a given Student row in the database has two related Enrollment rows (rows that contain that student’s primary key value in their StudentID foreign key column), that Student entity’s Enrollments navigation property will contain those two Enrollment entities.
Navigation properties are typically defined as virtual so that they can take advantage of certain Entity Framework functionality such as lazy loading. (Lazy loading will be explained later, in the Reading Related Data tutorial later in this series.)
If a navigation property can hold multiple entities (as in many-to-many or one-to-many relationships), its type must be a list in which entries can be added, deleted, and updated, such as ICollection.
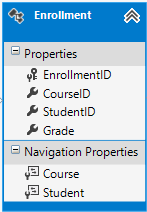
The Enrollment Entity
Enrollment_entity
In the Models folder, create Enrollment.cs and replace the existing code with the following code:
The EnrollmentID property will be the primary key; this entity uses the classnameID pattern instead of ID by itself as you saw in the Student entity. Ordinarily you would choose one pattern and use it throughout your data model. Here, the variation illustrates that you can use either pattern. In a later tutorial, you’ll see how using ID without classname makes it easier to implement inheritance in the data model.
The Grade property is an enum. The question mark after the Grade type declaration indicates that the Grade property is nullable. A grade that’s null is different from a zero grade — null means a grade isn’t known or hasn’t been assigned yet.
The StudentID property is a foreign key, and the corresponding navigation property is Student. An Enrollment entity is associated with one Student entity, so the property can only hold a single Student entity (unlike the Student.Enrollments navigation property you saw earlier, which can hold multiple Enrollment entities).
The CourseID property is a foreign key, and the corresponding navigation property is Course. An Enrollment entity is associated with one Course entity.
Entity Framework interprets a property as a foreign key property if it’s named <navigation property name><primary key property name> (for example, StudentID for the Student navigation property since the Student entity’s primary key is ID). Foreign key properties can also be named the same simply <primary key property name> (for example, CourseID since the Course entity’s primary key is CourseID).
The Course Entity
Course_entity
In the Models folder, create Course.cs, replacing the template code with the following code:
The Enrollments property is a navigation property. A Course entity can be related to any number of Enrollment entities.
We’ll say more about the DatabaseGenerated attribute in a later tutorial in this series. Basically, this attribute lets you enter the primary key for the course rather than having the database generate it.
Create the Database Context
The main class that coordinates Entity Framework functionality for a given data model is the database context class. You create this class by deriving from the System.Data.Entity.DbContext class. In your code you specify which entities are included in the data model. You can also customize certain Entity Framework behavior. In this project, the class is named SchoolContext.
To create a folder in the ContosoUniversity project, right-click the project in Solution Explorer and click Add, and then click New Folder. Name the new folder DAL (for Data Access Layer). In that folder create a new class file named SchoolContext.cs, and replace the template code with the following code:
This code creates a DbSet property for each entity set. In Entity Framework terminology, an entity set typically corresponds to a database table, and an entity corresponds to a row in the table.
[!NOTE]
You could have omitted the DbSet<Enrollment> and DbSet<Course> statements and it would work the same. The Entity Framework would include them implicitly because the Student entity references the Enrollment entity and the Enrollment entity references the Course entity.
Specifying the connection string
The name of the connection string (which you’ll add to the Web.config file later) is passed in to the constructor.
You could also pass in the connection string itself instead of the name of one that is stored in the Web.config file. For more information about options for specifying the database to use, see Entity Framework - Connections and Models.
If you don’t specify a connection string or the name of one explicitly, Entity Framework assumes that the connection string name is the same as the class name. The default connection string name in this example would then be SchoolContext, the same as what you’re specifying explicitly.
Specifying singular table names
The modelBuilder.Conventions.Remove statement in the OnModelCreating method prevents table names from being pluralized. If you didn’t do this, the generated tables in the database would be named Students, Courses, and Enrollments. Instead, the table names will be Student, Course, and Enrollment. Developers disagree about whether table names should be pluralized or not. This tutorial uses the singular form, but the important point is that you can select whichever form you prefer by including or omitting this line of code.
Set up EF to initialize the database with test data
The Entity Framework can automatically create (or drop and re-create) a database for you when the application runs. You can specify that this should be done every time your application runs or only when the model is out of sync with the existing database. You can also write a Seed method that the Entity Framework automatically calls after creating the database in order to populate it with test data.
The default behavior is to create a database only if it doesn’t exist (and throw an exception if the model has changed and the database already exists). In this section you’ll specify that the database should be dropped and re-created whenever the model changes. Dropping the database causes the loss of all your data. This is generally OK during development, because the Seed method will run when the database is re-created and will re-create your test data. But in production you generally don’t want to lose all your data every time you need to change the database schema. Later you’ll see how to handle model changes by using Code First Migrations to change the database schema instead of dropping and re-creating the database.
In the DAL folder, create a new class file named SchoolInitializer.cs and replace the template code with the
following code, which causes a database to be created when needed and loads test data into the new database.
The Seed method takes the database context object as an input parameter, and the code in the method uses
that object to add new entities to the database. For each entity type, the code creates a collection of new
entities, adds them to the appropriate DbSet property, and then saves the changes to the database. It isn’t
necessary to call the SaveChanges method after each group of entities, as is done here, but doing that helps
you locate the source of a problem if an exception occurs while the code is writing to the database.
To tell Entity Framework to use your initializer class, add an element to the entityFramework element in the application Web.config file (the one in the root project folder), as shown in the following example:
The context type specifies the fully qualified context class name and the assembly it’s in, and the databaseinitializer type specifies the fully qualified name of the initializer class and the assembly it’s in. (When you don’t want EF to use the initializer, you can set an attribute on the context element: disableDatabaseInitialization="true".) For more information, see Entity Framework - Config File Settings.
As an alternative to setting the initializer in the Web.config file is to do it in code by adding a Database.SetInitializer statement to the Application_Start method in the Global.asax.cs file. For more information, see Understanding Database Initializers in Entity Framework Code First.
The application is now set up so that when you access the database for the first time in a given run of the
application, the Entity Framework compares the database to the model (your SchoolContext and entity classes). If there’s a difference, the application drops and re-creates the database.
[!NOTE] When you deploy an application to a production web server, you must remove or disable code that drops and re-creates the database. You’ll do that in a later tutorial in this series.
Set up EF to use a SQL Server Express LocalDB database
LocalDB is a lightweight version of the SQL Server Express Database Engine. It’s easy to install and configure, starts on demand, and runs in user mode. LocalDB runs in a special execution mode of SQL Server Express that enables you to work with databases as .mdf files. You can put LocalDB database files in the App_Data folder of a web project if you want to be able to copy the database with the project. The user instance feature in SQL Server Express also enables you to work with .mdf files, but the user instance feature is deprecated; therefore, LocalDB is recommended for working with .mdf files. In Visual Studio 2012 and later versions, LocalDB is installed by default with Visual Studio.
Typically SQL Server Express is not used for production web applications. LocalDB in particular is not recommended for production use with a web application because it is not designed to work with IIS.
In this tutorial you’ll work with LocalDB. Open the application Web.config file and add a connectionStrings element preceding the appSettings element, as shown in the following example. (Make sure you update the Web.config file in the root project folder. There’s also a Web.config file is in the Views subfolder that you don’t need to update.)
If you are using Visual Studio 2015, replace “v11.0” in the connection string with “MSSQLLocalDB”, as the default SQL Server instance name has changed.
The connection string you’ve added specifies that Entity Framework will use a LocalDB database named ContosoUniversity1.mdf. (The database doesn’t exist yet; EF will create it.) If you wanted the database to be created in your App_Data folder, you could add AttachDBFilename=|DataDirectory|\ContosoUniversity1.mdf to the connection string. For more information about connection strings, see SQL Server Connection Strings for ASP.NET Web Applications.
You don’t actually have to have a connection string in the Web.config file. If you don’t supply a connection string, Entity Framework will use a default one based on your context class. For more information, see Code First to a New Database.
Creating a Student Controller and Views
Now you’ll create a web page to display data, and the process of requesting the data will automatically trigger
the creation of the database. You’ll begin by creating a new controller. But before you do that, build the project to make the model and context classes available to MVC controller scaffolding.
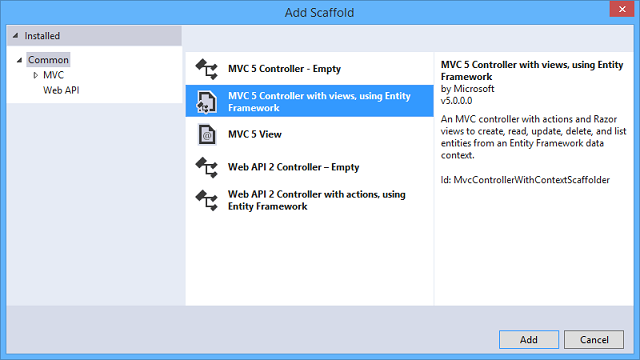
Right-click the Controllers folder in Solution Explorer, select Add, and then click New Scaffolded Item.
In the Add Scaffold dialog box, select MVC 5 Controller with views, using Entity Framework.
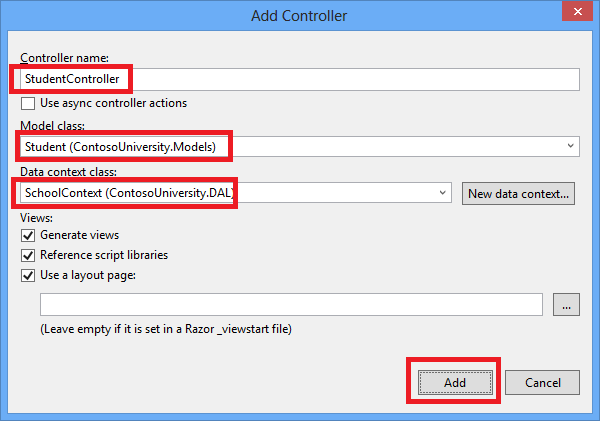
In the Add Controller dialog box, make the following selections and then click Add:
Model class: Student (ContosoUniversity.Models). (If you don’t see this option in the drop-down list, build the project and try again.)
Data context class: SchoolContext (ContosoUniversity.DAL).
Add_Controller_dialog_box_for_Student_controller
When you click Add, the scaffolder creates a StudentController.cs file and a set of views (.cshtml files) that work with the controller. In the future when you create projects that use Entity Framework you can also take advantage of some additional functionality of the scaffolder: just create your first model class, don’t create a connection string, and then in the Add Controller box specify new context class. The scaffolder will create your DbContext class and your connection string as well as the controller and views.
Visual Studio opens the Controllers.cs file. You see a class variable has been created that instantiates a database context object:
27: @Html.ActionLink("Edit", "Edit", new { id=item.ID }) |
28: @Html.ActionLink("Details", "Details", new { id=item.ID }) |
29: @Html.ActionLink("Delete", "Delete", new { id=item.ID })
30: </td>
31: </tr>
32: }
Press CTRL+F5 to run the project. (If you get a “Cannot create Shadow Copy” error, close the browser and try again.)
Click the Students tab to see the test data that the Seed method inserted. Depending on how narrow your browser window is, you’ll see the Student tab link in the top address bar or you’ll have to click the upper right corner to see the link.
Menu buttonStudent Index page
View the Database
When you ran the Students page and the application tried to access the database, EF saw that there was no database and so it created one, then it ran the seed method to populate the database with data.
You can use either Server Explorer or SQL Server Object Explorer (SSOX) to view the database in Visual Studio. For this tutorial you’ll use Server Explorer. (In Visual Studio Express editions earlier than 2013, Server Explorer is called Database Explorer.)
Close the browser.
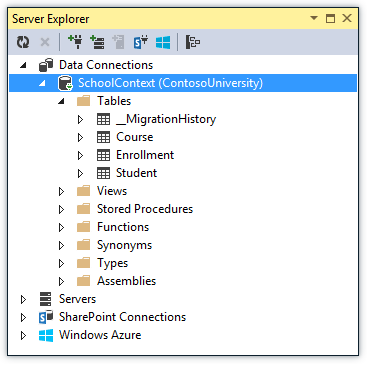
In Server Explorer, expand Data Connections, expand School Context (ContosoUniversity), and then expand Tables to see the tables in your new database.
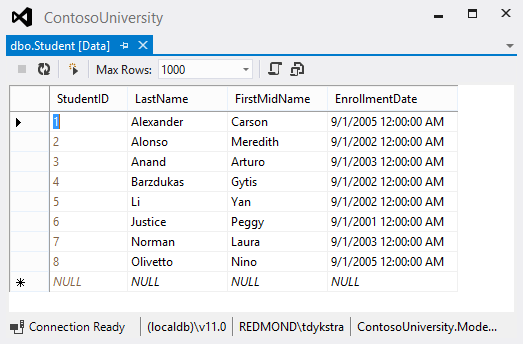
Right-click the Student table and click Show Table Data to see the columns that were created and the rows that were inserted into the table.
Close the Server Explorer connection.
The ContosoUniversity1.mdf and .ldf database files are in the C:\Users\<yourusername> folder.
Because you’re using the DropCreateDatabaseIfModelChanges initializer, you could now make a change to the Student class, run the application again, and the database would automatically be re-created to match your change. For example, if you add an EmailAddress property to the Student class, run the Students page again, and then look at the table again, you will see a new EmailAddress column.
Conventions
The amount of code you had to write in order for the Entity Framework to be able to create a complete database for you is minimal because of the use of conventions, or assumptions that the Entity Framework makes. Some of them have already been noted or were used without your being aware of them:
The pluralized forms of entity class names are used as table names.
Entity property names are used for column names.
Entity properties that are named ID or classnameID are recognized as primary key properties.
A property is interpreted as a foreign key property if it’s named <navigation property name><primary key property name> (for example, StudentID for the Student navigation property since the Student entity’s primary key is ID). Foreign key properties can also be named the same simply <primary key property name> (for example, EnrollmentID since the Enrollment entity’s primary key is EnrollmentID).
You’ve seen that conventions can be overridden. For example, you specified that table names shouldn’t be pluralized, and you’ll see later how to explicitly mark a property as a foreign key property. You’ll learn more about conventions and how to override them in the Creating a More Complex Data Model tutorial later in this series. For more information about conventions, see Code First Conventions.
Summary
You’ve now created a simple application that uses the Entity Framework and SQL Server Express LocalDB to store and display data. In the following tutorial you’ll learn how to perform basic CRUD (create, read, update, delete) operations.
Please leave feedback on how you liked this tutorial and what we could improve. You can also request new topics at Show Me How With Code.


 )
)