Connect Xgecu T48 programmer to Linux computer
XGecu T48 (TL866-3G) now is my new device to write firmware. This device supports over 34,000+ ICs, covering a wide range of memory technologies, microcontrollers, and communication interfaces.
- 1. Supported Memory & Chip Types
- SPI NOR Flash: The most common BIOS and firmware chips (e.g., 25Qxx series from Winbond, Macronix, GigaDevice)
- SPI NAND Flash: High-capacity serial NAND chips (e.g., 1Gb–4Gb+ chips used in routers, smart TVs, and set-top boxes).
- Parallel NAND Flash: High-density raw NAND memory (up to 256GB capacity, supporting both 8-bit and 16-bit data buses).
- Parallel NOR Flash: Older parallel flash memory (e.g., 28Fxx, 29Fxx, 39SFxx, 49Fxx series).
- eMMC / eMCP: Embedded MultiMediaCard storage (up to 256GB capacity) commonly found in smartphones, tablets, TVs, and car infotainment systems. It also includes eMMC health/lifetime diagnostics and partition management.
- Serial EEPROM: Small non-volatile memory chips (24Cxx, 25xxx, 93Cxx, 95xxx series) used for storing device settings, automotive odometer/airbag data, and EDID monitor profiles.
- Parallel EPROM & EEPROM: Legacy UV-erasable EPROMs (27Cxx series—supported because the T48 provides up to 25V VPP programming voltage) and parallel EEPROMs (28Cxx series).
- Microcontrollers (MCUs) with Internal Flash/EEPROM:
- AVR (ATmega, ATtiny)
- PIC (Microchip PIC10/12/16/18 series)
- 8051 / MCS-51 (Atmel, Intel, SST, Winbond, STC)
- Laptop Embedded Controllers (EC): Such as ENE KB9012, ITE IT85xx/IT89xx, Nuvoton, etc.
- GAL / PLD: Programmable Logic Devices (e.g., ATF16V8, ATF22V10, GAL16V8, GAL20V8).
- SRAM & Logic ICs (Testing Only): Can test 74-series / 4000-series logic chips and static RAM (SRAM) chips for faults.
- 2. Supported Communication Interfaces & Bus Modes. The T48 uses a 40-pin ZIF socket combined with a 16-pin multi-functional ISP (In-System Programming) port (56 total dedicated I/O channels) to communicate over the following interfaces:
- SPI (Serial Peripheral Interface):
- Standard SPI (1-bit): Used for standard EEPROMs and Flash.
- Dual SPI / Quad SPI (x2 / x4 mode): High-speed multi-I/O mode for SPI NOR and SPI NAND Flash.
- I²C (Inter-Integrated Circuit): Two-wire interface (SDA/SCL) used for 24-series EEPROMs and monitor/screen EDID chips.
- Microwire: Three-wire serial interface used for 93-series EEPROMs (93C46, 93C56, 93C66, etc.).
- UNI/O & 1-Wire / Single-Wire: Used for specialized Microchip/Atmel serial EEPROMs (e.g., 11AAxxx, 24CSxx).
- Parallel Bus (8-bit & 16-bit): Used for Parallel NOR Flash, Parallel NAND Flash, EPROMs, and SRAMs via the ZIF socket or TSOP48/BGA adapters.
- eMMC / SD Bus (1-bit & 4-bit modes): Communicates via DAT0 (1-bit ISP mode) or DAT0–DAT3 (4-bit high-speed adapter mode) along with CMD and CLK lines.
- ICSP / ISP (In-Circuit Serial Programming): Direct on-board programming interface for AVR, PIC, 8051 MCUs, SPI Flash, SPI NAND, and eMMC without desoldering the chip from the PCB.
- JTAG / SMBus (Specific Chips): Used on select microcontrollers and laptop EC chips (like KB9012 via keyboard connector pins).
- 3. Voltage Support Note
- The T48 has adjustable logic and supply voltages (VCC from 1.2V/1.8V to 6.5V and VPP up to 25V), meaning it natively supports modern 1.8V, 2.5V, 3.3V, and legacy 5V memory chips (though using the dedicated 1.8V adapter board is still recommended as extra hardware protection for 1.8V SPI chips).
There are different packages for this device, this is my package:
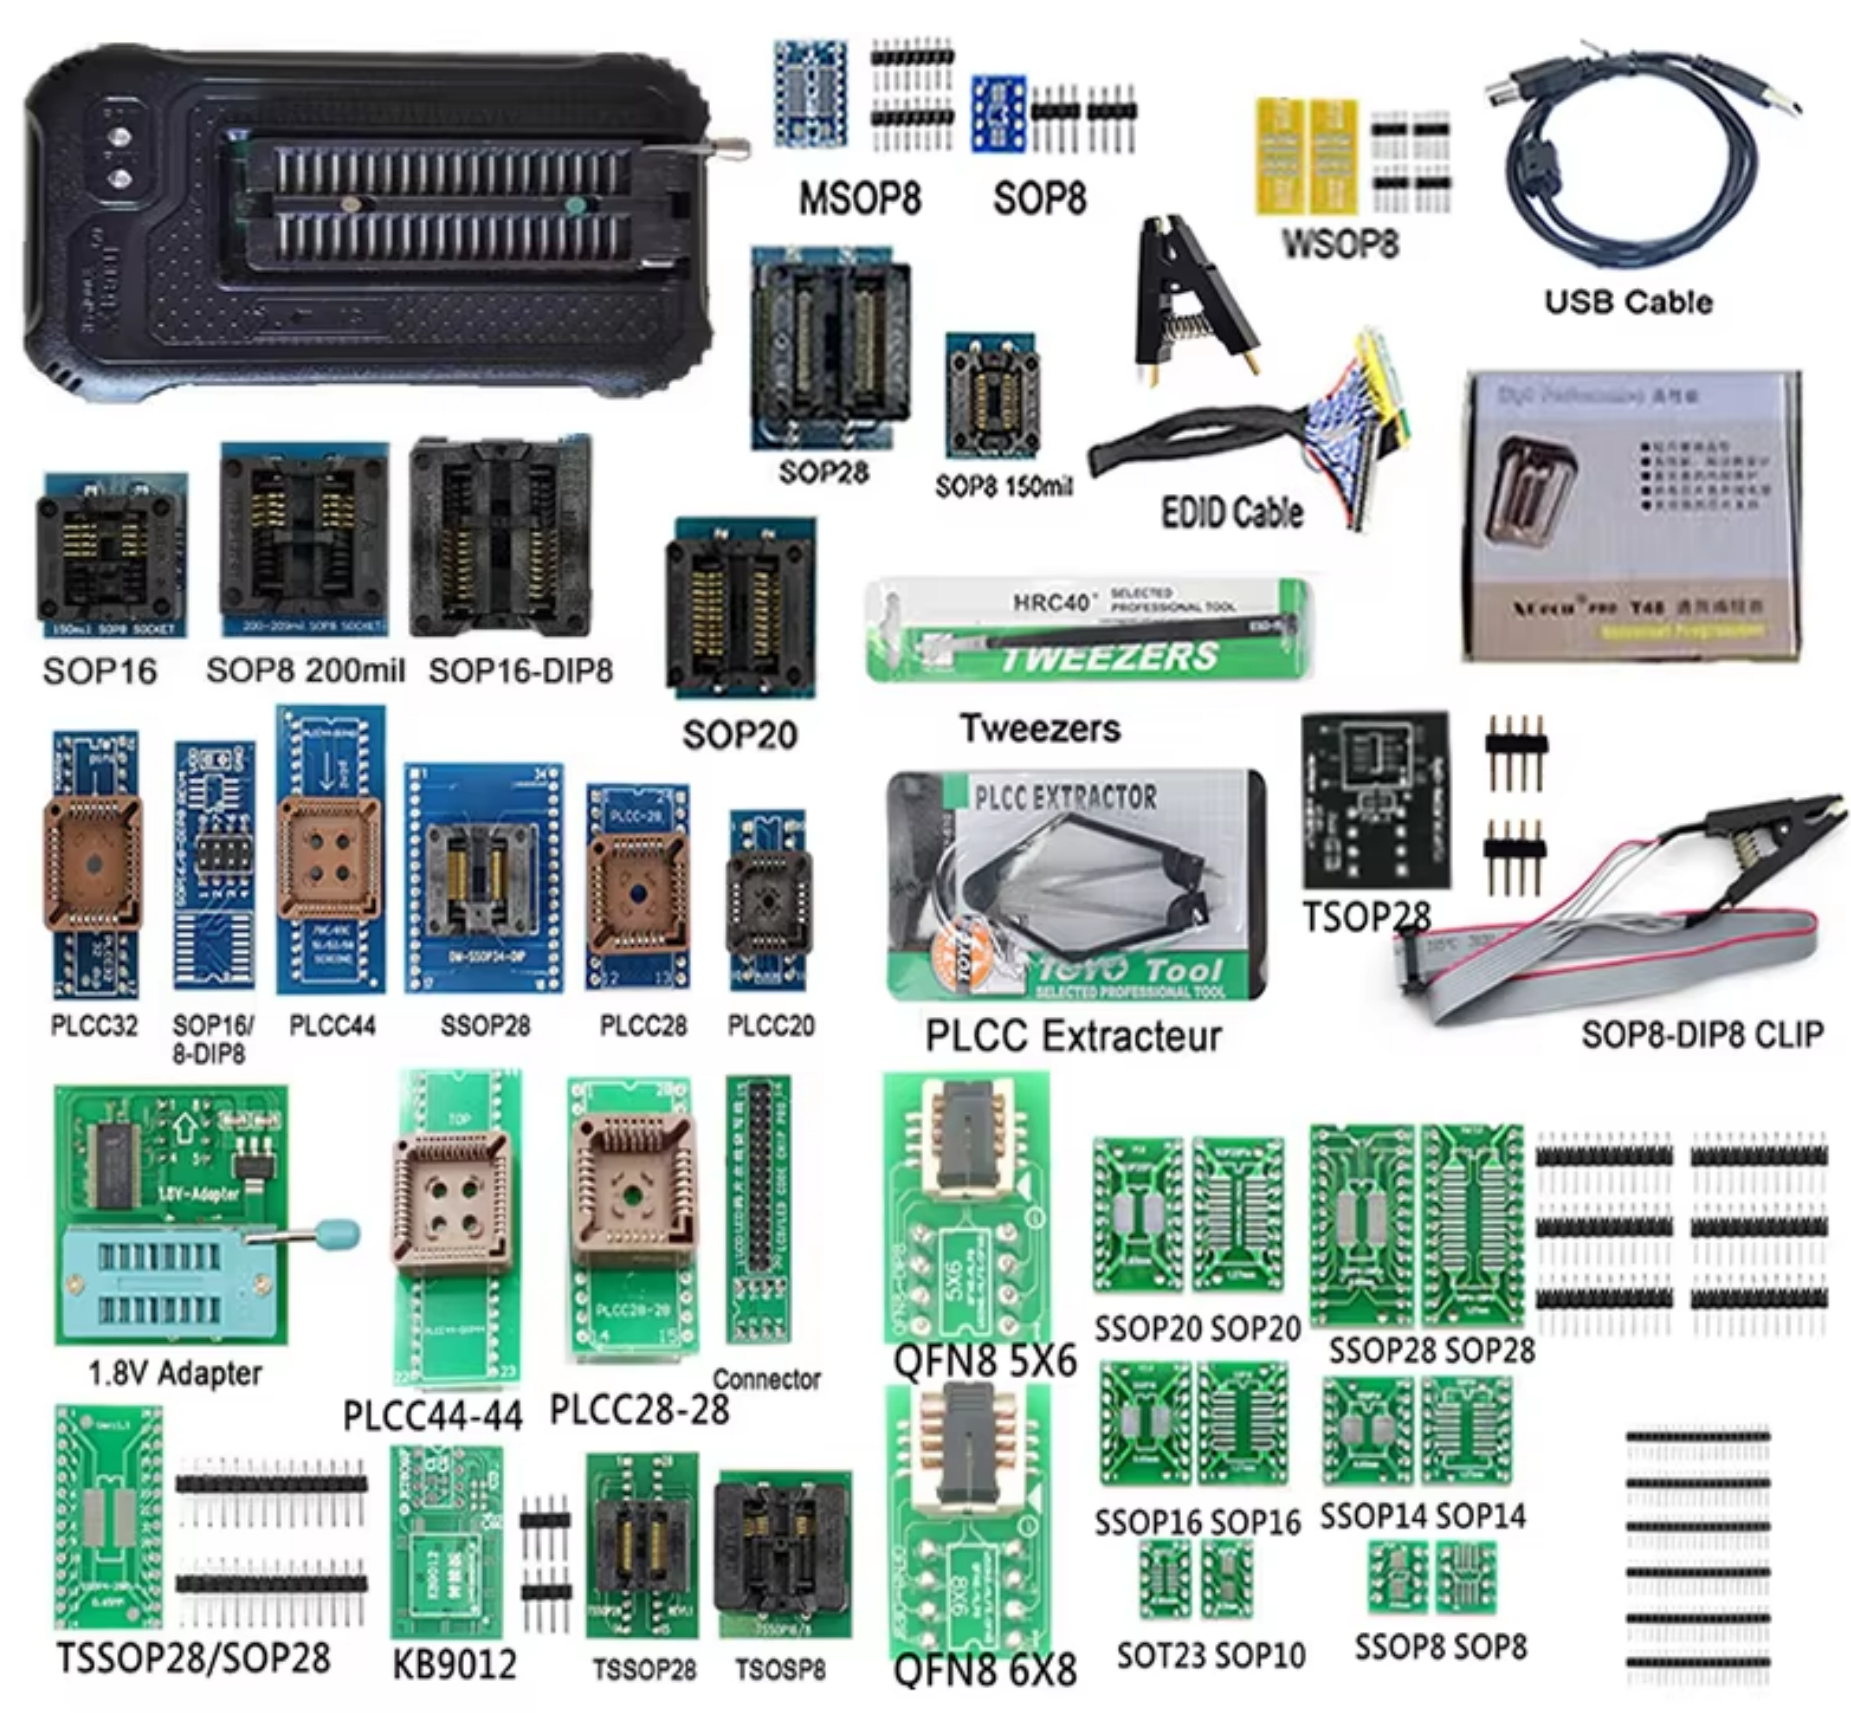
- 1. SOP / SOIC / WSOP / MSOP Adapters. These adapters convert Surface-Mount Device (SMD) chips with gull-wing leads into Dual In-line Package (DIP) pins that fit into the T48's ZIF (Zero Insertion Force) socket.
- SOP8 (PCB Breakout Board): Solder-on adapter for standard 8-pin SOP/SOIC chips (typically 150mil or 200mil pitch). Commonly used for small serial EEPROMs (e.g., 24Cxx, 93Cxx) and BIOS chips.
- SOP8 150mil (ZIF Socket): Press-down ZIF socket for narrow-body (3.9mm width) 8-pin SOP/SOIC chips. Allows programming without soldering.
- SOP8 200mil (ZIF Socket): Press-down ZIF socket for wide-body (5.2mm-5.4mm width) 8-pin SOP/SOIC chips, heavily used for SPI NOR Flash BIOS chips (e.g., Winbond 25Qxx).
- WSOP8 (PCB Breakout Board): Solder-on adapter for Wide-body SOP8 chips (often 208mil/300mil), used for larger capacity SPI Flash chips.
- MSOP8 (PCB Breakout Board): Solder-on adapter for Micro Small Outline Package 8-pin chips, which have a much finer pin pitch (0.65mm) and smaller footprint than standard SOP8.
- SOP16 (ZIF Socket): Press-down ZIF socket for 16-pin SOP/SOIC chips (150mil narrow body), used for logic ICs, EEPROMs, and drivers.
- SOP16-DIP8 (ZIF Socket): Converts 16-pin wide-body (300mil) SOP chips into an 8-pin DIP layout. Specifically designed for high-capacity 16-pin SPI Flash memory chips (like 25Q128/25Q256) where only 8 pins are functionally active.
- SOP16 / 8-DIP8 (PCB Breakout Board): A multi-purpose solder-on adapter that converts either 16-pin or 8-pin SOP chips to a DIP8 footprint.
- SOP20 (ZIF Socket): Press-down ZIF socket for 20-pin SOP/SOIC chips, used for microcontrollers, buffers, and programmable logic devices.
- SOP28 (ZIF Socket): Press-down ZIF socket for 28-pin SOP/SOIC chips (typically 300mil wide), used for older parallel Flash, SRAM, and microcontrollers.
- 2. SSOP / TSSOP / TSOP Adapters. These are designed for thinner, smaller, and finer-pitch surface-mount packages.
- SSOP8 / SOP8 (PCB Breakout Board): Double-sided solder-on adapter supporting 8-pin Shrink Small Outline Packages (0.65mm pitch) on one side and standard SOP8 on the other.
- SSOP14 / SOP14 (PCB Breakout Board): Double-sided solder-on adapter for 14-pin SSOP and SOP chips.
- SSOP16 / SOP16 (PCB Breakout Board): Double-sided solder-on adapter for 16-pin SSOP and SOP chips.
- SSOP20 / SOP20 (PCB Breakout Board): Double-sided solder-on adapter for 20-pin SSOP and SOP chips.
- SSOP28 / SOP28 (PCB Breakout Board): Double-sided solder-on adapter for 28-pin SSOP and SOP chips.
- SSOP28 (ZIF Socket): Press-down ZIF socket for 28-pin SSOP chips, allowing solderless programming of fine-pitch microcontrollers and memory chips.
- TSSOP28 (ZIF Socket): Press-down ZIF socket for 28-pin Thin Shrink Small Outline Package chips (commonly used in automotive electronics, airbag modules, and modern MCUs).
- TSSOP28 / SOP28 (PCB Breakout Board): Double-sided solder-on adapter supporting both 28-pin TSSOP and SOP packages.
- TSOP28 (ZIF Socket): Press-down ZIF socket for 28-pin Thin Small Outline Package chips (where pins exit from the shorter ends of the chip), used for older parallel NOR Flash and SRAM.
- TSOSP8 / TSSOP8 (ZIF Socket): Press-down ZIF socket for 8-pin Thin Shrink Small Outline Package chips (commonly found in compact automotive dashboards and miniature EEPROMs).
- 3. PLCC Adapters. Plastic Leaded Chip Carrier (PLCC) chips are square/rectangular with "J-leads" tucked under the edges.
- PLCC20 (ZIF Socket): Converts 20-pin PLCC chips to DIP20 (used for PAL/GAL programmable logic devices and small MCUs).
- PLCC28 (ZIF Socket): Converts 28-pin PLCC chips to DIP28 (used for EPROMs, EEPROMs, and microcontrollers).
- PLCC28-28 (Green ZIF Socket): Another variant of the 28-pin PLCC to DIP28 adapter, ensuring 1-to-1 pin mapping for specific chip families.
- PLCC32 (ZIF Socket): Converts 32-pin PLCC chips to DIP32 (heavily used for older PC motherboard BIOS chips and Flash memory).
- PLCC44 (Blue ZIF Socket): Converts 44-pin PLCC chips to DIP40/DIP44, typically wired specifically for 44-pin microcontrollers (like the 8051/AVR families) or specific EPROMs.
- PLCC44-44 (Green ZIF Socket): Converts 44-pin PLCC chips with direct 44-pin mapping, often used for CPLDs, larger Flash chips, or universal 44-pin programming.
- 4. QFN & SOT Adapters
- QFN8 5X6 (ZIF Socket): Press-down clamshell socket for leadless Quad Flat No-leads (QFN8 / WSON8 / DFN8) chips measuring 5mm x 6mm. Commonly used in modern laptops and motherboards for BIOS storage.
- QFN8 6X8 (ZIF Socket): Press-down clamshell socket for larger leadless QFN8 / WSON8 / DFN8 chips measuring 6mm x 8mm (used for high-capacity SPI Flash).
- SOT23 / SOP10 (PCB Breakout Board): Double-sided solder-on adapter for tiny Small Outline Transistor (SOT23-5 / SOT23-6) packages and 10-pin SOP packages.
- 5. Specialized & Voltage Adapters
- 1.8V Adapter: A voltage level-shifting adapter. Many modern SPI Flash chips (found in newer laptops, GPUs, and iPhones) operate at 1.8V instead of 3.3V. This adapter protects those chips from being damaged by higher voltages during reading/writing.
- KB9012 (PCB Breakout Board): A dedicated adapter for programming ENE KB9012 (and compatible KB9010/KB9016/KB9022) LQFP128 Embedded Controllers (EC / Super I/O chips) found on laptop motherboards, without needing to desolder the entire 128-pin chip.
- 6. Cables, Clips & Tools
- SOP8-DIP8 CLIP (SOIC8 Test Clip): A spring-loaded test clip attached to a ribbon cable. It clamps directly onto an 8-pin SOP chip while it is still soldered to a circuit board (In-Circuit Programming / ISP), saving you from having to desolder the chip.
- EDID Cable: Used to read and write Extended Display Identification Data (EDID) directly from LCD/LED monitor screens or VGA/DVI/HDMI ports without disassembling the display.
- Connector (Pin Header / ISP Cable): Used for In-Circuit Serial Programming (ICSP) via the T48's dedicated ISP port to program microcontrollers directly on a target board.
- PLCC Extractor ("PLCC Extracteur"): A specialized spring-loaded hook tool used to safely pull PLCC chips out of tight motherboard sockets without cracking the chip or bending the pins.
- Tweezers: Anti-static precision tweezers (HRC40) for safely handling tiny SMD chips and placing them into ZIF sockets.
- USB Cable: Connects the XGecu T48 programmer to your PC for data transfer and power.
So, how this device can connecting to Linux computer and how we can read/write memory?
Install dependency and compile minipro from source code.
# sudo zypper install gcc make git-core srecord rpmdevtools libusb-1_0-devel
# git clone https://gitlab.com/DavidGriffith/minipro.git
# cd minipro
# make
# sudo make install
Add your user to the plugdev group
# sudo cp udev/*.rules /etc/udev/rules.d/
# sudo usermod -a -G plugdev admin
# sudo groupadd plugdev
# groups
# ls -l /usr/lib/udev/rules.d/60-minipro.rules
# id admin
# sudo udevadm control --reload-rules
# groups
# reboot
For manufacturer device XGecu T48 usually arrived without fresh firmware, but software "minipro" already waiting last version of firmware, therefore first mandatory step is update firmware.
For this perposes we need to install Unrar to Linux firstly.
# sudo zypper install unrar
# unrar --version
Then download last firmware version from Kreeblah/XGecu_Software repository on GitHub, in my case this is xgproV1316_T48_T56_T866II_Setup.rar.
Then we need unpack this file.
# unrar x xgproV1316_T48_T56_T866II_Setup.rar
Next step looks as trick, we nee unpack again EXE file.
# unrar x XgproV1316_Setup.exe
# cp XgproV1316_Setup.exe /home/admin/Downloads/xgproV1316_T48_T56_T866II_Setup/
In this unpack step we will receive a lot of files, main of that is UpdateT48.dat and then we need to update firmware.
# cd /home/admin/Downloads/xgproV1316_T48_T56_T866II_Setup/
#  minipro -F UpdateT48.dat
Now device become visible from Minipro software.
# cd /home/admin/Downloads/minipro/
# minipro -p "T48" -z
And now device must start working in command line mode. This is command to identify device state and read data from chip type "24C02" .
# minipro -l | grep T48
# minipro -p "T48" -z
# minipro -p "24C02" -r backup.bin
# hexdump -C backup.bin
Device working fine and command line in common is enough.
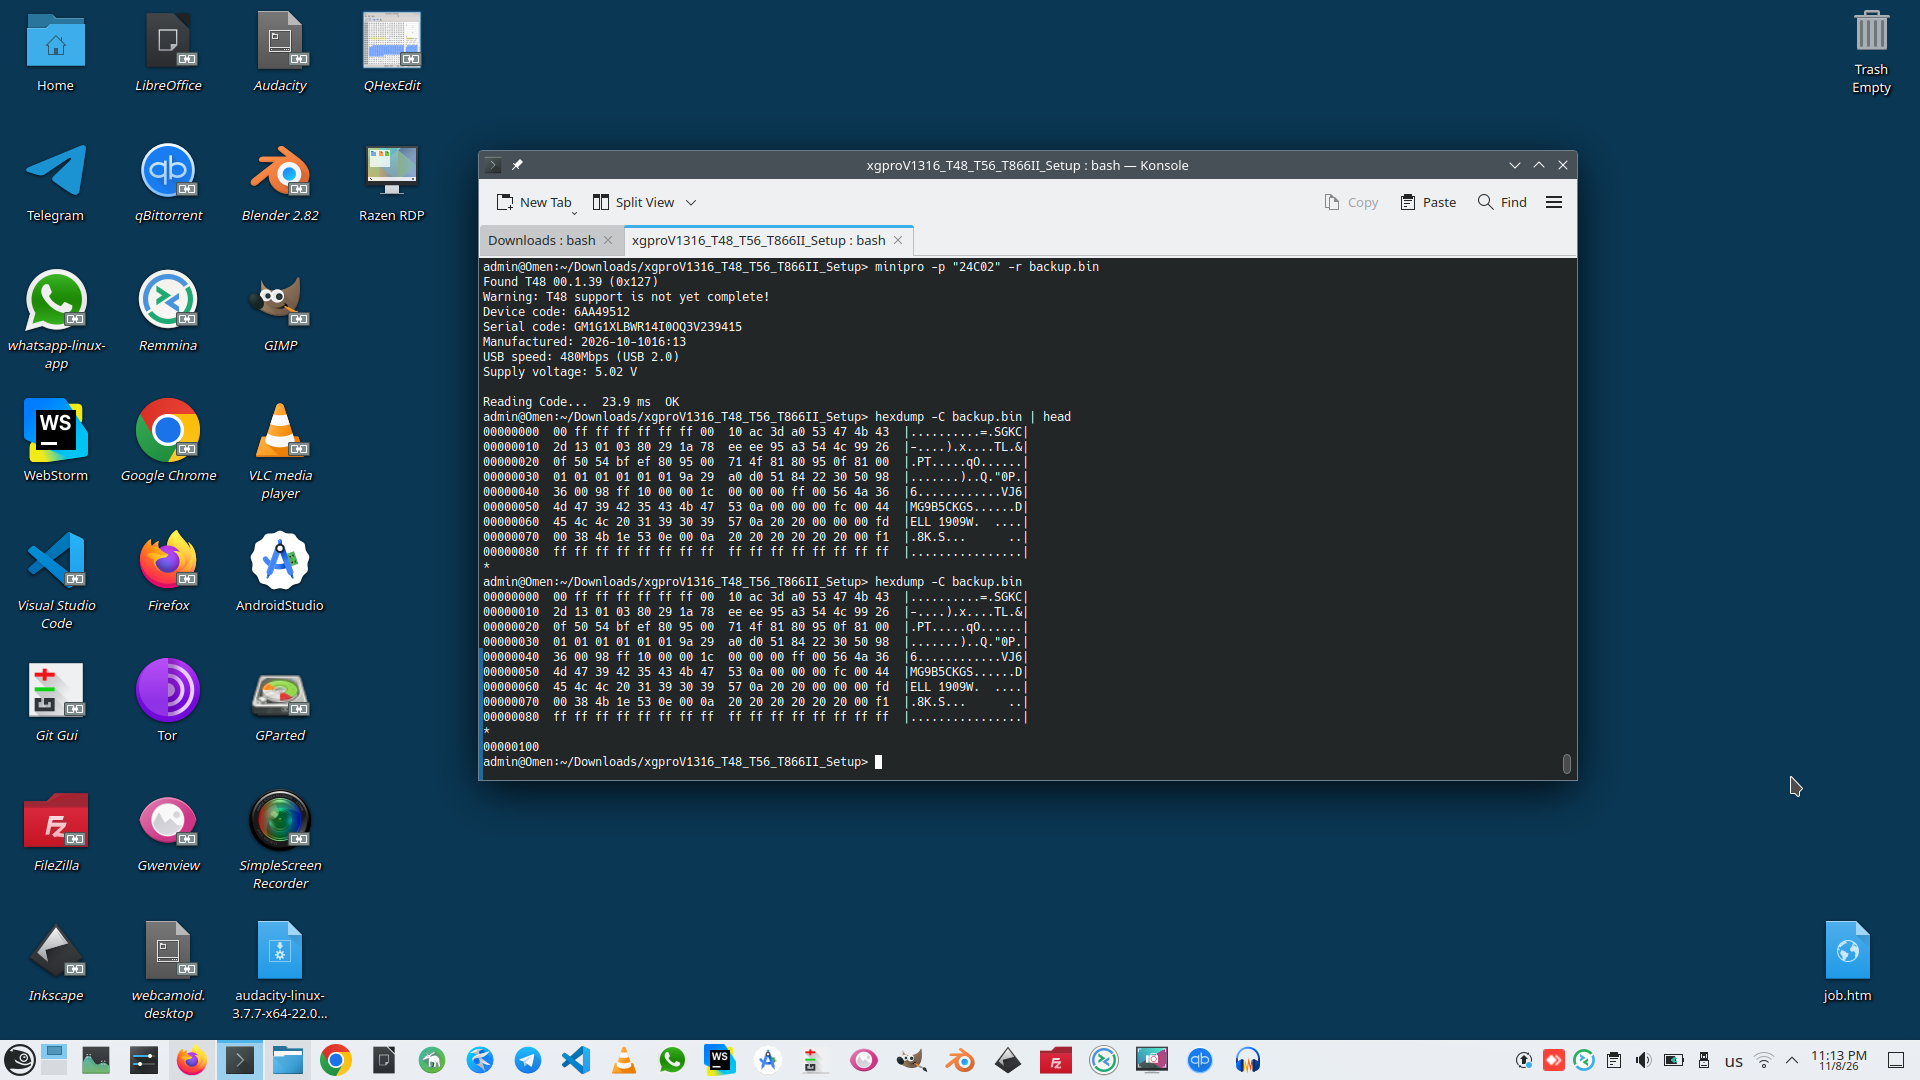
To write data we need add empty data to meaningful data.
# printf 'HELLO T48 TEST\n' > test.bin
# dd if=/dev/zero bs=1 count=241 >> test.bin
# minipro -p "24C02" -w test.bin
But in chip type 24C02 EEPROM (an 8-pin I²C serial EEPROM) Must be tied to GND for writing:
- Pin 7 — WP (Write Protect): Must be connected to GND to allow writing. (If Pin 7 is connected to VCC, the chip is hardware write-protected and you can only read data, not write).
- Pins 1, 2, 3 — A0, A1, A2 (Device Address Pins): Connect all three to GND. (On a 24C02, these set the I²C slave address; standard programmers expect them pulled low to GND).
There are one additional step, to install GUI to Minipro
# 1. Install Python dependencies (openSUSE)
# sudo zypper install python311-PyQt6
# 2. Download and run the GUI
# git clone https://codeberg.org/pvdm/minipro-gui.git
# cd minipro-gui
# python3.11 minipro_gui.py
And this is cool program that demonstrate all features of Minipro software and allow select chip type for a couple of characters from chip name.
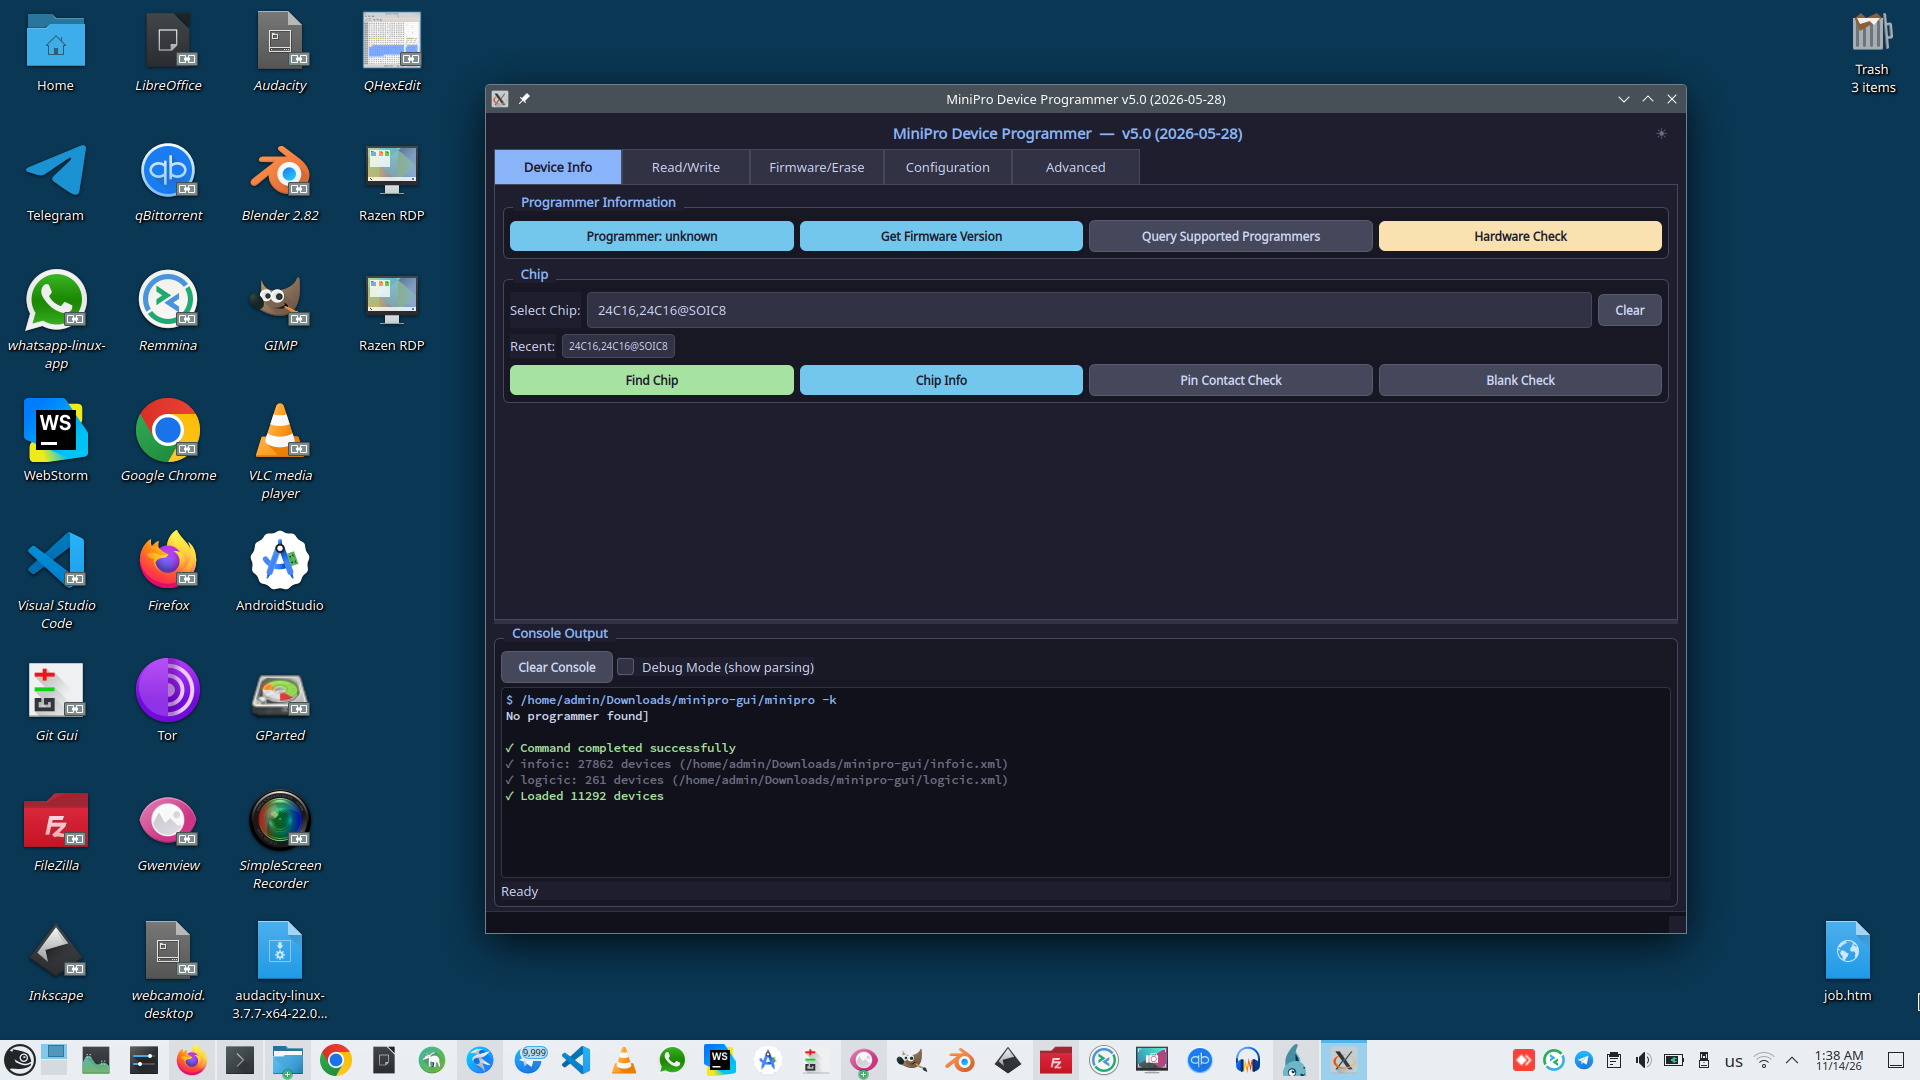
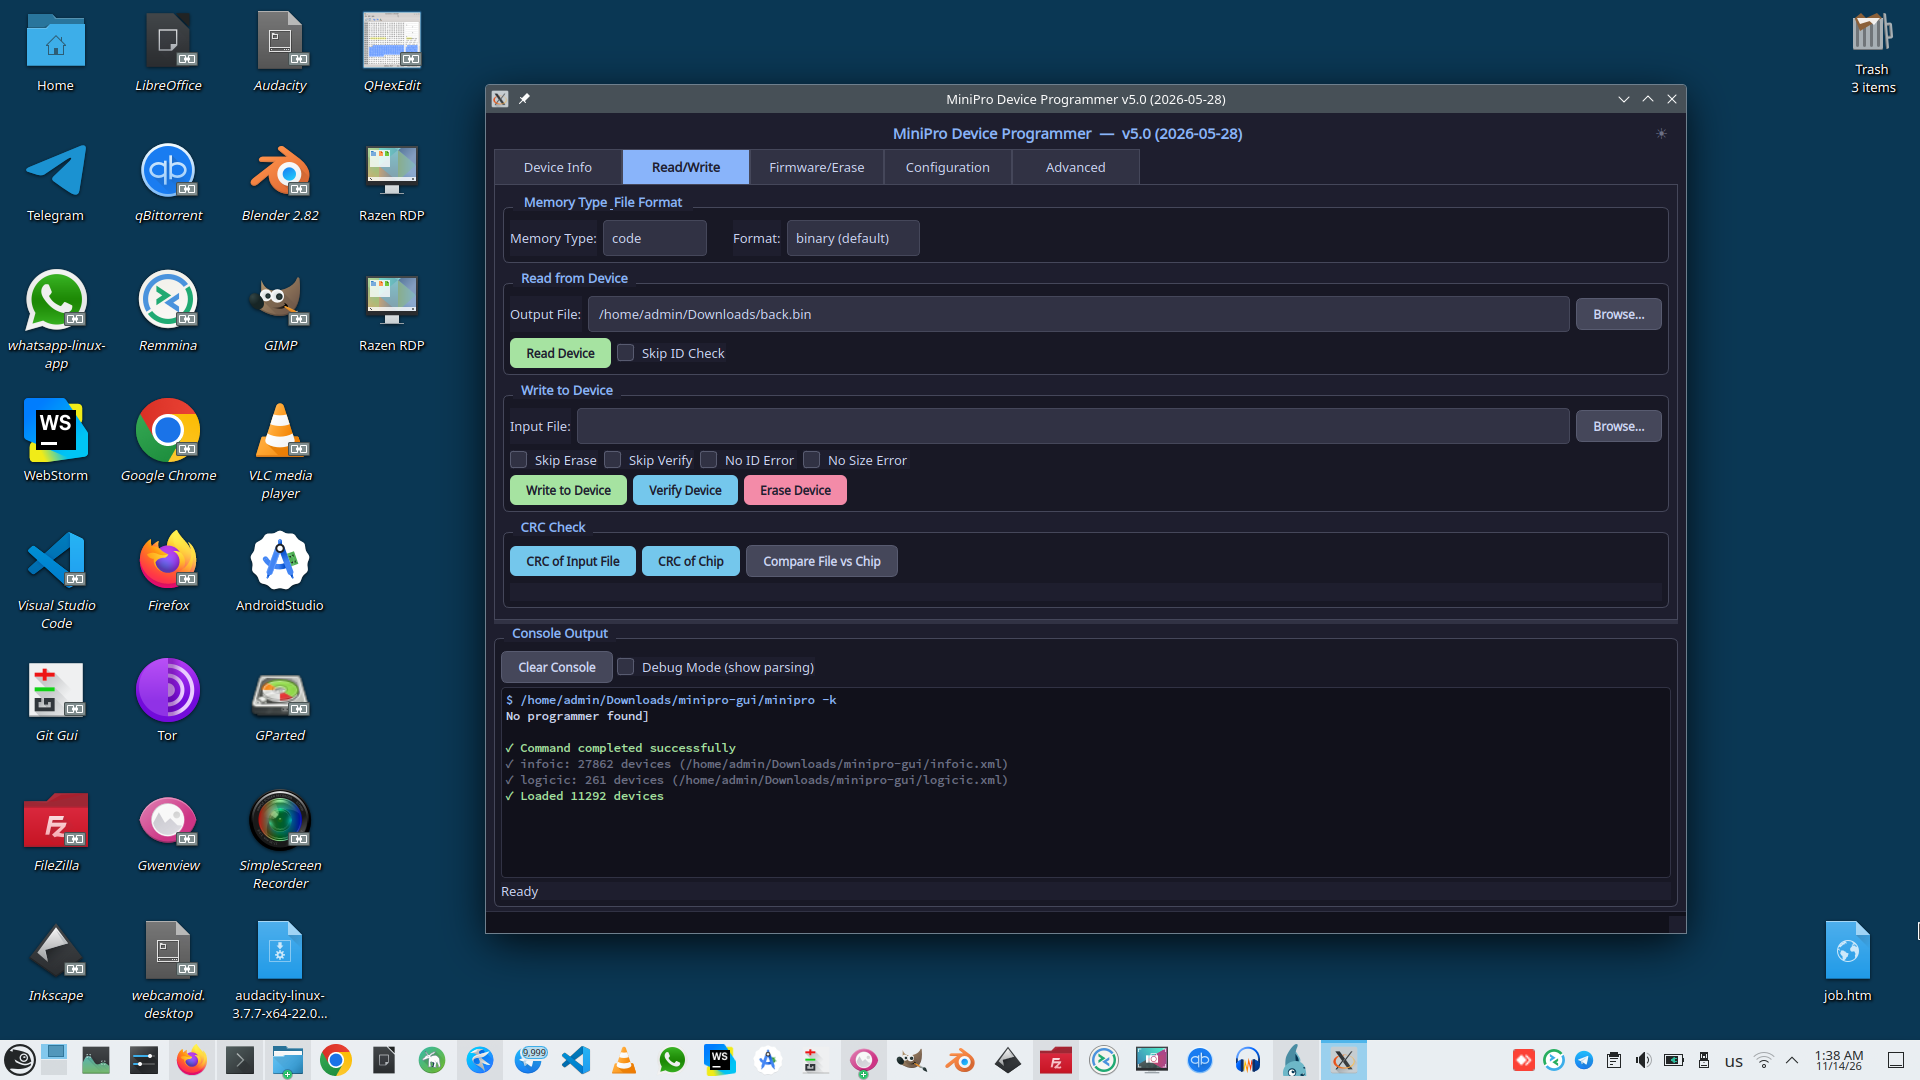
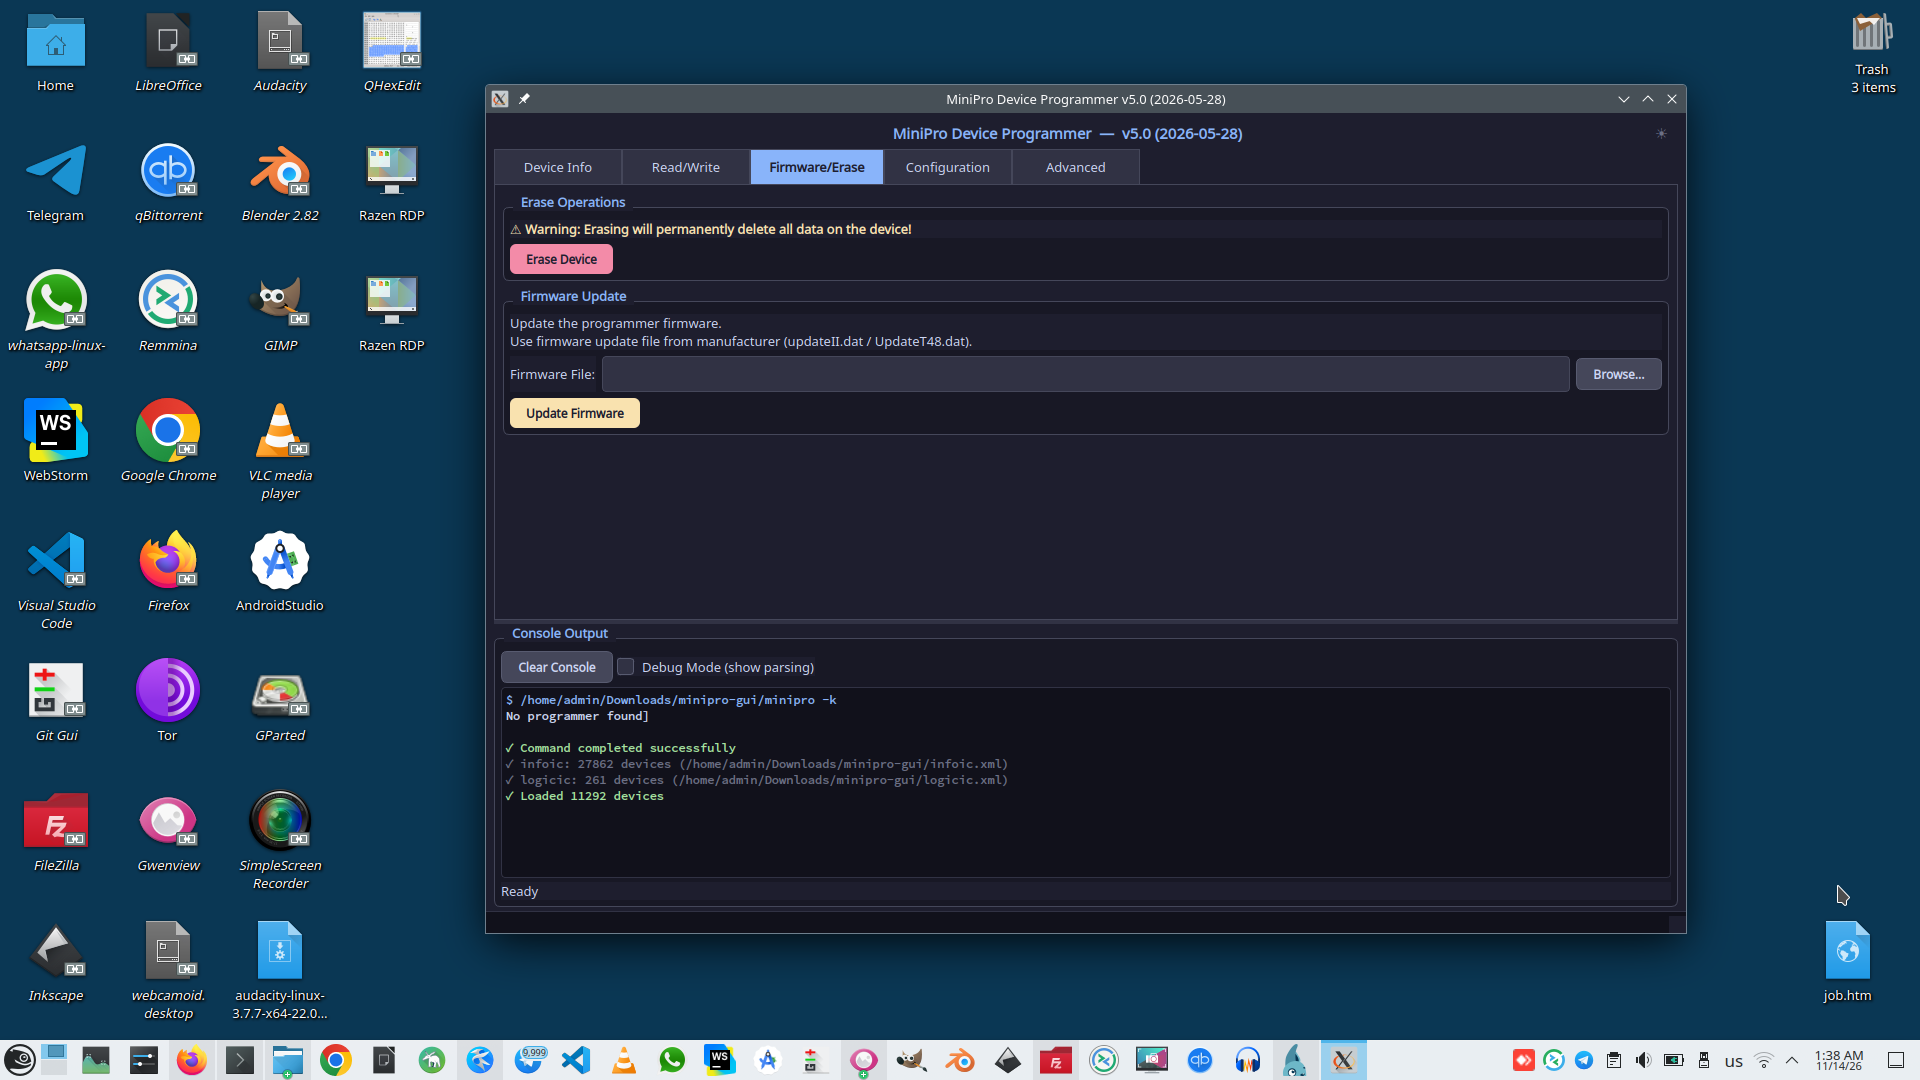
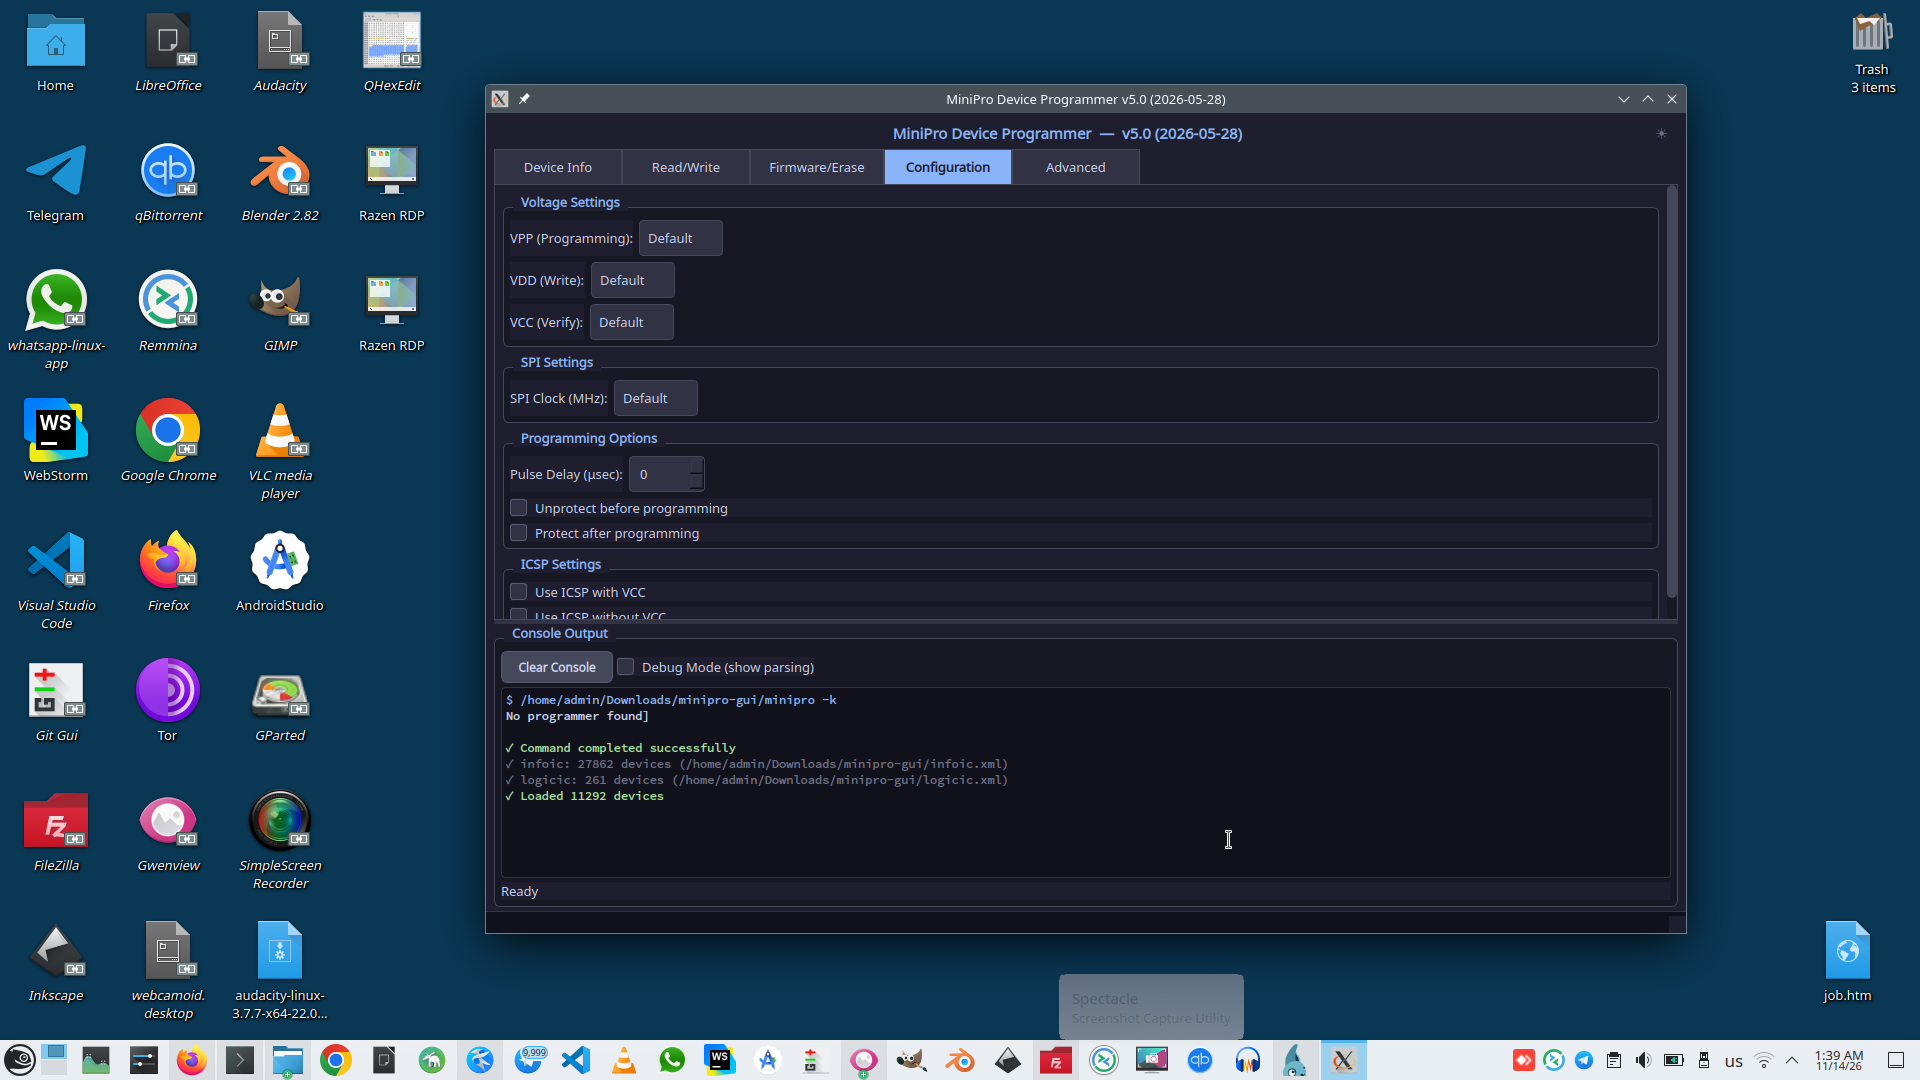
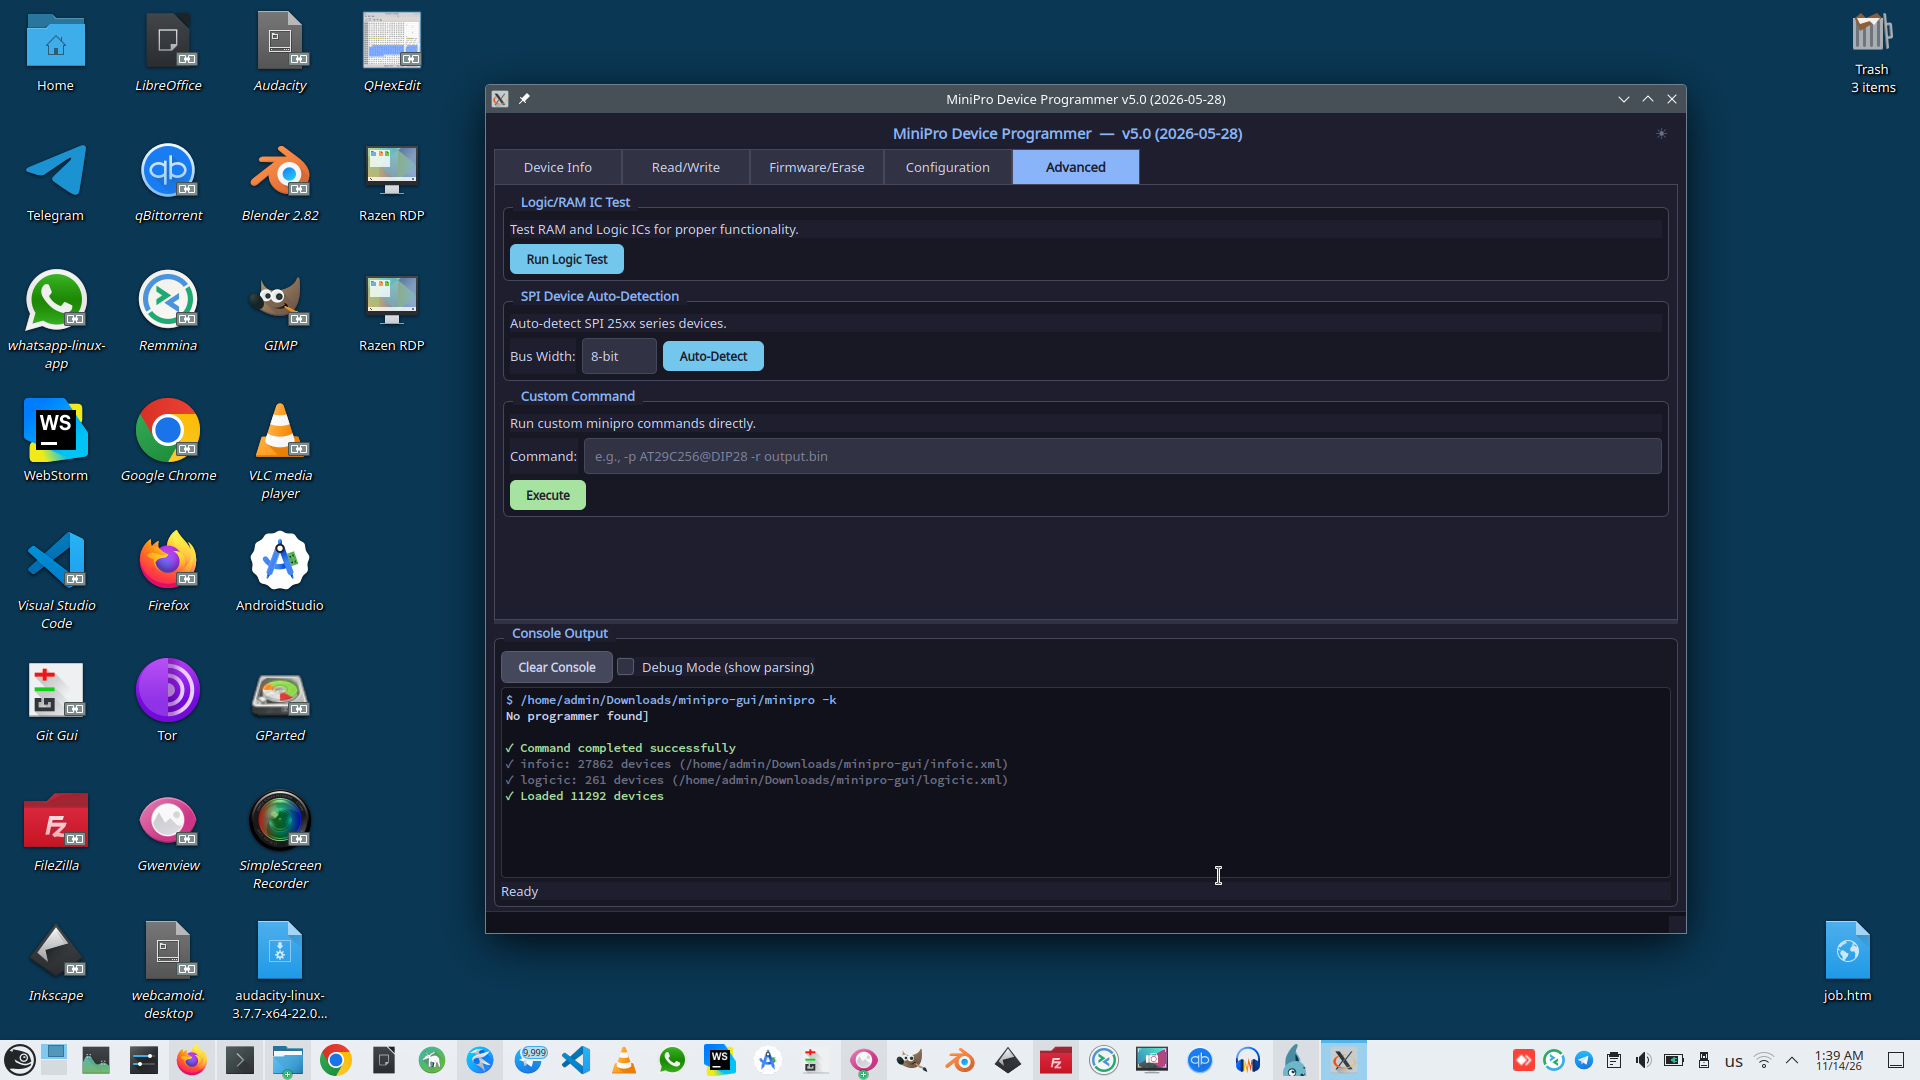
At moment on this video I make my request to issue me a license to German Handworker team and XGecu T48 exactly connected to my computer because I recently received it.
 )
|
|